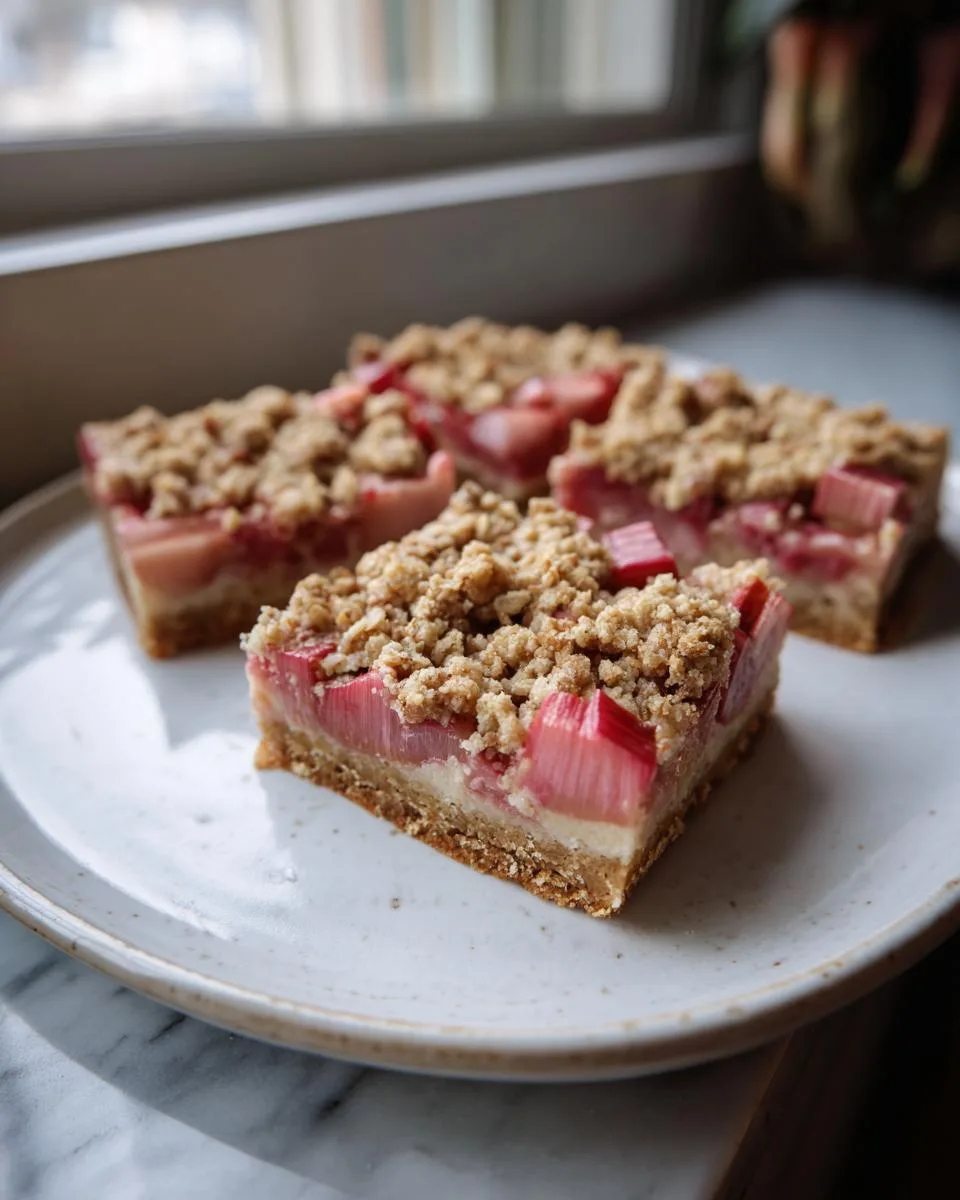
Oh, let me tell you about my Creamy Rhubarb Cheesecake Bars—they’re the kind of dessert that makes you close your eyes and sigh after the first bite. That perfect balance of tangy rhubarb and sweet, velvety cream cheese filling? Absolute magic. I’ve been making these since my kids were little, back when we’d pick rhubarb from Grandma Jo’s garden every spring. She’d wink and say, “Don’t let that sour face fool you—it’s gonna be sweet as pie once it’s baked.” And oh, was she right.
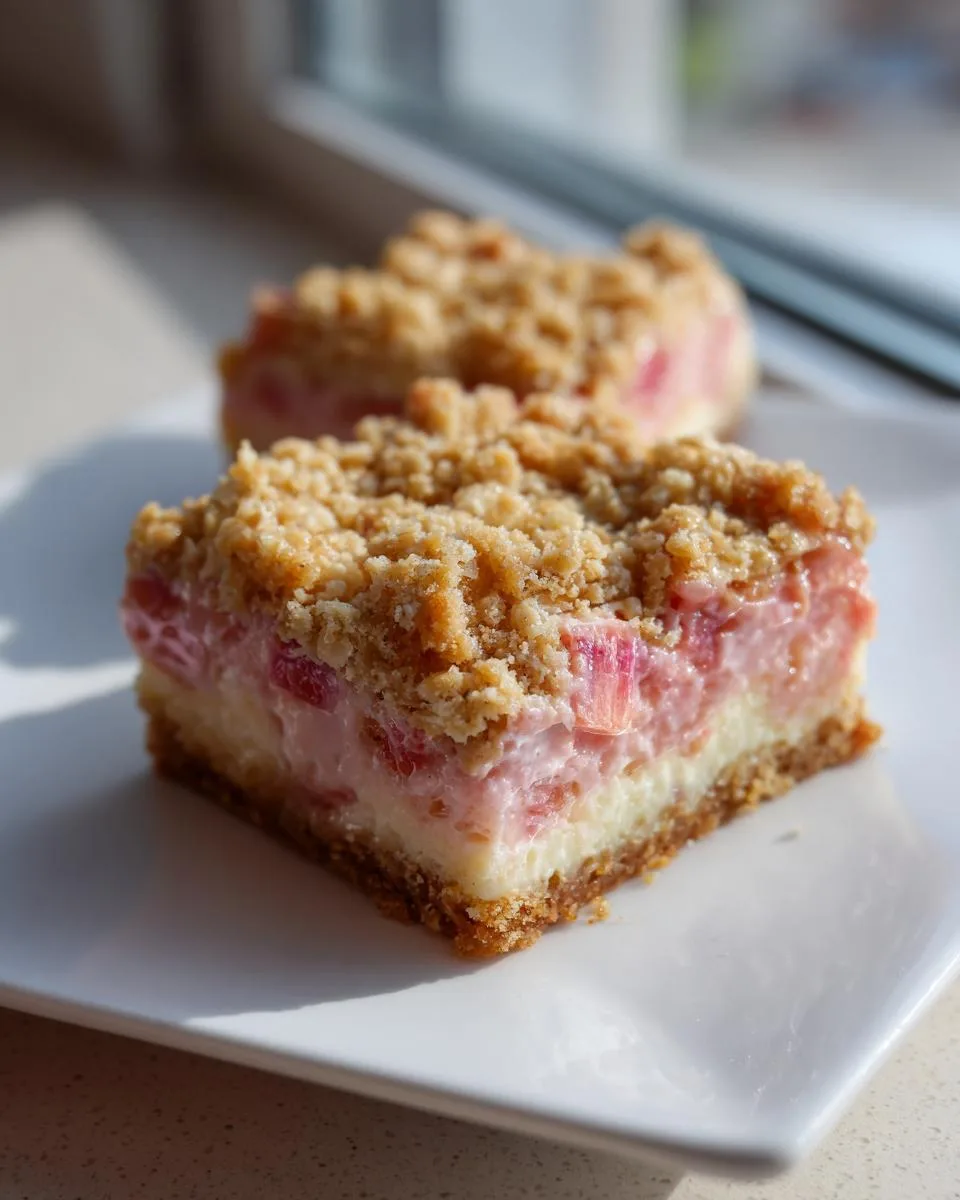
Table of Contents
Table of Contents
These bars are my love letter to old-fashioned desserts done right. The crust is buttery with just enough crunch from the oats, the filling so creamy it practically melts on your tongue, and that rhubarb? It gives each bite a little zing that keeps you coming back for more. Trust me, I’ve lost count of how many times I’ve caught neighbors “just stopping by” when these are cooling on the counter.
What makes them special isn’t just the taste—it’s how they bring people together. Whether it’s a church potluck or a Tuesday afternoon with grandkids, these cheesecake bars always disappear first. And the best part? They’re simpler to make than they look. No fancy techniques, just good ingredients handled with care. Just like Grandma Jo taught me.
Why You’ll Love These Creamy Rhubarb Cheesecake Bars
Let me count the ways these bars will steal your heart! First off, they’re ridiculously easy to make—no water baths or fancy springform pans needed. Just layer, bake, and let them do their magic in the oven while you put your feet up.
But here’s what really gets me every time:
- That nostalgic tang – One bite takes me straight back to Grandma Jo’s kitchen, where the sharpness of rhubarb always mellowed into something magical when baked with sugar. It’s like childhood summers in dessert form.
- Texture heaven – Crackly oat topping gives way to creamy filling, then little bursts of rhubarb. I swear, the contrast makes my taste buds do a happy dance!
- Crowd-pleasing magic – I’ve served these to picky kids and fancy foodies alike, and watched every last crumb disappear. The combo of familiar cheesecake with that rhubarb twist makes them irresistible.
- Make-ahead dream – Unlike fussy desserts, these actually taste better after chilling. Whip them up in the morning, and by dinnertime? Perfection waiting in your fridge.
Honestly, the hardest part is waiting for them to cool before digging in. (Though I won’t judge if you sneak a warm bite—I’ve been there!)
Ingredients for Creamy Rhubarb Cheesecake Bars
Now, let’s talk ingredients—because using the right stuff makes all the difference between good and “oh-my-goodness” amazing. I’ve grouped everything so you can easily see what goes where. And yes, I’m particular about those little details like “packed” brown sugar and “softened” cream cheese—they matter more than you’d think!
For the Oat Crust & Topping:
- 1-1/4 cups all-purpose flour – Spoon it into the measuring cup and level it off, don’t scoop!
- 1/2 cup old-fashioned oats – Not quick oats—they disappear in the crust.
- 1/2 cup packed brown sugar – Really press it into the cup for that caramel depth.
- 1/2 cup cold butter, cubed – Straight from the fridge, cut into pea-sized pieces.
For the Creamy Filling:
- 1 package (8 ounces) cream cheese, softened – Leave it out for 2 hours—no shortcuts here!
- 3/4 cup sugar – Plain granulated works best for smooth blending.
- 1/2 teaspoon salt – Just enough to make the flavors pop.
- 1/4 teaspoon ground cinnamon + 1/8 teaspoon nutmeg – My secret spice duo.
- 1 large egg, room temperature, lightly beaten – Cold eggs can make the filling lumpy.
- 1/2 teaspoon vanilla extract – The good stuff, not imitation.
- 1-1/2 cups diced fresh or frozen rhubarb, thawed – Cut into 1/4-inch pieces—no stringy bits!
Ingredient Notes & Substitutions
Listen, I know we don’t always have exactly what a recipe calls for. Here’s how to adapt without losing that magic:
- Rhubarb: Fresh is ideal (look for crisp, bright pink stalks), but frozen works in a pinch—just thaw and drain well. Canned? Too mushy, darling.
- Flour: Need gluten-free? Swap 1:1 with your favorite GF blend, but add 1/2 teaspoon xanthan gum.
- Cream cheese: Full-fat only, please. Low-fat versions make the filling weep (and we don’t want sad cheesecake bars).
- Spices: Out of nutmeg? A pinch more cinnamon won’t hurt.
See? Flexibility where it counts, but no compromising on the essentials. Now let’s get mixing!
Equipment You’ll Need
Now, don’t go thinking you need fancy gadgets for these bars—just a few trusty tools from your kitchen will do the trick. Here’s what I always pull out when the rhubarb craving hits:
- 9-inch square baking pan – The perfect size for thick, bakery-style bars. Glass or metal both work, but if you’re using dark metal, keep an eye on the baking time—it browns faster!
- Mixing bowls (one medium, one small) – I’ve used the same chipped Pyrex bowls for 20 years—they’re like old friends at this point.
- Hand mixer or sturdy whisk – For that dreamy smooth filling. (Though let’s be real—a wooden spoon and some elbow grease will work in a pinch!)
- Pastry cutter or two forks – To work that cold butter into the crust until it’s perfectly crumbly.
- Rubber spatula – Essential for scraping every last bit of filling into the pan. Waste not, want not!
- Measuring cups and spoons – My grandma always said baking is science, so measure with love—but accurately.
That’s it! No stand mixer required, no special pans to hunt down. Just good ol’ reliable tools that make baking feel like home.
How to Make Creamy Rhubarb Cheesecake Bars
Alright, let’s get to the fun part—turning these simple ingredients into something spectacular! Don’t let the layers fool you; this is one of those “looks fancy but secretly easy” recipes. Just follow these steps, and you’ll be the hero of dessert time.
Step 1: Prepare the Oat Crust
First things first—that buttery oat crust! In a medium bowl, whisk together the flour, oats, and packed brown sugar until they’re all best friends. Now grab your pastry cutter or forks and start working in those cold butter cubes. You’ll know it’s ready when the mixture looks like coarse sand with a few pea-sized butter bits remaining—that’s what gives the crust its perfect texture.
Here’s my pro tip: Set aside exactly 1 cup of this mixture for the topping before pressing the rest into your greased pan. I use the bottom of a measuring cup to press it firmly into an even layer—no cracks allowed! Pop it in the oven at 350°F for about 8 minutes while you make the filling. This quick pre-bake keeps the crust from getting soggy later.
Step 2: Make the Cream Cheese Filling
While the crust gets a head start, let’s whip up that dreamy filling. Beat the softened cream cheese (no lumps allowed!) with sugar, salt, cinnamon, and nutmeg until it’s smoother than a jazz record. Scrape down the bowl—those sneaky clumps hide in the corners!
Now add the room-temperature egg and vanilla, mixing just until combined. Overbeating after adding the egg can make the filling puff up then collapse, and we want creamy—not puffy. Gently fold in the diced rhubarb with a spatula, distributing it evenly without overmixing. The filling should look like pink-speckled clouds at this point.
Step 3: Bake and Chill
Time to bring it all together! Pour the filling over your partially baked crust, then sprinkle with the reserved oat mixture. Bake for about 40 minutes—you’ll know it’s done when the topping is golden brown and the center barely jiggles when nudged (like firm Jell-O, not liquid).
Here’s where patience pays off: Let the pan cool completely on a wire rack for at least 1 hour, then refrigerate for 2 more. I know, I know—waiting is hard! But slicing into warm cheesecake bars is a recipe for gooey disappointment. The chilling time lets the flavors meld and the filling set up perfectly. Trust me, it’s worth every minute.
Print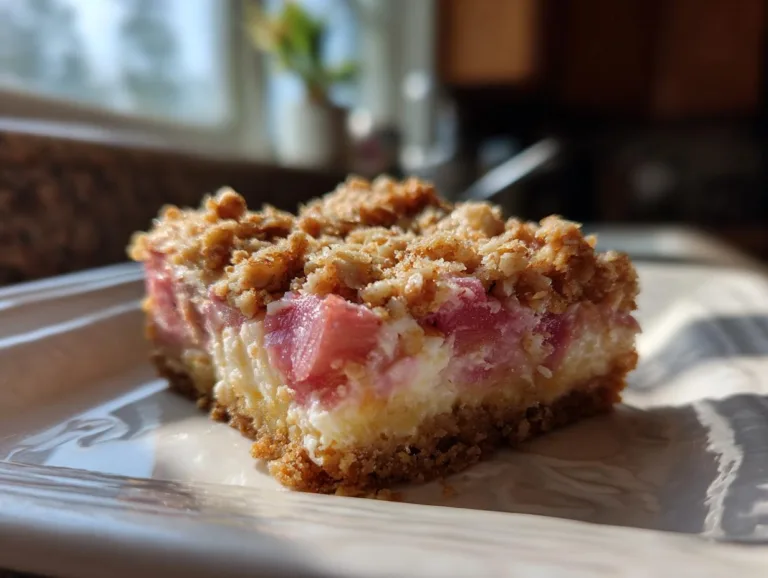
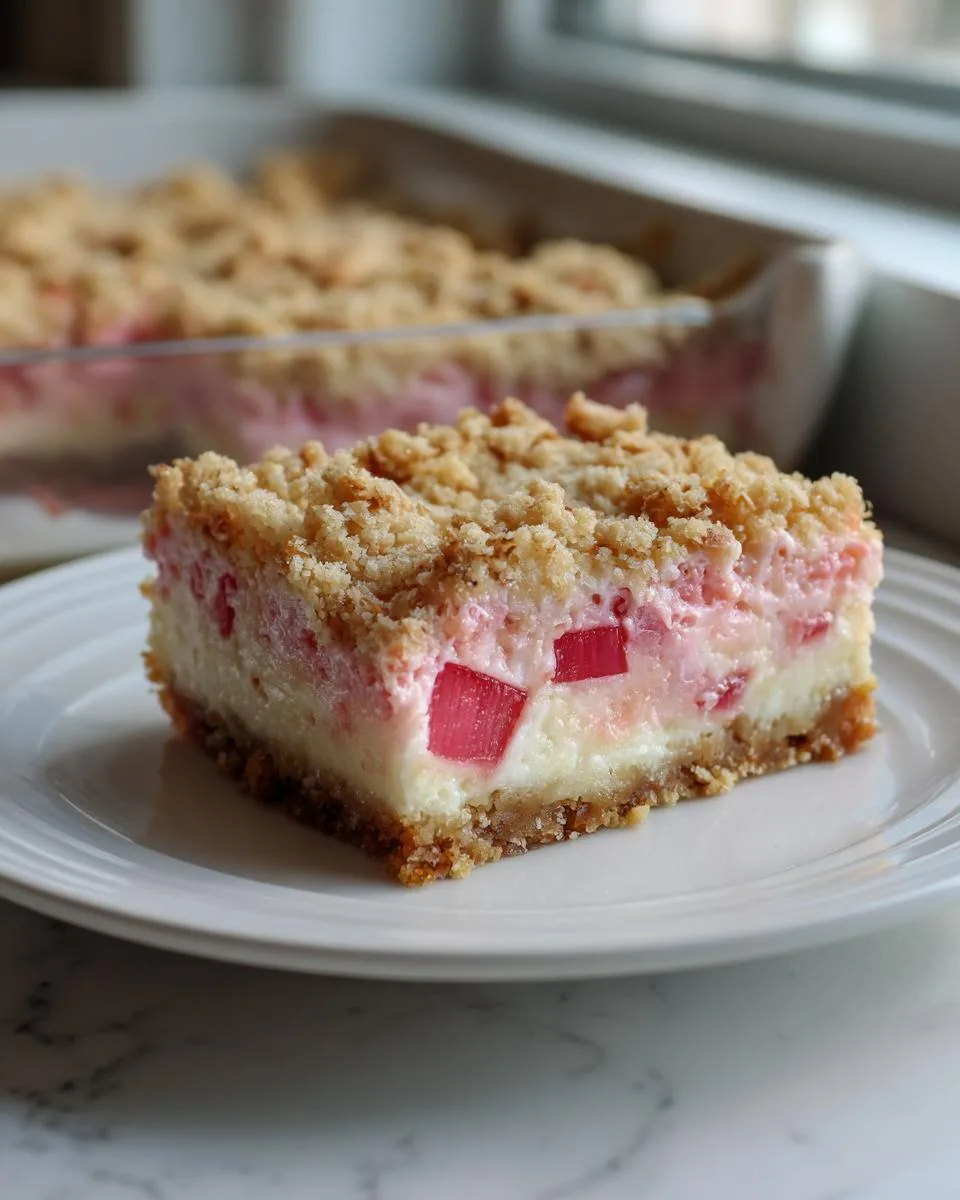
36 Creamy Rhubarb Cheesecake Bars That Steal Hearts
Creamy Rhubarb Cheesecake Bars combine a buttery oat crust with a smooth cream cheese filling and tangy rhubarb. A perfect dessert for any occasion.
- Total Time: 3 hours (includes chilling)
- Yield: 9 bars 1x
Ingredients
- 1–1/4 cups all-purpose flour
- 1/2 cup old-fashioned oats
- 1/2 cup packed brown sugar
- 1/2 cup cold butter, cubed
- 1 package (8 ounces) cream cheese, softened
- 3/4 cup sugar
- 1/2 teaspoon salt
- 1/4 teaspoon ground cinnamon
- 1/8 teaspoon ground nutmeg
- 1 large egg, room temperature, lightly beaten
- 1/2 teaspoon vanilla extract
- 1–1/2 cups diced fresh or frozen rhubarb, thawed
Instructions
- Preheat oven to 350°. In a small bowl, mix flour, oats and brown sugar; cut in butter until crumbly. Reserve 1 cup mixture for topping. Press remaining mixture onto bottom of a greased 9-in. square baking pan.
- For filling, beat cream cheese, sugar, salt and spices until smooth. Add egg and vanilla; beat on low speed just until combined. Fold in rhubarb. Spread over crust. Sprinkle with topping.
- Bake until golden brown and filling is set, about 40 minutes. Cool on a wire rack 1 hour. Refrigerate, covered, until cold, about 2 hours. Cut into squares.
Notes
- Use fresh rhubarb for the best flavor.
- Ensure the cream cheese is fully softened for a smooth filling.
- Chill thoroughly before slicing for clean cuts.
- Prep Time: 20 minutes
- Cook Time: 40 minutes
- Category: Dessert
- Method: Baking
- Cuisine: American
- Diet: Vegetarian
Nutrition
- Serving Size: 1 bar
- Calories: 280
- Sugar: 20g
- Sodium: 180mg
- Fat: 15g
- Saturated Fat: 9g
- Unsaturated Fat: 4g
- Trans Fat: 0g
- Carbohydrates: 35g
- Fiber: 1g
- Protein: 4g
- Cholesterol: 55mg
Tips for Perfect Creamy Rhubarb Cheesecake Bars
Oh honey, after making these bars more times than I can count, I’ve picked up a few tricks that I swear by. These little nuggets of wisdom will take your bars from “pretty good” to “can I have the recipe?” status every time!
Temperature is everything
Listen to Grandma Jo on this one—room temperature ingredients are non-negotiable for that silky smooth filling. Take your cream cheese out at least 2 hours before baking (or give it 30 seconds in the microwave at 50% power if you’re in a pinch). Cold cream cheese = lumpy filling, and we don’t want that! Same goes for the egg—let it sit out while you prep the crust.
Rhubarb rules
When dicing your rhubarb, aim for pieces no bigger than 1/4-inch—any larger and they’ll sink to the bottom during baking. And here’s my secret: if using frozen rhubarb, pat it dry with paper towels after thawing. That extra moisture can make your filling weep. Fresh rhubarb? Give it a good rinse first to remove any garden grit.
Pan prep perfection
For bars that slide out in perfect squares every time, line your pan with parchment paper with overhanging edges. Spray the pan lightly first so the parchment sticks, then press in your crust. When it’s time to slice, just lift the whole thing out by the parchment “handles”! No more wrestling with sticky corners.
Baking know-how
Don’t be fooled by jiggles—the center should wobble slightly when you nudge the pan, but not look liquidy. If the topping browns too fast, tent loosely with foil. And resist the urge to peek constantly! Every oven is different, so start checking at 35 minutes.
Slice like a pro
For clean cuts that’ll impress even your mother-in-law, use a sharp knife dipped in hot water (and wiped dry) between each slice. Chilling the bars thoroughly (I mean it—no cheating!) makes this step a breeze. If you’re serving them the next day, let them sit at room temp for 15 minutes first—that cream cheese filling tastes even better when it’s not ice-cold.
There you have it—my tried-and-true tips for cheesecake bar success! Now go forth and bake with confidence, my dear.
Serving Suggestions
Oh, now comes the best part—showing off these gorgeous bars! They’re delicious all on their own, but a little extra love takes them from great to “can I have seconds?” Here’s how I love to serve ‘em:
- A dollop of fresh whipped cream – Sweetened just slightly with a teaspoon of sugar and a splash of vanilla. The airy texture plays so nicely with that dense, creamy filling.
- Vanilla bean ice cream – Warm the bars for 10 seconds if you want that irresistible warm-cold contrast. The vanilla mellows out the rhubarb’s tang perfectly.
- Springtime flair – In rhubarb season, I garnish with edible flowers or a mint leaf. Come fall, a sprinkle of cinnamon sugar on top adds cozy vibes.
- Tea time elegance – Cut them smaller and serve with Earl Grey for afternoon tea—my book club ladies go wild for this pairing!
And here’s my favorite way: straight from the fridge with a cup of black coffee for breakfast (don’t judge—fruit and dairy make it practically health food!). However you serve them, just make sure to watch your guests’ faces after the first bite—that’s the real reward.
Storing and Freezing Creamy Rhubarb Cheesecake Bars
Now, let’s talk about keeping these beauties fresh—because let’s be real, they rarely last long enough to need storing in my house! But just in case you’ve got some self-control (or want to stash a secret batch for later), here’s how to keep them tasting like they just came out of the oven.
Fridge Storage
Once fully chilled and sliced, these bars are happiest in an airtight container in the fridge. Layer them between sheets of parchment or wax paper so they don’t stick together—nobody wants to pry apart cheesecake layers! They’ll stay perfect for about 3 days, though the crust might soften slightly by day 3. (Not that it stops anyone from eating them!)
Here’s my trick: If I’m making them for a party, I’ll bake and chill the whole pan overnight, then cut and arrange them on a pretty platter the next morning. Cover loosely with plastic wrap, and they’ll be party-ready whenever you are! If you want to see more of my favorite make-ahead recipes, check out my collection of recipes.
Freezing Like a Pro
Yes, you can freeze these—what a glorious discovery! Here’s how I do it:
- Flash freeze first: Place cut bars on a parchment-lined baking sheet and freeze until solid (about 2 hours). This prevents them from sticking together later.
- Wrap individually: Once frozen, wrap each bar tightly in plastic wrap, then pop them all into a freezer bag. Squeeze out as much air as possible—oxygen is the enemy of creamy fillings!
- Thaw gently: When the craving hits, transfer wrapped bars to the fridge overnight. No microwave! The gradual thaw keeps that perfect texture intact.
Frozen bars keep beautifully for up to 2 months. Though between you and me? Mine never last that long—I usually “forget” about them for a week, then “rediscover” them during a midnight snack attack. Grandma Jo would approve.
One last tip: If you’re freezing a whole pan, skip the slicing and freeze it intact with layers of parchment between the pan and plastic wrap. Thaw in the fridge overnight before cutting—it’ll be just like fresh!
Nutrition Information
Now, let’s talk numbers—but remember, these are just estimates based on my exact ingredients. Your bars might vary a smidge depending on your rhubarb’s sweetness or whether you use that extra pat of butter (no judgment here!). Here’s the scoop per generous bar:
- Calories: About 280 – Perfect for when you want something indulgent but not overwhelming.
- Sugar: 20g – Mostly from that brown sugar crust and natural rhubarb sweetness.
- Fat: 15g – Thank that glorious butter and cream cheese for all the richness!
- Protein: 4g – Who knew dessert could pack a little protein punch?
- Fiber: 1g – Those oats and rhubarb strands do their part.
A little side note from my kitchen to yours: Nutrition labels can’t measure the joy these bars bring to a family dinner or the memories they create. So while it’s good to be mindful, don’t let numbers steal the simple pleasure of sharing something made with love. After all, Grandma Jo always said, “A little sweetness feeds the soul as much as the belly.”
Frequently Asked Questions
Over the years, I’ve gotten so many questions about these rhubarb cheesecake bars—some from panicked bakers mid-recipe! Here are the answers to the ones I hear most often, straight from my flour-dusted recipe box to you:
Can I use canned rhubarb instead of fresh or frozen?
Oh honey, I wouldn’t recommend it. Canned rhubarb turns to absolute mush in the filling—it’s like trying to bake with wet noodles! Stick with fresh or properly thawed frozen rhubarb for those perfect little tart bursts in every bite.
Why did my filling crack?
Ah, the heartbreak of cheesecake cracks! Usually it means the oven was too hot or the bars cooled too quickly. Next time, try baking at 325°F for a bit longer, and let them cool gradually in the turned-off oven with the door cracked open. But listen—cracked or not, they’ll still taste amazing. We call those “rustic charm” in my kitchen!
Can I make these gluten-free?
Absolutely! Swap the all-purpose flour for your favorite 1:1 gluten-free blend (I like the ones with xanthan gum already added). The oats should be certified GF too—regular oats can sometimes have cross-contamination. My neighbor Mary swears by this version, and you’d never know the difference!
How do I know when they’re fully baked?
Watch for three signs: the topping should be golden brown, the edges slightly puffed, and the center should jiggle like firm Jell-O when you nudge the pan—not liquidy, but not completely stiff either. Carryover cooking during cooling will finish the job. When in doubt, err on the side of underbaking!
Can I double this recipe?
You bet! Double everything and use a 9×13-inch pan instead. You’ll need to add about 10-15 minutes to the baking time—just keep an eye on that topping so it doesn’t get too dark. This is my go-to move for potlucks, and I never bring leftovers home!
Still got questions? Don’t hesitate to ask—I’ve probably made every mistake possible with this recipe over the years, so I’ve got solutions for just about anything that might come up. Happy baking, dear!
For More recipes, Follow me on Facebook!