
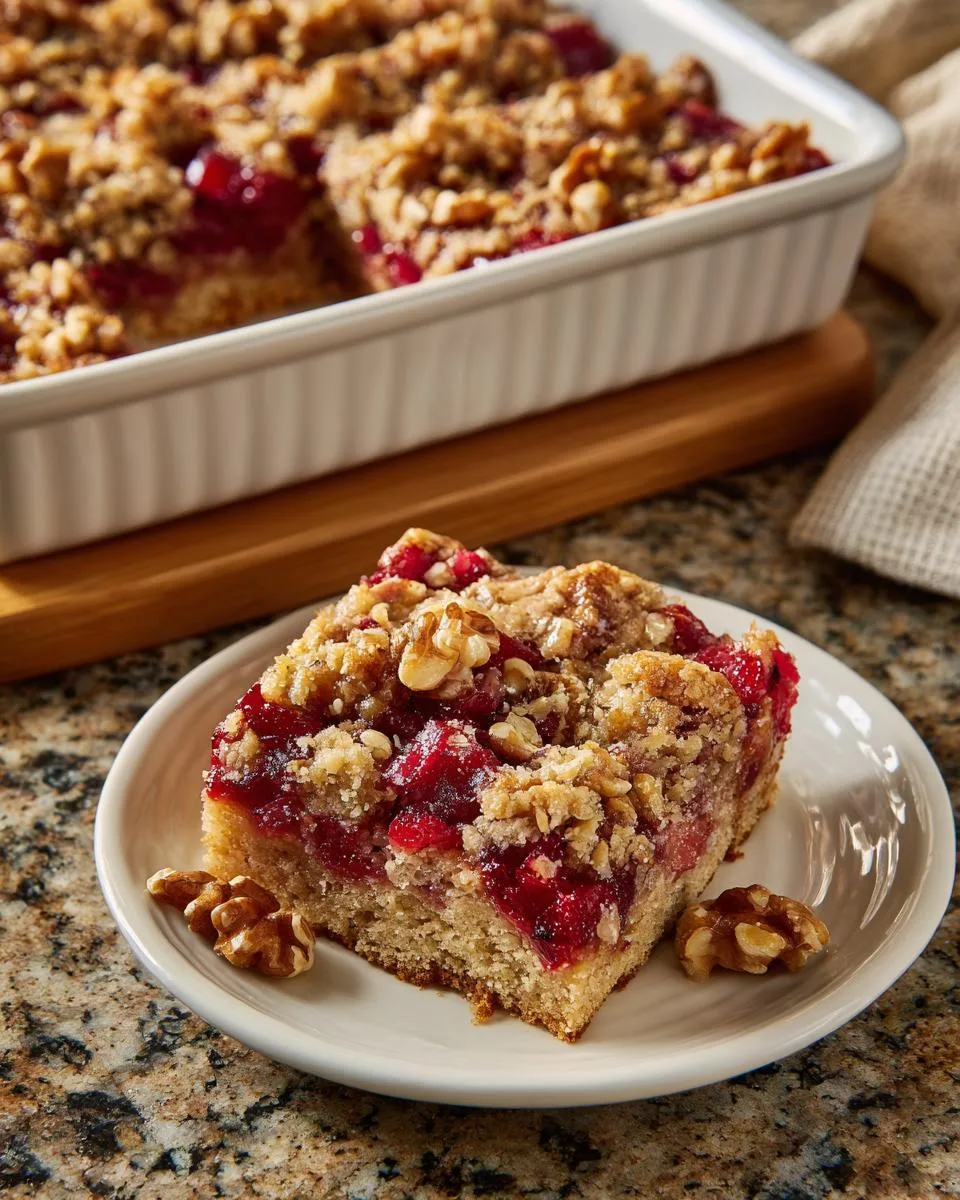
There’s something magical about the desserts of our childhood, isn’t there? The ones that transport you back to grandma’s kitchen with just one bite. For me, that taste memory comes from these Coconut Walnut Rhubarb Dream Bars – a recipe I’ve been baking for over 40 years. It all started when my neighbor Mrs. Henderson brought a pan to our church picnic back in ’78. I took one nibble of that buttery shortbread crust topped with tangy rhubarb, sweet coconut, and crunchy walnuts, and I just had to get the recipe!

Table of Contents
Table of Contents
Now, these bars are what my grandkids beg for every spring when the rhubarb pokes through the garden dirt. I always make a double batch because somehow the first pan disappears before it’s even cooled. There’s just something about that perfect balance – the crisp crust giving way to the soft, fruity filling with little bursts of nutty crunch. It’s old-fashioned comfort in every square, the kind of treat that makes everyone gather around the kitchen counter, fingers sneaking little tastes before dessert time.
What I love most is how these dream bars bridge generations. My daughter now makes them for her book club, and my grandson (who’s only seven!) helps me measure the coconut. That’s the power of good recipes – they become part of your family’s story. And this one? Well, it’s written in our history in buttery, rhubarb-stained pages.
Why You’ll Love These Coconut Walnut Rhubarb Dream Bars
Oh honey, these bars are pure nostalgia in every bite! Let me tell you why they’re my go-to dessert for every potluck and family gathering:
- That buttery crust – crisp yet tender, made with real butter just like grandma used
- Sweet-tart magic – the rhubarb’s tang dances perfectly with coconut’s tropical sweetness
- Easy as pie (but simpler) – just mix, press, and bake – no fancy techniques needed
- Crowd-pleaser guaranteed – always the first empty pan at gatherings
- Old-fashioned comfort – tastes like Sunday afternoons at grandma’s house
Trust me, one bite and you’ll understand why I’ve baked this same recipe for four decades. The walnuts add just enough crunch, the coconut makes it special, and that rhubarb? Pure perfection!
Ingredients for Coconut Walnut Rhubarb Dream Bars
Now, let’s gather our goodies! This recipe comes together with simple ingredients you probably already have in your kitchen. I like to divide everything into crust and filling – keeps me from forgetting anything in the excitement of baking!

For the Buttery Crust:
- 1 cup all-purpose flour (spooned and leveled – no packing!)
- 1/3 cup confectioners’ sugar (the powdery kind that makes everything dreamy)
- 1/2 cup cold butter, cubed (I chill mine for at least 30 minutes – cold butter makes the flakiest crust)
For the Dreamy Filling:
- 1/4 cup all-purpose flour (this helps thicken our fruity filling)
- 1-1/4 to 1-1/2 cups granulated sugar (I use 1-1/4 cups for tarter bars, 1-1/2 for sweeter)
- 2 large eggs (room temperature blends smoother)
- 2 cups diced fresh or frozen rhubarb (no need to thaw if frozen – such a timesaver!)
- 1/2 cup chopped walnuts (I like a rough chop for great texture)
- 1/2 cup sweetened shredded coconut (pack it lightly when measuring)
A little tip from my baking apron: measure your rhubarb after dicing it – those 2 cups should be nice and full, not packed down. And don’t you dare skip toasting those walnuts if you’ve got an extra minute! Just pop them in a dry skillet over medium heat until fragrant – makes all the difference.
How to Make Coconut Walnut Rhubarb Dream Bars
Alright, let’s get baking! I’ve made these bars so many times I could do it in my sleep, but I’ll walk you through each step just like I showed my granddaughter last week. Remember – baking is about joy, not perfection. If your crust crumbles a bit or your filling bubbles over, that just adds character!
Preparing the Crust
First things first – preheat that oven to 350°F. While it’s warming up, grab your favorite 13×9-inch baking dish and give it a good greasing. I use butter for mine – just a quick swipe around the bottom and sides with the wrapper from our cubed butter. Waste not, want not!
Now for the fun part – making that buttery crust. In a medium bowl, whisk together 1 cup flour and 1/3 cup confectioners’ sugar. Time to get hands-on! Drop in those cold butter cubes and start working them into the flour mixture with your fingers. You’ll know it’s ready when it looks like coarse sand with some pea-sized butter bits remaining – those little pockets make the crust extra flaky.
Press this mixture firmly into your greased pan. I like to use the bottom of a measuring cup to get it nice and even across the bottom. Don’t press too hard though – we want it to hold together but still stay tender. Pop it in the oven for 13-15 minutes until the edges just start turning golden brown. Your kitchen should smell like sweet butter at this point – heavenly!
Mixing the Filling
While the crust bakes, let’s whip up that dreamy filling. In a large bowl, whisk together the remaining 1/4 cup flour and your sugar (remember, 1-1/4 cups for tart, 1-1/2 for sweeter). Crack in those two eggs and beat everything until it’s smooth and glossy – about a minute with a good old-fashioned whisk should do it.
Now fold in the rhubarb, walnuts, and coconut. The mixture will look thick and lumpy with all those goodies – that’s exactly what we want! If you’re using frozen rhubarb, don’t worry about any extra liquid. The flour and sugar will absorb it beautifully as it bakes. Just give everything a gentle stir until all the rhubarb pieces are coated in that sweet egg mixture.
Baking and Cooling
When your crust comes out looking lightly golden, pour the filling right over the top. Spread it evenly with a spatula – the walnuts and rhubarb will settle where they please, and that’s part of the charm. Back into the oven it goes for 30-35 minutes.
You’ll know it’s done when the filling is set (no jiggling in the middle!) and the top is a beautiful golden brown with the rhubarb peeking through here and there. Oh, and your whole house will smell like a sweet tropical garden – that’s your cue to take them out!
Here’s the hardest part – let them cool completely before cutting. I know, I know, the temptation is real! But waiting means cleaner slices and that perfect chewy-yet-tender texture. About 2 hours should do it, but if you’re in a hurry, 30 minutes in the fridge helps. Then slice into squares and watch them disappear!
Print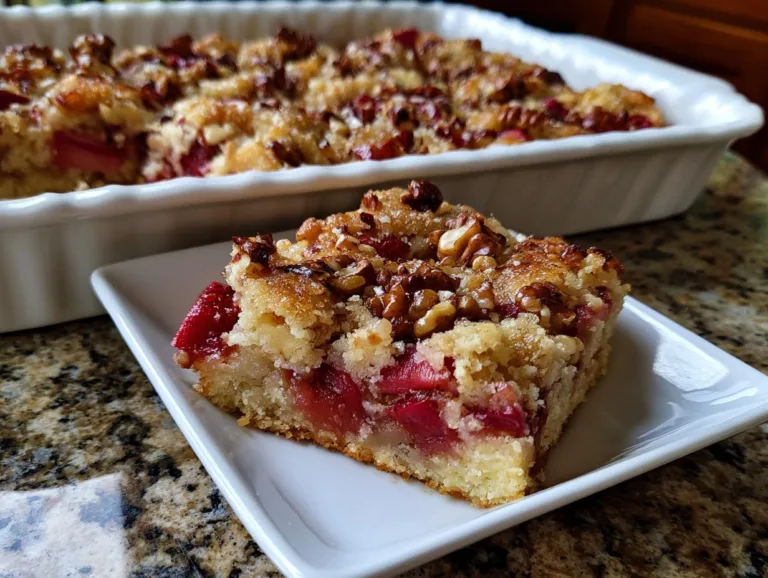
Nostalgic Coconut Walnut Rhubarb Dream Bars Grandma Loves
A delightful dessert combining tart rhubarb, crunchy walnuts, and sweet coconut on a buttery shortbread crust.
- Total Time: 1 hour
- Yield: 24 bars 1x
Ingredients
- 1–1/4 cups all-purpose flour, divided
- 1/3 cup confectioners’ sugar
- 1/2 cup cold butter, cubed
- 1–1/4 to 1-1/2 cups sugar
- 2 large eggs
- 2 cups diced fresh or frozen rhubarb
- 1/2 cup chopped walnuts
- 1/2 cup sweetened shredded coconut
Instructions
- Preheat oven to 350°F.
- Combine 1 cup flour and confectioners’ sugar in a bowl. Cut in butter until crumbly.
- Press mixture into greased 13×9-inch baking dish. Bake 13-15 minutes until edges brown.
- Mix sugar and remaining flour in another bowl. Add eggs.
- Stir in rhubarb, walnuts, and coconut. Pour over crust.
- Bake 30-35 minutes until set. Cool before cutting.
Notes
- Use frozen rhubarb when fresh isn’t available.
- Bars firm up as they cool.
- Store covered at room temperature.
- Prep Time: 15 minutes
- Cook Time: 45 minutes
- Category: Dessert
- Method: Baked
- Cuisine: American
- Diet: Vegetarian
Nutrition
- Serving Size: 1 bar
- Calories: 180
- Sugar: 15g
- Sodium: 55mg
- Fat: 8g
- Saturated Fat: 4g
- Unsaturated Fat: 3g
- Trans Fat: 0g
- Carbohydrates: 25g
- Fiber: 1g
- Protein: 2g
- Cholesterol: 30mg
Tips for Perfect Coconut Walnut Rhubarb Dream Bars
After baking these dream bars for decades, I’ve picked up a few tricks that make all the difference between good and “grandma-worthy” results. Here’s my best advice:
Frozen rhubarb works wonders! Don’t wait for spring – I keep bags of diced rhubarb in my freezer year-round. Just toss it in frozen (no thawing!) and it’ll bake up perfectly tender. The frozen pieces actually help prevent the filling from getting too runny.
The toothpick test never lies. When checking doneness, insert a toothpick near the center. It should come out with moist crumbs, not wet batter. If the edges are getting too dark but the center’s still wobbly, tent with foil for the last 10 minutes.
Cooling is non-negotiable. I know it’s hard to wait, but cutting warm bars leads to crumbly messes. Let them cool at least 2 hours – the filling continues to set as it cools. For super-neat squares, chill the pan for 30 minutes first.
Storage secret: These keep beautifully at room temperature for 3 days under a cake dome. Layer them between parchment paper in an airtight container if stacking. For longer storage, freeze individual portions – they thaw in minutes and taste fresh-baked!
My personal trick: For extra coconut flavor, toast the shredded coconut in a dry skillet until golden before adding it to the filling. The nutty aroma will make your kitchen smell heavenly!
Variations on Coconut Walnut Rhubarb Dream Bars
Oh, how I love playing with this recipe! Every time I make these bars, I discover new ways to tweak them while keeping that beloved old-fashioned charm. Here are my favorite variations that have passed the family taste test with flying colors:
Pecans for walnuts: When my Tennessee cousins visit, I swap walnuts for pecans. That rich, buttery crunch takes these bars to a whole new level! Just chop them the same way – no need to measure differently.
Citrus sunshine: A tablespoon of orange zest mixed into the filling brightens everything up beautifully. My granddaughter calls these her “sunshine bars” when I add it. Lemon zest works too if you prefer more tang.
Gluten-free magic: For my neighbor with celiac disease, I use 1-to-1 gluten-free flour (the kind with xanthan gum already added). Nobody can tell the difference! Just be extra gentle when pressing the crust.
Berry twist: In late summer, I’ll sometimes replace half the rhubarb with diced strawberries. The sweetness balances the rhubarb’s tartness perfectly – like strawberry-rhubarb pie in bar form!
Spiced version: A pinch of cinnamon or cardamom in the filling makes these feel extra cozy on chilly days. Start with 1/4 teaspoon and adjust to your taste.
Remember, baking is all about making recipes your own. These variations have all become family favorites over the years, but don’t be afraid to experiment! The basic formula is so flexible – as long as you keep that buttery crust and sweet-tart filling ratio, you really can’t go wrong. If you want to see more of my family’s favorite sweet treats, check out my dessert recipes here!
Serving and Storing Coconut Walnut Rhubarb Dream Bars
Now let’s talk about the best part – enjoying these dream bars! After waiting patiently for them to cool (I know, it’s tough!), here’s how to serve and keep them tasting fresh:
Serving temperature matters! These bars truly shine at room temperature. The flavors meld together beautifully, and that shortbread crust regains its perfect tender-crisp texture. I always take them out of the fridge 30 minutes before serving if I’ve chilled them for slicing.
For picture-perfect presentation: Use a sharp knife dipped in hot water between cuts. Wipe the blade clean each time for those clean edges that make everyone say “wow!” Arrange them on my grandmother’s cake stand with the rhubarb side up – those pink speckles peeking through the golden topping make mouths water.
Storage secrets from decades of baking:
- Room temperature: Cover tightly with foil or plastic wrap for up to 3 days. The sugar acts as a natural preservative!
- Freezing: These bars freeze beautifully for up to 3 months. I layer them between parchment paper in airtight containers – that way I can grab just one or two when the craving strikes.
- Reviving leftovers: If they dry out a bit (rare in my house!), a quick 10-second microwave zap brings back that just-baked softness.
Here’s my favorite serving tip: Pair a square with a scoop of vanilla ice cream for an unforgettable dessert. The cold creaminess against the chewy coconut and tart rhubarb? Pure heaven! For breakfast (shh, our little secret), I’ll sometimes crumble one over Greek yogurt – the tangy yogurt cuts the sweetness perfectly.
Nutritional Information for Coconut Walnut Rhubarb Dream Bars
Now, I’ll be honest – we never counted calories back when this recipe was born! But since folks ask, here’s the scoop on what’s in these dreamy bars. Remember, these are estimates – your actual results might dance a little depending on your exact ingredients and portion sizes. That said, let’s peek at what makes these treats tick:
- Serving Size: 1 bar (about 2×2 inches)
- Calories: 180 (perfect for satisfying that sweet tooth!)
- Sugar: 15g (mostly from the natural rhubarb and coconut)
- Fat: 8g (that’s the good kind from walnuts and butter)
- Saturated Fat: 4g
- Carbohydrates: 25g
- Fiber: 1g (thank those walnuts and rhubarb!)
- Protein: 2g
- Cholesterol: 30mg
A little note from my experience – these bars pack more nutrition than you might think! The walnuts add healthy fats and protein, while rhubarb sneaks in some vitamin K and fiber. And coconut? Well, that’s just delicious goodness. Everything in moderation, as my grandma used to say – though moderation gets tough when these bars are fresh from the oven!
If you’re watching your sugar intake, remember you can reduce it to 1-1/4 cups in the filling – the rhubarb’s natural tartness still shines through beautifully. And for my friends counting carbs, a smaller 1×2 inch portion makes a lovely little treat at about half these values. For more simple, comforting recipes like this, take a look at my collection of classic recipes.
Frequently Asked Questions About Coconut Walnut Rhubarb Dream Bars
Over my years of baking these dream bars, I’ve gotten the same wonderful questions again and again. Here are the answers I’ve discovered through plenty of trial and (happy) error:
Can I use frozen rhubarb?
Oh goodness yes – frozen rhubarb works beautifully! In fact, I keep it stocked in my freezer year-round. No need to thaw – just toss those frozen pink chunks right into the filling. The cold actually helps prevent the crust from getting soggy during baking. Measure after dicing for accuracy.
How do I prevent a soggy crust?
Three simple tricks: 1) Make sure your butter is ice-cold when making the crust. 2) Don’t overmix – leave some pea-sized butter bits. 3) Bake the crust until it’s lightly golden before adding filling. That initial bake creates a protective barrier against moisture.
Can I reduce the sugar?
Absolutely! I often use just 1-1/4 cups sugar when I want the rhubarb’s natural tartness to shine. Below that, the texture changes, but for a slightly less sweet bar, it works beautifully. My grandson prefers them this way – says they taste more “grown-up”! If you enjoy slightly less sweet desserts, you might also enjoy my Miso Millionaire Bars.
Can I make these ahead?
They actually improve with time! Bake them up to 2 days before serving – the flavors meld wonderfully. Store covered at room temperature. For longer storage, freeze in layers with parchment between for up to 3 months. Thaw at room temp when the craving strikes.
Why did my filling separate?
This happens when the eggs and sugar aren’t fully combined before adding other ingredients. Take that extra minute to whisk them until glossy – it makes all the difference! Also, avoid overmixing after adding rhubarb. If you’re looking for other easy-to-manage baked goods, check out my recipe for Banana Oat Breakfast Muffins.
For More recipes, Follow me on Facebook!






