
Oh, Halloween – the time of year when my kitchen turns into a mad scientist’s lab! Some of my fondest memories are making spooky treats with my grandkids, their little hands covered in chocolate and cookie crumbs. That’s why these Halloween Dirt Cups hold such a special place in my heart. They’re not just dessert – they’re edible playgrounds where gummy worms crawl through chocolate “dirt” and cookie tombstones mark the spot of deliciousness!

Table of Contents
Table of Contents
I’ll never forget little Timmy’s face when he first saw these creepy cups – eyes wide as saucers, then that mischievous grin as he dug right in with both hands. Now my grandbabies are all grown up, but we still make these every October. The best part? You don’t need fancy skills – just some Oreos, pudding, and a whole lot of Halloween spirit. Trust me, once you try this recipe, it’ll become your family’s tradition too!
Why You’ll Love These Halloween Dirt Cups
Oh, where do I start? These cups are pure magic – here’s why:
- So easy a ghost could make ‘em – No baking, just mixing and layering!
- Kid-approved fun – Let little hands crush cookies and arrange gummy worms
- Customizable creepiness – Swap candies or pudding flavors for endless variations
- Instant nostalgia – Takes me right back to classroom Halloween parties in the ‘80s
Seriously – if smiles were calories, these would be guilt-free!
Ingredients for Halloween Dirt Cups
Now let’s dig into the good stuff – here’s what you’ll need to make these spooky treats come alive:

- 12 Oreo cookies – Crushed fine (I use my trusty rolling pin, but a food processor works too)
- 1 box (3.3 oz) instant chocolate pudding mix – The secret to that rich, velvety “mud” layer
- 2 cups cold milk – Whole milk makes it extra creamy, but any kind works
- 16 oz Cool Whip – Thawed overnight in the fridge (trust me, it folds in better this way)
- 8 Milano cookies – Our edible tombstones (gluten-free cookies work great too)
- Gummy worms & candy pumpkins – The creepy-crawly stars of the show!
- Wilton black writing icing – For those spooky “RIP” tombstone messages
Psst – for my dairy-free friends, just swap in almond milk and coconut whipped topping. The ghosts won’t know the difference!
Equipment You’ll Need
Don’t worry – no fancy gadgets required here! Just grab:
- A medium mixing bowl and whisk (or just a fork in a pinch)
- Measuring cups – for that perfect pudding-to-milk ratio
- 8 small cups or mason jars – the “graves” for our dirt cups
- Food processor or rolling pin – to smash those Oreos into dirt
That’s it – now let’s get our hands dirty!
How to Make Halloween Dirt Cups
Alright, let’s get our hands dirty – figuratively speaking! These Halloween Dirt Cups come together faster than a ghost disappears, but there’s a method to the madness. Follow these steps, and you’ll have graveyard-ready treats in no time.
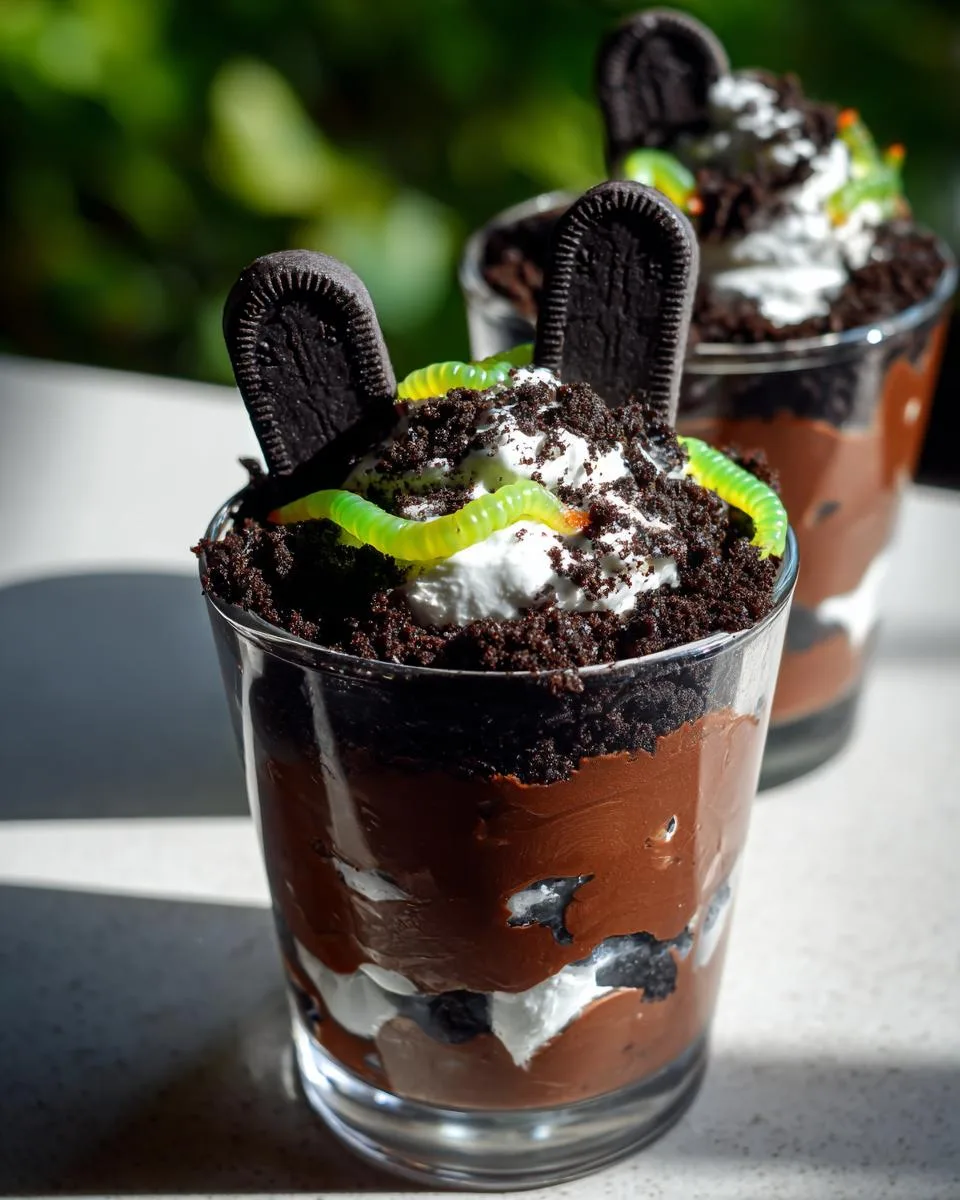
Step 1: Prepare the Pudding Mixture
First things first – let’s make that luscious chocolate “mud” layer. Grab your mixing bowl and whisk together the pudding mix and cold milk until it starts to thicken. Now here’s my little secret – let it sit for exactly 10 minutes in the fridge. This gives it time to set up properly.
Once it’s nicely thickened, gently fold in the thawed Cool Whip. Don’t rush this part – use big, sweeping motions until no white streaks remain. Pop it back in the fridge for another 20 minutes while you work on the other components. Chilling is key for perfect layers!
Step 2: Crush the Oreos
Time to make some dirt! Toss those Oreos into your food processor (or if you’re old-school like me, put them in a ziplock bag and whack ’em with a rolling pin). You want them crushed fine – think potting soil texture, not gravel. Little hands love helping with this part – just watch out for sneaky cookie thieves!
Pro tip: Save a couple tablespoons of the finest crumbs to sprinkle on top later for that fresh-dug grave look.
Step 3: Assemble the Halloween Dirt Cups
Now the fun begins! Grab your cups and start layering:
- Spoon about 1/3 cup of pudding mixture into each cup
- Sprinkle with a tablespoon of Oreo “dirt”
- Repeat layers until cups are nearly full
Now for the decorations – write “RIP” on your Milano tombstones with the black icing (messy writing makes it extra spooky). Stick them into the dirt at an angle. Scatter gummy worms peeking out from the dirt and add candy pumpkins for color. Voila – you’ve just created edible Halloween magic!
Print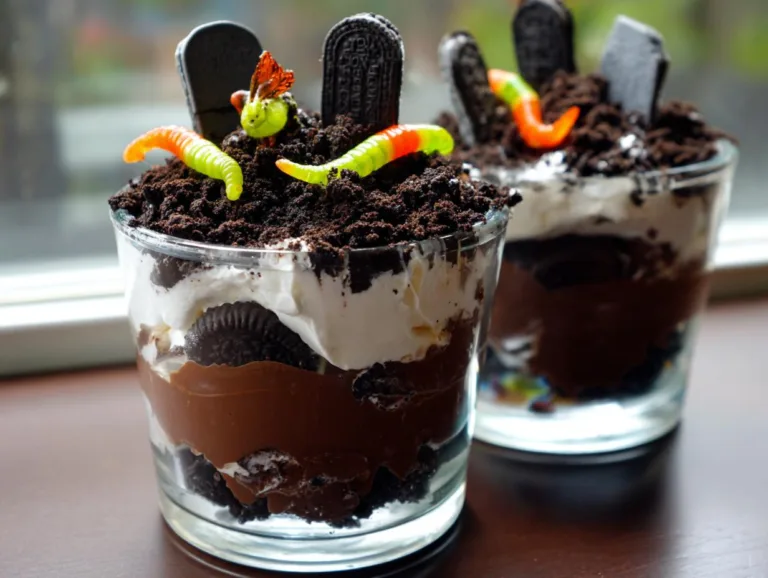
Spooky Halloween Dirt Cups Kids Will Devour in 10 Minutes
A fun and spooky Halloween dessert featuring layers of chocolate pudding, whipped cream, and crushed Oreos, topped with tombstone cookies and gummy worms.
- Total Time: 30 minutes
- Yield: 8 servings 1x
Ingredients
- 12 Oreo Cookies
- 16 oz Cool Whip
- 1 box (3.3 oz) Instant Chocolate Pudding Mix
- 2 cups Milk
- 8 Milano Cookies
- Gummy Worms (optional)
- Candy Pumpkins (optional)
- Wilton Black Writing Icing
Instructions
- Whisk together the pudding mix and milk in a medium bowl. Refrigerate for 10 minutes or until set.
- Fold in the Cool Whip until well combined. Refrigerate for 20 minutes to chill.
- Crush Oreos in a food processor or blender until fine.
- Assemble the cups: Fill small cups 1/3 full with pudding mixture.
- Top with a small amount of crushed Oreos. Repeat layers in all cups.
- Write ‘RIP’ on Milano cookies with black icing. Place in cups to resemble tombstones.
- Decorate with gummy worms and candy pumpkins. Enjoy!
Notes
- Use gluten-free cookies for a gluten-free version.
- Substitute dairy-free milk and whipped topping for a vegan option.
- Prep Time: 15 minutes
- Cook Time: 0 minutes
- Category: Dessert
- Method: No-Bake
- Cuisine: American
- Diet: Vegetarian
Nutrition
- Serving Size: 1 cup
- Calories: 280
- Sugar: 22g
- Sodium: 180mg
- Fat: 10g
- Saturated Fat: 5g
- Unsaturated Fat: 4g
- Trans Fat: 0g
- Carbohydrates: 42g
- Fiber: 1g
- Protein: 4g
- Cholesterol: 5mg
Tips for Perfect Halloween Dirt Cups
After making these spooky treats for decades, I’ve learned a few tricks to make them extra special:
- Chill that pudding! – The colder the mixture, the cleaner your layers will be. I sometimes make it the night before.
- Crush those Oreos fine – A few pulses in the food processor gives you that authentic “dirt” texture kids love.
- Try a piping bag – For picture-perfect layers, pipe the pudding mixture instead of spooning it in.
- Add worms last – Tuck gummy worms in just before serving so they stay perky and don’t get soggy.
Remember – messy is part of the fun with these cups. The more “grave” they look, the better!
Variations for Halloween Dirt Cups
Oh, the possibilities! Over the years, we’ve had so much fun playing with different versions of these dirt cups. Here are some of our family’s favorite twists:
- Vanilla graveyard – Swap the chocolate pudding for vanilla, then dye it green with food coloring for “ectoplasm”
- Cookie monsters – Try Golden Oreos or graham crackers instead of chocolate cookies
- Spooky themes – Use skeleton candies in October or candy eyeballs for monster mash-ups
The best part? There’s no wrong way to make these – just let your Halloween spirit guide you!
Serving and Storing Halloween Dirt Cups
Here’s the dirt on keeping these spooky treats perfect: always serve them chilled – the colder they are, the more the flavors pop! If you’re making them ahead (smart thinking!), just cover the cups with plastic wrap and they’ll keep happily in the fridge for up to 2 days. Though between you and me, they’ve never lasted that long in my house – the grandkids sniff them out like little dessert detectives!
Halloween Dirt Cups FAQs
Over the years, I’ve gotten all sorts of questions about these spooky treats – here are the ones that pop up most often:
Can I make Halloween Dirt Cups ahead of time?
Absolutely! In fact, I often assemble them the night before. Just wait to add the gummy worms until right before serving so they don’t get too soft.
Are there vegan options for these dirt cups?
You bet! Use dairy-free milk, vegan whipped topping, and gluten-free cookies. The worms might be trickier – look for gelatin-free gummies or swap in fruit leather “worms.”
What if I don’t have Milano cookies for the tombstones?
No worries – get creative! Nilla wafers, graham crackers, or even shortbread cookies work great. One year we used Pepperidge Farm Chessmen cookies – looked like ancient tombstones!
How long do Halloween Dirt Cups last in the fridge?
They’re best within 2 days, though honestly they never last that long in my house! The pudding might weep a bit after day two, but they’ll still taste delicious.
Nutritional Information
Now, I’m no nutritionist (just a grandma who loves treats!), but here’s the scoop on these Halloween Dirt Cups: Nutrition varies based on your ingredients, but each serving clocks in around 280 calories with 22g sugar. Remember – it’s Halloween! A little sugar never scared me, especially when it comes with this much fun and memories.
Oh, I’d love to see your creepy creations! Snap a photo of your dirt cups and share them with me – nothing warms this old ghost’s heart like seeing new generations enjoying this spooky tradition. Happy haunting… I mean, baking!
For More recipes, Follow me on Facebook!






