
Nothing says “holiday magic” quite like the smell of Chocolate Peppermint Blossoms baking in the oven. That rich chocolate scent mingling with cool peppermint takes me right back to Christmas mornings at Grandma Jo’s house – flour dusted on her apron, candy cane wrappers scattered across the counter, and us kids sneaking kisses (the chocolate kind!) before they made it onto the cookies.

Table of Contents
Table of Contents
These little gems became our family’s edible holiday tradition. The contrast of fudgy chocolate cookies with that burst of peppermint cream in the center? Absolute perfection. I still make them exactly how Grandma Jo taught me – with Dutch process cocoa for depth, frozen kisses that hold their shape, and that critical 7-8 minute bake time that keeps them soft but not raw. One bite and you’ll understand why three generations of our family can’t imagine December without these blossoms.
Why You’ll Love These Chocolate Peppermint Blossoms
Oh my stars, where do I even begin? These little cookies have stolen hearts at every holiday gathering I’ve ever brought them to. Let me count the ways you’re going to adore them:
- Festive magic in every bite – That deep chocolate paired with cool peppermint just screams holidays. The red-striped kisses make them look like edible ornaments!
- Easy enough for kids to help – My grandkids love rolling the dough balls and pressing in the kisses. It’s become our special pre-Christmas tradition.
- Perfect fudgy texture – That precise 7-8 minute bake gives you cookies that are crisp on the edges but stay gloriously soft in the center.
- Total crowd-pleasers – I’ve never brought these to a party without someone asking for the recipe. They disappear faster than Santa’s cookies!
- Make-ahead friendly – You can freeze the unbaked dough balls or store baked cookies for days. Holiday baking stress? Solved.
Honestly, what’s not to love? They’ve got that nostalgic homemade taste with just enough festive flair to feel special. One batch and you’ll understand why these Chocolate Peppermint Blossoms have been my signature holiday cookie for over 30 years!
Chocolate Peppermint Blossoms Ingredients
Now let’s gather everything you’ll need to make these festive cookies just right. Trust me, using the exact ingredients listed here makes all the difference between “good” and “Grandma Jo would approve” cookies!

- 1 1/2 cups (188 g) all-purpose flour – spooned gently into your measuring cup and leveled off with a knife (no packing it down!)
- 1/2 cup (40 g) cocoa powder – Dutch process is my non-negotiable here for that deep, rich chocolate flavor
- 1/2 tsp baking powder – the fresh stuff from your pantry, not that questionable tin from 2018
- 1/2 tsp baking soda – yes, we’re using both leaveners for the perfect lift
- 1/2 tsp salt – just enough to make all the flavors pop
- 3/4 cup (168 g) unsalted butter – softened to that perfect “finger leaves an indent” stage
- 3/4 cup (165 g) light brown sugar – packed firmly into your measuring cup
- 1/4 cup (50 g) granulated sugar – for both the dough and rolling
- 2 egg yolks – at room temperature (cold yolks make the dough stiff)
- 1 tsp vanilla – the real stuff, please!
- 34 Candy Cane Hershey Kisses – frozen solid before using (trust me on this)
See how specific Grandma Jo was with her measurements? That’s why her cookies turned out perfect every single time. No vague “a pinch of this” or “some of that” – just good old-fashioned precision with a dash of love.
How to Make Chocolate Peppermint Blossoms
Alright, let’s roll up our sleeves and get baking! Follow these steps exactly like I do, and you’ll have perfect Chocolate Peppermint Blossoms every time. The secret? Freezing those kisses (really – don’t skip it!) and that magic 7-8 minute bake window. Ready?
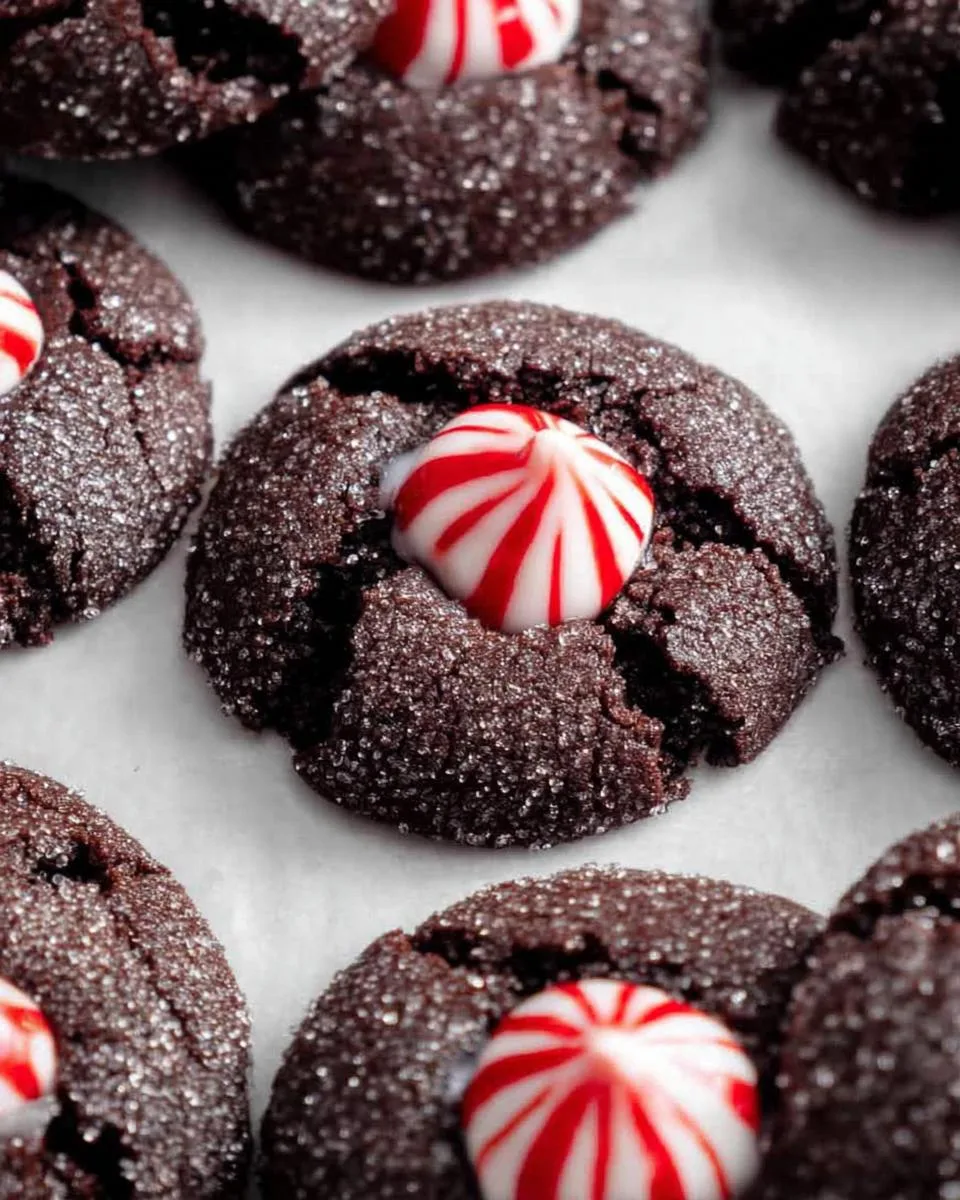
Preparing the Dough
First things first – grab your trusty mixer and let’s cream that butter and sugar like Grandma Jo taught me. You’ll want to beat the softened butter with both sugars for a good 1-2 minutes until it’s light and fluffy. I always set a timer because it’s easy to rush this step, but those air bubbles are what give our cookies that perfect texture.
Next, add those room-temperature egg yolks one at a time, followed by the vanilla. Keep mixing until everything looks pale and dreamy – about another minute. Now here comes the important part: gently mix in your dry ingredients just until combined. Overmixing = tough cookies, and we don’t want that! The dough should pull away from the sides of the bowl when it’s ready.
Baking and Assembling
While your oven preheats to 350°F, line your baking sheets with parchment paper (no sticking disasters here!). Scoop the dough into 34 little portions – I use my #60 cookie scoop for perfect uniformity. Roll each between your palms into smooth balls, then give them a quick roll in granulated sugar for that pretty sparkly finish.
Space them 2 inches apart on your prepared sheets – these babies spread just enough. Bake for exactly 7-8 minutes. Set a timer! They’ll look slightly underdone when you pull them out, but that’s perfect. Now the fun part: immediately press a frozen Hershey Kiss into the center of each cookie. The heat from the cookie will soften it slightly while keeping its shape. Let them cool completely on the baking sheets – this helps them set up properly without crumbling.
See? Not complicated at all. Just remember: frozen kisses, precise timing, and that immediate kiss-press make all the difference between “good” and “Grandma Jo would be proud” cookies!
Print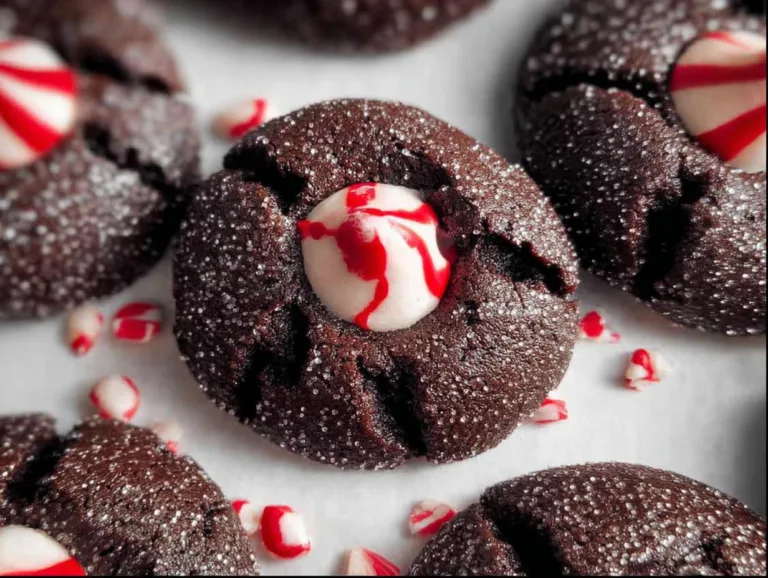
Irresistible 34 Chocolate Peppermint Blossoms Recipe
Chocolate Peppermint Blossoms are festive cookies with a rich chocolate base and a peppermint candy center. Perfect for holiday gatherings.
- Total Time: 58 minutes
- Yield: 34 cookies 1x
Ingredients
- 1 1/2 cups (188 g) all-purpose flour, spooned and leveled
- 1/2 cup (40 g) cocoa powder, Dutch process
- 1/2 tsp baking powder
- 1/2 tsp baking soda
- 1/2 tsp salt
- 3/4 cup (168 g) unsalted butter, softened
- 3/4 cup (165 g) light brown sugar, packed
- 1/4 cup (50 g) granulated sugar
- 2 egg yolks, at room temperature
- 1 tsp vanilla
- 34 Candy Cane Hershey Kisses, frozen
- 1/4 cup (50 g) granulated sugar for rolling the dough
Instructions
- Unwrap 34 Candy Cane Hershey Kisses and freeze for 30 minutes.
- Preheat oven to 350°F and line baking sheets with parchment paper.
- Whisk flour, cocoa powder, baking powder, baking soda, and salt in a bowl.
- Cream butter, brown sugar, and granulated sugar for 1-2 minutes.
- Add egg yolks and vanilla, mix until pale and fluffy.
- Mix in dry ingredients until combined.
- Scoop dough into 34 portions, roll into balls, and coat in sugar.
- Place dough balls 2 inches apart on baking sheets.
- Bake for 7-8 minutes.
- Press a frozen Hershey Kiss into each cookie immediately after baking.
- Let cookies cool completely on baking sheets.
- Serve or store in an airtight container for up to 3 days.
Notes
- Use Dutch process cocoa for best results.
- Freezing Hershey Kisses prevents melting.
- Cookies stay fresh for up to 3 days.
- Prep Time: 20 minutes
- Cook Time: 8 minutes
- Category: Dessert
- Method: Baking
- Cuisine: American
- Diet: Vegetarian
Nutrition
- Serving Size: 1 cookie
- Calories: 90
- Sugar: 8g
- Sodium: 50mg
- Fat: 4g
- Saturated Fat: 2.5g
- Unsaturated Fat: 1g
- Trans Fat: 0g
- Carbohydrates: 12g
- Fiber: 0.5g
- Protein: 1g
- Cholesterol: 20mg
Tips for Perfect Chocolate Peppermint Blossoms
After making these cookies for decades, I’ve learned all the little tricks that take them from “pretty good” to “absolutely irresistible.” Here are my can’t-miss tips straight from Grandma Jo’s playbook:
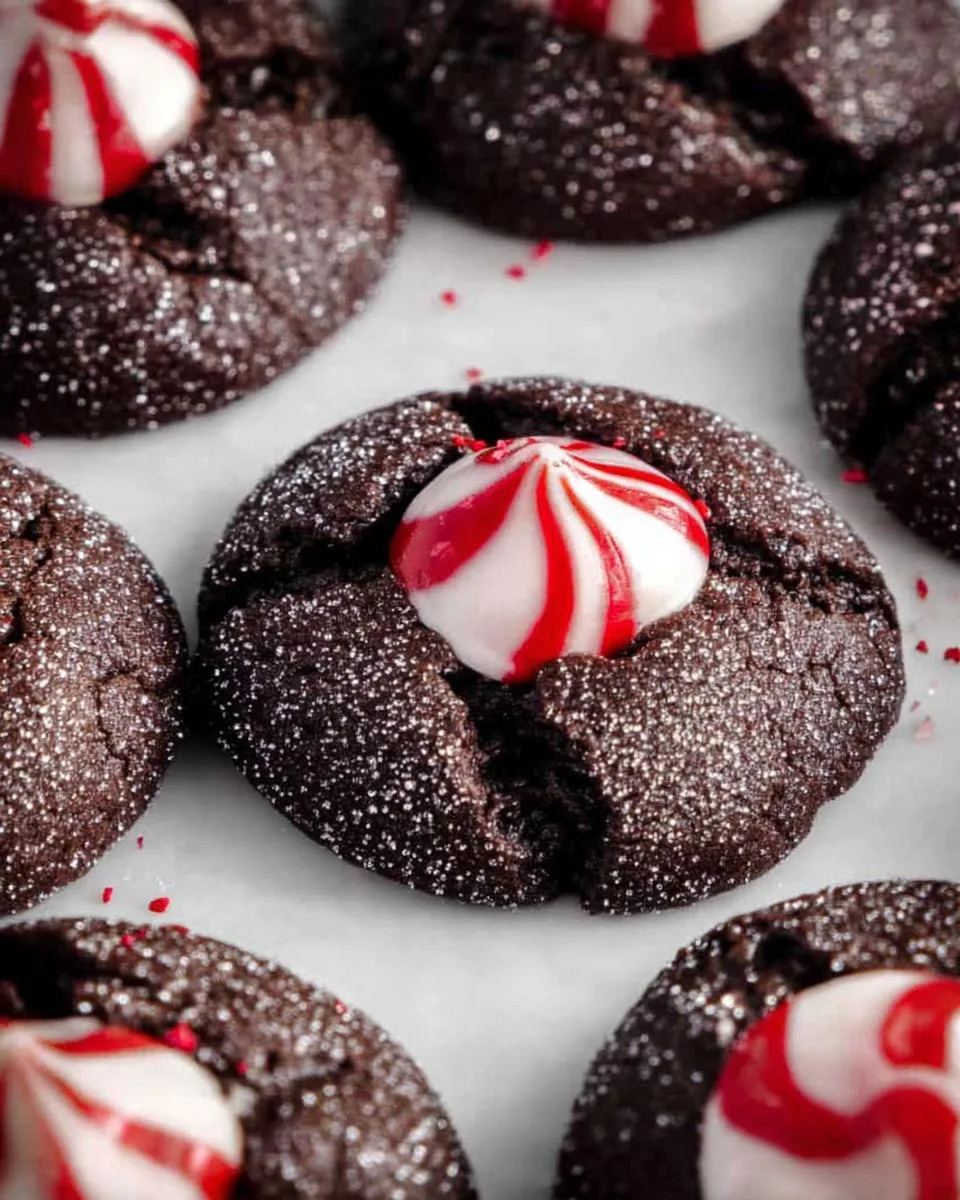
Dutch Process Cocoa is Non-Negotiable
That tin of regular cocoa powder in your pantry? Save it for hot chocolate. Dutch process cocoa gives our Chocolate Peppermint Blossoms their deep, rich flavor and dark color. The alkalizing process removes some of cocoa’s natural acidity, making it blend beautifully with our other ingredients. I tried using natural cocoa once – never again! The cookies tasted flat and didn’t have that signature fudginess we love.
Freeze Those Kisses Solid
I know it seems fussy, but trust me – those 30 minutes in the freezer make all the difference! Room temperature kisses melt into sad little puddles when you press them into warm cookies. Frozen ones hold their perfect candy cane stripe shape while still softening just enough to stick. Pro tip: unwrap them first and pop them in a single layer on a plate – much easier than wrestling with wrappers when your hands are full of cookie dough!
Let Them Cool on the Sheets
Resist the urge to move those cookies right away! Giving them a full cooling period on the baking sheets lets them set up properly. If you try transferring them too soon, you’ll end up with smooshed blossoms or worse – broken cookies with lopsided kisses. I usually bake my last batch right before bed and let them cool overnight – then wake up to perfect cookies ready for gift boxes.
Two bonus tips from my kitchen to yours: use a cookie scoop for evenly sized dough balls (no guessing!), and if your dough feels sticky, pop it in the fridge for 15 minutes. These little details might seem small, but they’re what make these Chocolate Peppermint Blossoms truly special year after year.
Keeping Your Chocolate Peppermint Blossoms Fresh
Here’s the beautiful thing about these cookies – they taste amazing right out of the oven, but somehow get even better after a day! The flavors really settle in and that peppermint-chocolate combo becomes irresistible. But you’ve got to store them right, or you’ll lose that perfect texture.
My Go-To Storage Method
I always use an airtight container with a sheet of parchment between layers. Those festive tins from the dollar store work great too! The key is keeping air out – moisture is the enemy of crisp edges. They’ll stay fresh at room temperature for 3 days, though in my house they never last that long!
One year I made the mistake of refrigerating them – what a disaster! The cookies got soggy and the chocolate lost its snap. Learned that lesson the hard way. Now I just keep them in my cool pantry, and they’re perfect every time.
Can You Freeze Them?
Absolutely! These Chocolate Peppermint Blossoms freeze like a dream. Here’s my method:
- Let cookies cool completely
- Arrange in a single layer in a freezer-safe container
- Separate layers with parchment paper
- Freeze for up to 3 months
When you’re ready to serve, just let them thaw at room temperature for about an hour. The kisses might lose a tiny bit of shine, but the flavor stays incredible. I often make double batches in November so I’m ready for surprise guests all season long!
Pro tip from experience: Don’t try to freeze the unbaked dough with the kisses already pressed in – the candy gets weirdly cloudy. Freeze the plain dough balls if you must, but baked cookies hold up much better in the freezer.
Chocolate Peppermint Blossoms Nutritional Information
Now, I know what you’re thinking – “Grandma Jo, are these little bites of heaven going to wreck my diet?” Well, let’s be honest – they’re holiday cookies, not health food! But I always believe in knowing what you’re eating, so here’s the scoop on what’s in each Chocolate Peppermint Blossom. Remember, these values are estimates – your exact numbers might vary depending on your specific ingredients and brands.
- Serving Size: 1 cookie (about 1.5 inches across)
- Calories: 90
- Sugar: 8g
- Sodium: 50mg
- Fat: 4g (2.5g saturated, 1g unsaturated)
- Carbohydrates: 12g
- Fiber: 0.5g
- Protein: 1g
- Cholesterol: 20mg
Now, here’s my two cents – during the holidays, I don’t count calories in cookies. I count memories made baking with loved ones and the smiles when people taste them. But if you’re watching portions (good for you!), these actually aren’t too bad as far as treats go. That rich chocolate flavor means one or two can satisfy your sweet tooth without going overboard.
Just between us? I’ve been known to enjoy mine with a small glass of cold milk – it’s the perfect pairing that makes the peppermint pop even more. But that’s our little secret! If you want to see more of Grandma Jo’s favorites, check out my recipe index.
Common Questions About Chocolate Peppermint Blossoms
Over the years, I’ve gotten all sorts of questions about these beloved holiday cookies. Here are the answers to the ones folks ask me most often – straight from Grandma Jo’s kitchen to yours!
Can I use regular cocoa powder?
Oh honey, I know Dutch process cocoa isn’t always easy to find, but trust me – it’s worth the hunt! Regular cocoa powder will work in a pinch, but your Chocolate Peppermint Blossoms won’t have that deep, rich chocolate flavor we love. The cookies might taste a bit sharper and look paler too.
If you absolutely must substitute, here’s my trick: for every 1/2 cup of Dutch process cocoa, use 1/2 cup regular cocoa plus 1/8 tsp baking soda. It helps balance the acidity. But promise me you’ll try the real deal next time – one taste and you’ll understand why I’m so particular!
How do I prevent the kisses from melting?
This one’s easy – freeze those kisses solid! I can’t stress this enough. Thirty minutes in the freezer makes all the difference between perfect peppermint blossoms and sad, melty messes.
Here’s my foolproof method: unwrap all the kisses first (much easier when your hands aren’t full of dough!), then spread them in a single layer on a plate. Pop them in the freezer while you make the dough. By the time your cookies come out of the oven, those kisses will be cold enough to hold their shape when pressed in.
Can I make these ahead?
Absolutely! These Chocolate Peppermint Blossoms are perfect for getting a jump on holiday baking. You’ve got two great options:
- Chill the dough overnight: Mix up the dough, form it into balls, then store them in an airtight container in the fridge for up to 2 days. When you’re ready to bake, roll them in sugar and proceed as usual.
- Freeze baked cookies: Let cooled cookies set in layers separated by parchment in an airtight container. They’ll keep beautifully for up to 3 months!
Just between us? I always make a double batch in early December – half for immediate enjoyment, half tucked away for last-minute guests. Nothing beats pulling out a plate of these festive cookies when friends drop by unexpectedly!
Share Your Chocolate Peppermint Blossoms
Oh, I’d just love to see your beautiful Chocolate Peppermint Blossoms! There’s nothing that makes this old baker happier than knowing my recipes are bringing joy to other kitchens. Did your family go crazy for them like mine always does? Did the kids fight over who got to press in the kisses? I want to hear all about it!
Leave a comment below telling me how yours turned out, or better yet – snap a photo and tag #GoodOlRecipes on social media. I check every single one (with my reading glasses and a cup of tea, naturally).
And if you loved this recipe as much as I do, would you do me a favor? Give it a star rating – it helps other bakers find Grandma Jo’s tried-and-true favorites. Now go enjoy those cookies with someone you love – that’s what holiday baking is really all about.
For More recipes, Follow me on Facebook!






