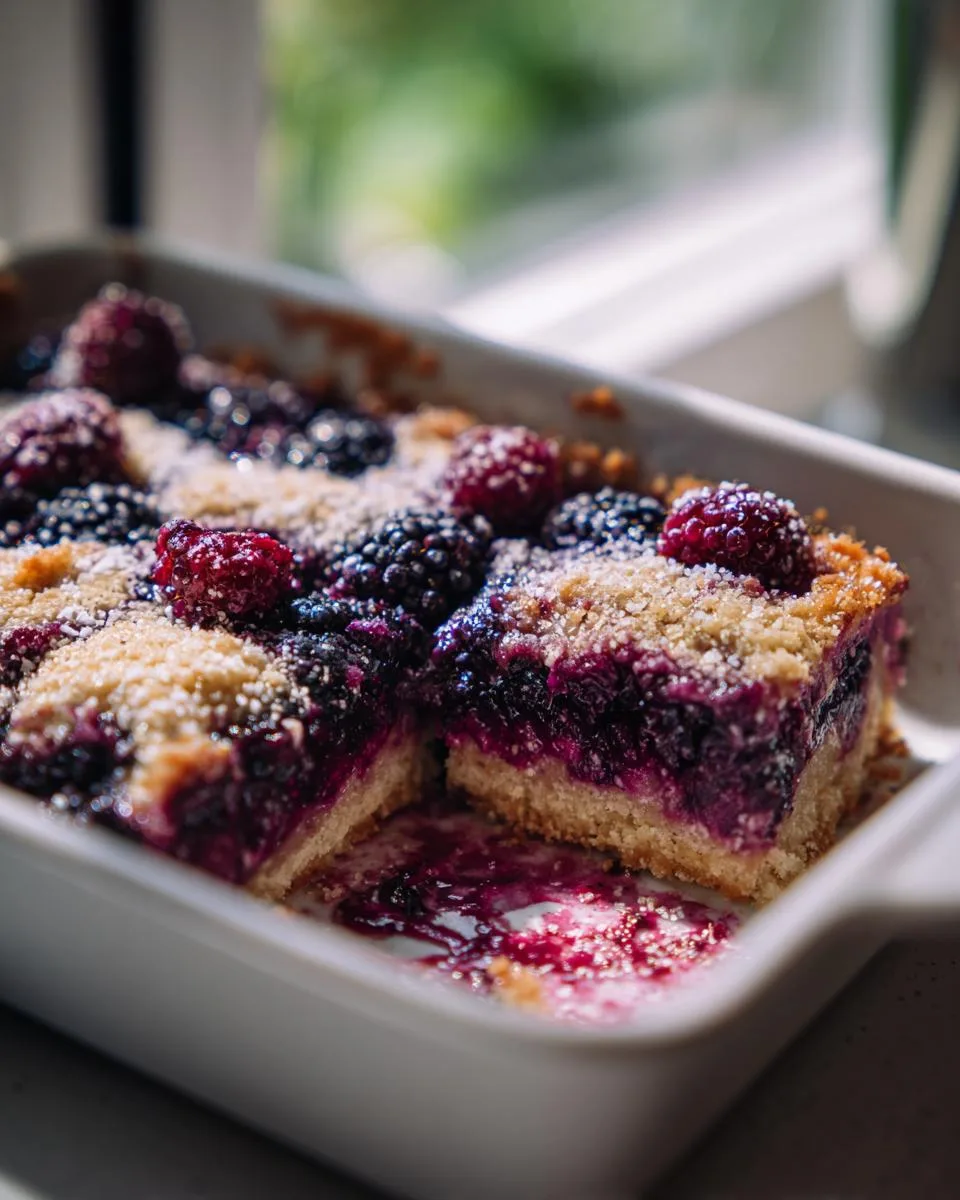
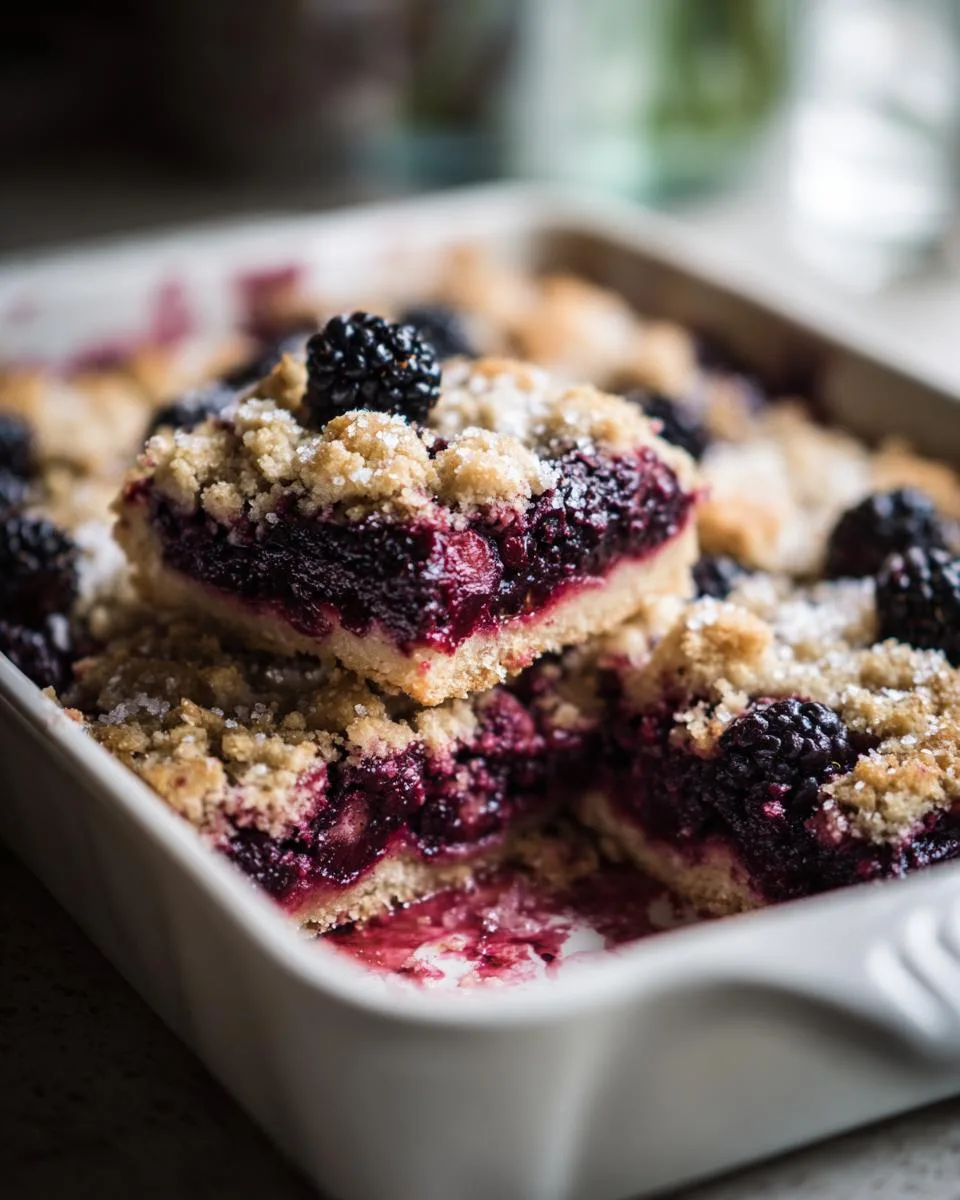
Oh, how I love the smell of black raspberry crumble bars baking in my old farmhouse kitchen! It takes me right back to summers with my grandkids, their little hands sneaking berries from the bowl before I could mix them into the batter. There’s something magical about that buttery crust hugging those tart-sweet black raspberries – it’s pure nostalgia in every bite.
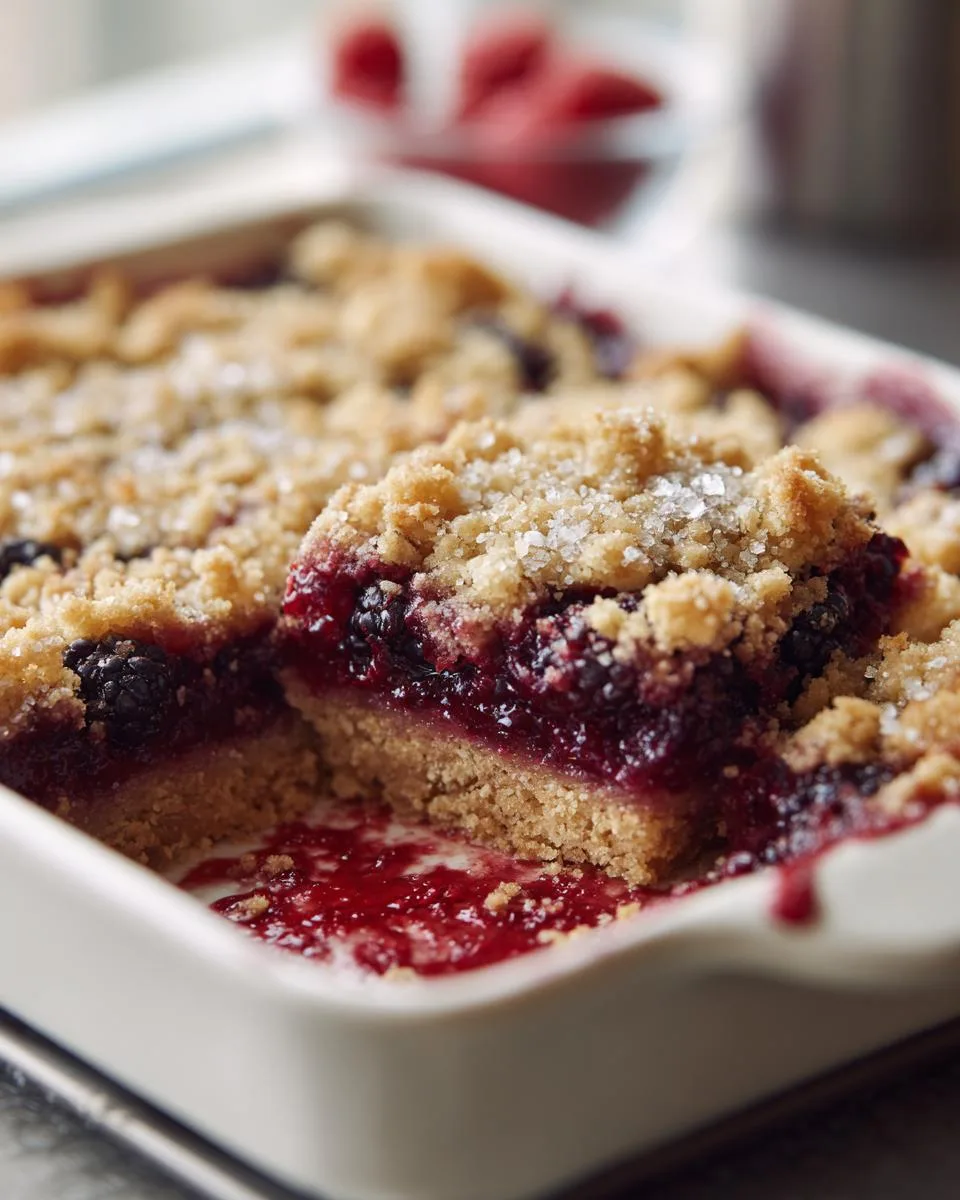
Table of Contents
Table of Contents
These bars have been my go-to for church potlucks and family reunions for decades, and trust me, they disappear faster than you can say “seconds please!” The best part? They’re simple enough for beginner bakers but impressive enough to feel like you’ve created something truly special.
Why You’ll Love These Black Raspberry Crumble Bars
Let me tell you why these bars have been my signature dessert for thirty years:
- Foolproof baking: Even my grandkids can make these with minimal supervision (though they still eat half the berries first!)
- That dreamy crust: Buttery, crumbly perfection with just the right amount of sweetness to balance tart berries
- Berry bliss: Black raspberries burst with flavor in every bite – not too sweet, not too sour
- Crowd pleaser: Equally loved at fancy tea parties and backyard barbecues
- Freezer friendly: I always stash some away for surprise guests (or midnight snacks)
One bite and you’ll understand why I make them weekly during berry season!
Ingredients for Black Raspberry Crumble Bars
Now, let’s talk ingredients – and yes, every single one matters! After fifty years of baking, I can tell you that quality ingredients make all the difference. Here’s what you’ll need for bars that’ll make your taste buds sing:
- 3 cups all-purpose flour – spooned and leveled might I add!
- 1 1/3 cups sugar – divided (pack it in the measuring cup like you mean it)
- 1 tsp baking powder – fresh is best, check that expiration date
- 1/2 tsp salt – I swear by kosher salt for baking
- 1 cup butter – softened (this means finger-dent soft, not melted!)
- 1 large egg – room temperature helps everything blend smoothly
- 1 Tbsp cornstarch – our little secret for perfect berry thickening
- 1 tsp pure vanilla extract – none of that imitation stuff
- 4 cups black raspberries – fresh or frozen (no need to thaw if frozen)
See? Nothing too fancy – just good, honest ingredients that work together like old friends. And don’t even get me started on substitutions… we’ll get to those later!
How to Make Black Raspberry Crumble Bars
Alright, let’s get baking! These bars come together so easily – even on busy days, I can whip them up while chatting with neighbors over the fence. Just follow these simple steps, and you’ll have a pan full of berry deliciousness before you know it.
Step 1: Prepare the Crumble Base
First things first – turn that oven to 375°F so it’s nice and hot when you’re ready. Now grab your biggest mixing bowl and whisk together the flour, baking powder, salt, and 1 cup of the sugar (save the rest for the berries!). Here’s my little trick: I always sift my dry ingredients through my fingers to make sure there’s no lumps.
Cut in that softened butter (I use my pastry cutter, but two forks work fine) until it looks like coarse crumbs. Then add the egg and vanilla – mix just until it starts clinging together. You want that perfect crumbly texture that’ll make the best crust!
Step 2: Assemble the Layers
Press about half of your crumble mixture into the bottom of your greased 9×13 pan. Really press it down firmly with your fingers – this forms the base that’ll hold all those juicy berries. Now toss those gorgeous black raspberries with the remaining 1/3 cup sugar and cornstarch (this keeps the filling from getting too runny).
Spread the berry mixture evenly over the crust, then sprinkle the remaining crumble on top. Don’t press this part down – those loose crumbs will turn golden and delicious in the oven!
Step 3: Bake and Cool
Pop your pan into that preheated oven and bake for 40-45 minutes. You’ll know they’re done when the top is golden brown and you can see berry juices bubbling around the edges. Now comes the hardest part – letting them cool completely before cutting! I know it’s tempting, but trust me, waiting ensures neat squares instead of berry lava flowing everywhere.
I usually let mine sit for at least an hour – perfect time to clean up and brew some tea to serve with these beauties!
Print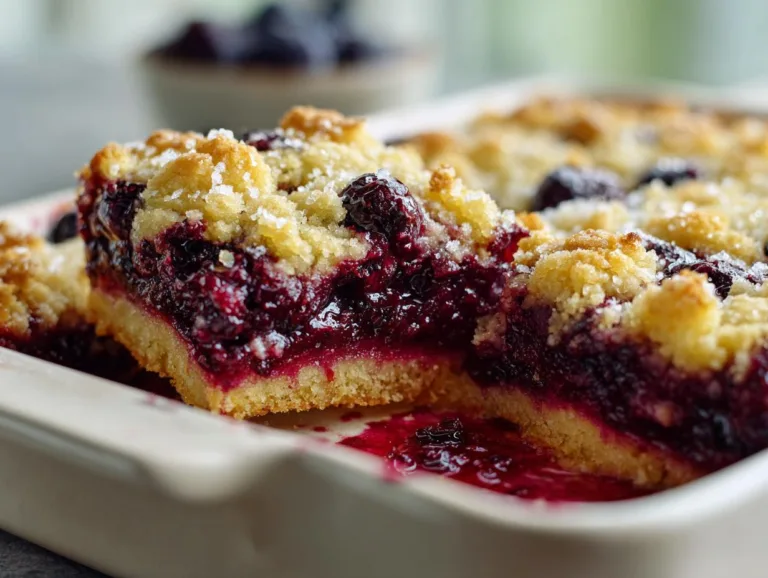
Grandma Jo’s 5-Star Black Raspberry Crumble Bars Recipe
Classic black raspberry crumble bars with a buttery crust and sweet berry filling.
- Total Time: 1 hour 5 minutes
- Yield: 12 bars 1x
Ingredients
- 3 cups flour
- 1 1/3 cups sugar (divided)
- 1 tsp baking powder
- 1/2 tsp salt
- 1 cup butter (softened)
- 1 egg
- 1 Tbsp cornstarch
- 1 tsp vanilla
- 4 cups black raspberries
Instructions
- Preheat oven to 375°F
- Mix dry ingredients with butter and egg to form crumble
- Press half the crumble into baking pan for crust
- Combine berries with remaining sugar and cornstarch
- Spread berry mixture over crust
- Top with remaining crumble
- Bake 40-45 minutes until golden
- Cool before cutting
Notes
- Works with frozen berries
- Adjust sugar to taste
- Store leftovers covered
- Prep Time: 20 minutes
- Cook Time: 45 minutes
- Category: Dessert
- Method: Baked
- Cuisine: American
- Diet: Vegetarian
Nutrition
- Serving Size: 1 bar
- Calories: 280
- Sugar: 18g
- Sodium: 180mg
- Fat: 12g
- Saturated Fat: 7g
- Unsaturated Fat: 4g
- Trans Fat: 0g
- Carbohydrates: 40g
- Fiber: 3g
- Protein: 3g
- Cholesterol: 45mg
Tips for Perfect Black Raspberry Crumble Bars
After making these bars more times than I can count, I’ve picked up some tricks that’ll make yours shine:
- Taste your berries first: If they’re extra tart, bump up the sugar by 1-2 Tbsp – no one likes puckering at dessert!
- Parchment paper is your friend: Line the pan with overhang for easy lifting – clean slices every time.
- Freeze before cutting: 30 minutes in the freezer firms everything up for picture-perfect bars.
- Chill the dough: If your crumble feels too soft, 15 minutes in the fridge makes pressing easier.
- Berry distribution: Spread berries evenly but leave gaps – too crowded makes a soggy crust.
Remember, practice makes perfect – but honestly, even “ugly” bars taste phenomenal!
Ingredient Substitutions & Variations
Now don’t you worry if black raspberries aren’t in season – this recipe is wonderfully adaptable! Over the years, I’ve tried every variation imaginable (sometimes out of necessity when the grandkids raided my berry stash). Here are my favorite swaps:
- Different berries: Blackberries or boysenberries work beautifully – just expect a slightly juicier filling
- Gluten-free: Swap in your favorite 1:1 gluten-free flour blend (I like ones with xanthan gum)
- Lemon love: Add a teaspoon of zest to the crumble for bright citrus notes
- Frozen berries: No need to thaw – just toss them frozen with sugar and bake a few minutes longer
- Nutty twist: Replace 1/2 cup flour with almond meal for extra richness
The beauty of this recipe? Even with substitutions, you’ll still end up with something absolutely delicious! If you’re looking for more sweet treats, check out my collection of dessert recipes.
Serving & Storing Black Raspberry Crumble Bars
Oh honey, these bars are best served at room temperature – that’s when the flavors really sing! I like to cut them into generous squares and serve on my vintage dessert plates with a dollop of whipped cream or vanilla ice cream. For storing, just pop them in an airtight container – they’ll stay fresh on the counter for 2 days or in the fridge for up to 5. My secret? I freeze individual portions wrapped in parchment paper for those sudden berry cravings (they thaw perfectly in about 30 minutes). Just between us, they’re pretty amazing straight from the freezer too!
Black Raspberry Crumble Bars Nutritional Info
Now, I’m no nutritionist, but here’s the scoop on what’s in these beauties! Each generous bar comes to about:
- 280 calories – worth every single one if you ask me
- 18g sugar – mostly from those lovely natural berries
- 12g fat – that’s where all the rich, buttery goodness comes from
- 3g fiber – thank you, berry skins!
Remember, these are just estimates – your exact amounts might vary depending on berry sweetness and how big you cut those squares!
Frequently Asked Questions
Over the years, I’ve fielded just about every question imaginable about these black raspberry crumble bars – here are the answers to the ones I hear most often!
Can I use jam instead of fresh berries?
Oh honey, I’ve tried this in a pinch! Use about 1 1/2 cups of good quality jam instead of fresh berries (no need for extra sugar or cornstarch). Just spread it thin so it doesn’t overwhelm the crust. The texture will be different – more like a fruit square than a crumble – but still delicious with tea!
How do I prevent a soggy crust?
My number one trick? Make sure that bottom layer is firmly pressed down – I mean really pack it in there! Also, don’t skip the cornstarch with fresh berries – it absorbs those juices beautifully. If using frozen berries, add an extra teaspoon of cornstarch.
Can I double the recipe?
Absolutely! I do this all the time for big gatherings. Just use two pans rather than one giant one – that way everything bakes evenly. The crumble topping might need an extra 5 minutes in the oven if you’re baking both pans at once.
Can I make these gluten-free?
You bet! My granddaughter has celiac disease, so we’ve perfected this with gluten-free flour. Use a 1:1 blend that includes xanthan gum. The texture is slightly more delicate, but still heavenly. Just be extra gentle when pressing the base!
Why does mine fall apart when cutting?
Patience, dear! Let them cool completely – I usually wait at least an hour. For extra clean cuts, pop the pan in the freezer for 20 minutes first. A sharp knife dipped in hot water between slices helps too!
Any other questions? Just ask – I’ve made every mistake possible with these bars over the decades, so I’m happy to help you avoid them!
Share Your Feedback
I’d love to hear how your black raspberry crumble bars turned out – did your family gobble them up as fast as mine always does? Snap a photo of your masterpiece and tell me all about your baking adventure! Your stories and tips make my recipe collection richer than butter – and who knows, your idea might help another baker create something wonderful. Now get baking and sharing!
For More recipes, Follow me on Facebook!