
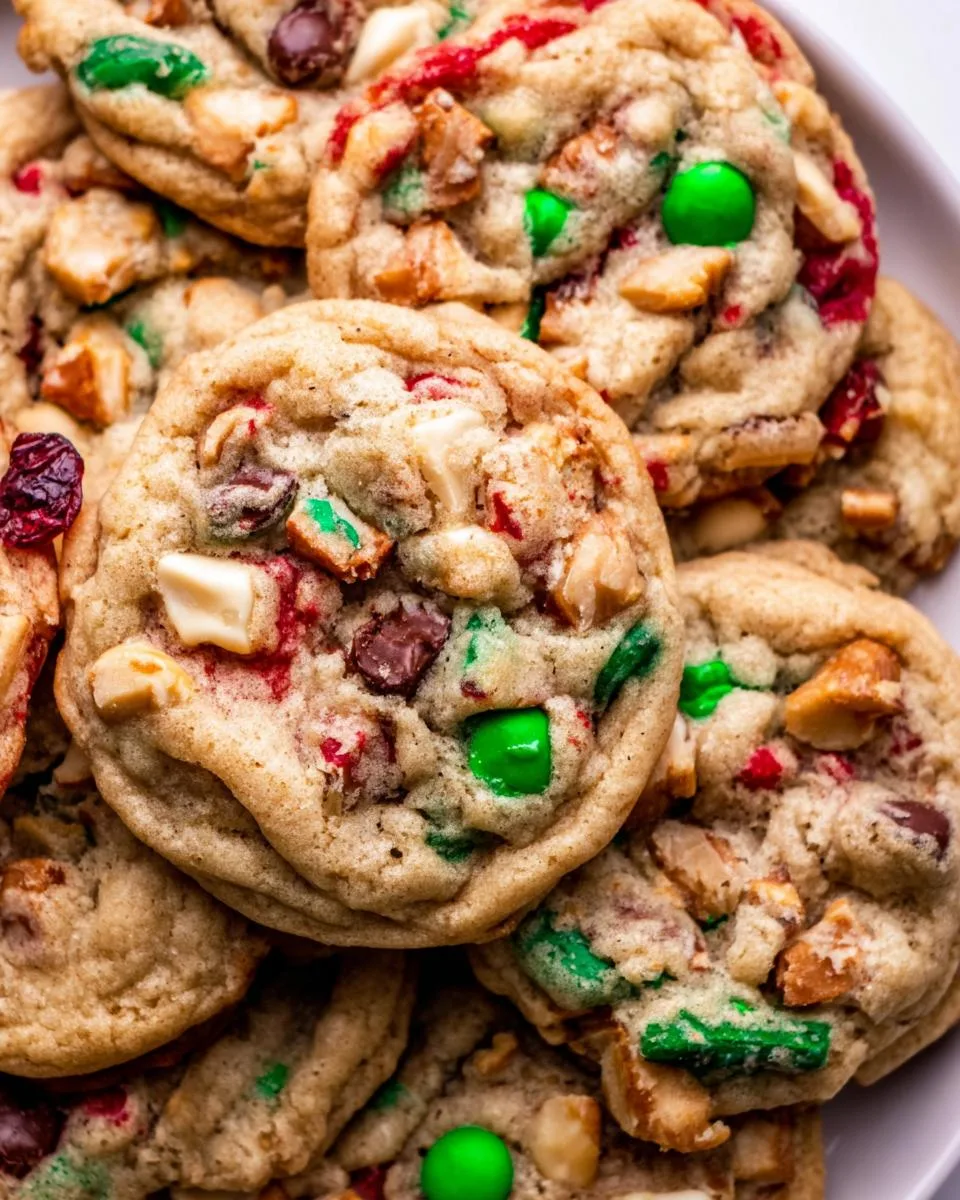
Oh, Christmas Kitchen Sink Cookies – just saying the name makes me smile! Picture this: my grandkids and I, flour dusting our noses, the kitchen smelling like vanilla and melted butter, tossing in whatever festive treats we can find into the cookie dough. That’s the magic of these cookies – they’re like a holiday party in every bite! No two batches are ever exactly alike in our house, and that’s half the fun. Whether you’re using up leftover baking supplies or going all out with red and green M&M’s, these cookies become whatever you need them to be – chewy, crunchy, sweet, or a little salty. They’re the recipe I turn to when I want that warm, nostalgic feeling of Christmas past mixed with the joy of creating new memories.

Table of Contents
Table of Contents
Why You’ll Love These Christmas Kitchen Sink Cookies
Oh, where do I even begin with these cookies? They’re the holiday magic you’ve been craving – trust me! Here’s why they’ll become your new Christmas tradition:
- Endless possibilities: Toss in whatever makes your heart happy – M&M’s, pretzels, even crushed candy canes! No two batches are ever the same.
- Perfect texture: Chewy centers, crispy edges, and little surprises in every bite from all those glorious mix-ins.
- Holiday nostalgia: That first whiff of vanilla and spices? Pure Christmas morning memories.
Best part? They’re practically foolproof – just throw everything in and bake up some joy!
Ingredients for Christmas Kitchen Sink Cookies
Grab your biggest mixing bowl – we’re throwing in everything but the kitchen sink! Well, almost. Here’s what you’ll need to make these holiday wonders:

- 1 cup unsalted butter, softened (trust me, room temp makes all the difference)
- 1 cup granulated sugar
- 1 cup packed brown sugar – the dark kind gives the best molasses flavor
- 2 large eggs (farm-fresh if you can get ’em)
- 1 teaspoon pure vanilla extract – none of that imitation stuff!
- 2 1/2 cups all-purpose flour (spoon and level it, don’t scoop!)
- 1 teaspoon baking soda
- 1/2 teaspoon baking powder
- 1/2 teaspoon fine sea salt
- 1 cup semi-sweet chocolate chips (or chunks if you’re feeling wild)
- 1 cup chopped walnuts or pecans (toast ’em first for extra flavor)
- 1 cup old-fashioned rolled oats (not instant!)
- 1/2 cup sweetened shredded coconut
- 1/2 cup dried cranberries (the chewy little ruby jewels of Christmas)
Ingredient Substitutions & Variations
One of my favorite things about Christmas Kitchen Sink Cookies is how flexible they are! Here’s how you can mix things up without losing that perfect chewy-crisp texture:
- Fruit swaps: Out of cranberries? Raisins or chopped dried apricots work beautifully – just chop them small so they distribute evenly.
- Nut-free option: Skip the nuts and throw in an extra 1/4 cup of oats or pretzel pieces for crunch instead.
- Chocolate choices: White chocolate chips or chopped candy canes make festive alternatives to standard chocolate chips.
- Gluten-free: Use your favorite 1:1 gluten-free flour blend (I like the ones with xanthan gum already added). The texture stays perfect!
- Coconut haters: Replace it with an extra 1/4 cup of oats or some crushed cornflakes for texture.
Remember – the “kitchen sink” spirit means you can toss in whatever holiday treats you’ve got! Just keep your total mix-ins to about 3 1/2 cups so the dough holds together.
How to Make Christmas Kitchen Sink Cookies
Alright, let’s get baking! I’ve made these cookies more times than I can count, and I’ve learned a few tricks along the way. Follow these steps, and you’ll have perfect Christmas Kitchen Sink Cookies in no time:
- Heat things up: First things first – preheat that oven to 350°F (175°C). Trust me, you want it nice and hot before those cookies go in. Line your baking sheets with parchment paper while you’re at it – saves so much cleanup!
- Cream the dream team: In your biggest mixing bowl (I use my trusty yellow one), beat together the softened butter and both sugars until they’re light and fluffy. This should take about 2-3 minutes with a hand mixer. You’ll know it’s ready when it looks almost like whipped frosting.
- Eggs-cellent addition: Add the eggs one at a time, mixing well after each one. Then pour in that glorious vanilla extract. Oh, that smell already says “holidays,” doesn’t it?
- Dry ingredients unite: In another bowl, whisk together the flour, baking soda, baking powder, and salt. Gradually add this to your butter mixture, mixing just until combined. Overmixing is the enemy here – stop when you no longer see dry flour.
- Mix-in madness: Now the fun part! Gently fold in all those delicious add-ins – chocolate chips, nuts, oats, coconut, cranberries. I like to use a wooden spoon for this part so nothing gets crushed.
- Scoop and bake: Drop tablespoon-sized mounds onto your prepared baking sheets, spacing them about 2 inches apart. These cookies like their personal space! Bake for 10-12 minutes until the edges are golden but centers still look slightly underdone.
- Cool it: Let them rest on the baking sheet for 5 minutes before transferring to a wire rack. This helps them set without falling apart.
Baking Tips for Perfect Cookies
Here are my tried-and-true secrets for cookie success:
- Space is key: Don’t crowd your baking sheet – these cookies spread! I bake just one sheet at a time in the center rack for even cooking.
- Timing is everything: Set your timer for 10 minutes and check. The edges should be golden, but the centers should still look slightly underbaked – they’ll finish cooking as they cool.
- Cool sheets: Let your baking sheets cool completely between batches, or your next round of dough will spread too fast.
- Butter matters: If your cookies spread too much, your butter might have been too soft. Next time, chill the dough for 30 minutes before baking.

Yummy Christmas Kitchen Sink Cookies with 15 Mix-in Ideas
Christmas Kitchen Sink Cookies are a delightful mix of flavors and textures, perfect for the holiday season. These cookies combine classic ingredients with a variety of add-ins, making them customizable and fun to bake.
- Total Time: 27 minutes
- Yield: 24 cookies 1x
Ingredients
- 1 cup unsalted butter, softened
- 1 cup granulated sugar
- 1 cup brown sugar
- 2 large eggs
- 1 teaspoon vanilla extract
- 2 1/2 cups all-purpose flour
- 1 teaspoon baking soda
- 1/2 teaspoon baking powder
- 1/2 teaspoon salt
- 1 cup chocolate chips
- 1 cup chopped nuts (walnuts or pecans)
- 1 cup rolled oats
- 1/2 cup shredded coconut
- 1/2 cup dried cranberries
Instructions
- Preheat your oven to 350°F (175°C). Line baking sheets with parchment paper.
- In a large bowl, cream together the butter, granulated sugar, and brown sugar until light and fluffy.
- Add the eggs one at a time, mixing well after each addition. Stir in the vanilla extract.
- In a separate bowl, whisk together the flour, baking soda, baking powder, and salt.
- Gradually add the dry ingredients to the wet ingredients, mixing until just combined.
- Fold in the chocolate chips, nuts, oats, coconut, and dried cranberries.
- Drop tablespoon-sized portions of dough onto the prepared baking sheets, spacing them about 2 inches apart.
- Bake for 10-12 minutes, or until the edges are golden brown.
- Let the cookies cool on the baking sheets for 5 minutes before transferring to a wire rack to cool completely.
Notes
- You can substitute or add other mix-ins like M&M’s, raisins, or pretzel pieces.
- Store the cookies in an airtight container at room temperature for up to 5 days.
- For a softer cookie, slightly underbake them and let them cool on the baking sheet longer.
- Prep Time: 15 minutes
- Cook Time: 12 minutes
- Category: Dessert
- Method: Baking
- Cuisine: American
- Diet: Vegetarian
Nutrition
- Serving Size: 1 cookie
- Calories: 180
- Sugar: 12g
- Sodium: 85mg
- Fat: 9g
- Saturated Fat: 4.5g
- Unsaturated Fat: 3.5g
- Trans Fat: 0g
- Carbohydrates: 23g
- Fiber: 1g
- Protein: 2g
- Cholesterol: 25mg
Storing and Freezing Christmas Kitchen Sink Cookies
Here’s the best part—these cookies keep like a dream! Store them in an airtight container at room temperature for up to 5 days (though good luck keeping them that long). Layer them with parchment paper so they don’t stick together. Want to get ahead? Freeze baked cookies for up to 3 months—just thaw at room temperature for an hour before serving. Or portion out the dough balls and freeze them raw on a baking sheet, then transfer to a freezer bag. When holiday cravings hit, bake straight from frozen, adding just 1-2 extra minutes to the bake time. Now that’s what I call smart cookie planning!

Serving Suggestions
Oh, these cookies practically beg for a tall glass of cold milk – my grandkids love dunking them! For holiday magic, arrange them on vintage Christmas plates or stack them in cellophane bags tied with ribbon for neighbor gifts. They’re perfect with hot cocoa by the tree or packed in lunchboxes for a sweet surprise. My trick? Warm them slightly before serving – just 10 seconds in the microwave makes the chocolate gooey again!
Christmas Kitchen Sink Cookies Nutritional Info
Now, I’m no nutritionist, but I do believe in knowing what’s going into our holiday treats! Keep in mind these numbers can change based on your exact ingredients (especially those mix-ins you chose). For a standard cookie with all our listed ingredients, you’re looking at about 180 calories and 9g fat per cookie. They’ve got 23g carbs, 1g fiber, and 2g protein too. Not bad for a little bundle of Christmas joy! Remember – these are estimates, so if you’re counting carefully, check your specific brands.
FAQs About Christmas Kitchen Sink Cookies
Got questions? I’ve got answers—from years of baking (and eating!) these cookies. Here’s what people ask me most:
Can I leave out the nuts?
Absolutely! These cookies are all about flexibility. Just add an extra handful of oats or pretzel pieces for crunch instead. My grandson has a nut allergy, so I often swap in sunflower seeds—they give that same satisfying bite.
How do I keep the cookies soft?
The secret? Pull them out when the edges are just golden but the centers still look slightly underdone—they’ll firm up as they cool. Store them in an airtight container with a slice of bread (sounds weird, but the bread keeps them chewy!).
Can I freeze the dough?
Oh yes, and it’s a lifesaver during the holidays! Scoop the dough into balls, freeze on a tray, then toss them in a freezer bag. Bake straight from frozen—just add 1-2 extra minutes. Perfect for last-minute cookie emergencies!
Why do my cookies spread too much?
Chances are your butter was too soft—it should be cool enough that your finger leaves a slight indent. Chill the dough for 30 minutes before baking, and always use parchment paper. Works like a charm!
Share Your Holiday Baking
Oh, I’d love to see your cookie creations! Did you add something wild like crushed peppermints or toffee bits? Snap a photo and tag me – nothing makes me happier than seeing families baking together. Leave a star rating too if you loved them as much as we do!
For More recipes, Follow me on Facebook!






