
There’s something magical about a bubbling dish of stuffed shells fresh from the oven—the kind of meal that makes everyone gather around the table before you’ve even called them. After 40 years of cooking for my big, hungry family, I can tell you this: nothing beats the comfort of tender pasta shells stuffed with creamy cheese and smothered in rich marinara. And the best part? These easy stuffed shells come together with barely any fuss—just simple, honest ingredients and a little love. It’s the kind of recipe that makes weeknights feel special, and trust me, even the pickiest eaters will beg for seconds.

Table of Contents
Table of Contents
Why You’ll Love These Easy Stuffed Shells
Listen, I’ve been making these stuffed shells since my kids were little – and now they’re making them for their kids! Here’s why this recipe sticks around:
- Weeknight superhero: From fridge to table in 40 minutes – perfect when you’re juggling homework, laundry, and hungry bellies.
- Creamy dreamy filling: That whipped cottage cheese blend melts into pure comfort with every bite (but shh – no one will guess how easy it is!).
- Crowd-pleasing magic: Works for meatless Mondays, potlucks, or when the in-laws visit – I’ve yet to meet someone who doesn’t ask for seconds.
- Freezer-friendly lifesaver: Make a double batch and stash half for those “I can’t even” nights – future you will send thank-you notes.
Honestly? It’s the dish I make when I want hugs from the inside. The cheese pulls alone are worth turning on the oven!
Ingredients for Easy Stuffed Shells
Gather these simple ingredients – you probably have most already! Exact measurements matter here, so I’ve included all the specifics from my well-loved recipe card:

- 12 ounces jumbo pasta shells – Look for the ones marked “extra large” so they hold all that cheesy goodness
- 1 tablespoon kosher salt – For boiling water (trust me, salted pasta water makes ALL the difference)
- 30 ounces whipped cottage cheese or ricotta cheese – See my notes below about this magical shortcut!
- 6 ounces Parmesan cheese, grated – Always grate your own for best flavor
- 1 egg – Helps bind everything together
- 1 to 2 garlic cloves, minced – Start with 1 if you’re garlic-shy
- 1 tablespoon fresh parsley, minced – That little green confetti makes it pretty
- ¾ cup fresh basil leaves, finely chopped (about 8 to 10 leaves) – The secret flavor booster
- ½ teaspoon salt – For seasoning the filling
- ½ teaspoon fresh ground pepper – Freshly cracked tastes best
- 28 ounces marinara sauce – Use your favorite jarred or homemade
- 8 ounces mozzarella cheese, grated – That gooey golden top we all crave
Ingredient Notes & Substitutions
After making these stuffed shells for decades, I’ve learned a few tricks about ingredients:
Whipped cottage cheese vs. ricotta: My secret weapon! Whipped cottage cheese blends up smooth as silk (no curds!), costs less than ricotta, and packs extra protein. But if you’re Team Ricotta, go for whole milk ricotta – just drain excess liquid in a fine mesh strainer for 15 minutes first.
Fresh herbs matter: I know dried basil is convenient, but fresh makes SUCH a difference here. That said, in a pinch use 1 tablespoon dried basil and 1 teaspoon dried parsley – just add them straight to the cheese mixture.
Cheese swaps:
- No Parmesan? Try Pecorino Romano (it’s saltier, so reduce added salt)
- Out of mozzarella? Provolone or fontina work beautifully
- For lactose-free, use lactose-free ricotta and mozzarella
Garlic options: If fresh garlic isn’t your thing, ¼ teaspoon garlic powder works too. Or for roasted garlic lovers, mash 3 cloves of roasted garlic into the cheese mix – heavenly!
Marinara shortcuts: No shame in good jarred sauce! My favorites are Rao’s or Victoria – but if you’re using homemade, you’ll need about 3½ cups.
Equipment Needed for Easy Stuffed Shells
Okay, let’s talk gear! The beauty of this recipe is that you don’t need anything fancy—just the basics you probably already have in your kitchen. Here’s what you’ll want to grab:
- 9×13 inch baking dish: This is the perfect size for fitting all those cheesy shells snugly. Glass or ceramic works best for even baking.
- Large pot: You’ll need a big one (at least 6 quarts) to boil those jumbo shells without them sticking together. Trust me, crowding the pot is a no-no here.
- Mixing bowl: A medium-sized one will do for combining all that creamy, cheesy filling. I like using a glass bowl so I can see when everything’s well mixed.
- Cooking spray: A quick spritz on the baking dish keeps the shells from sticking. You can also use a bit of olive oil if you prefer.
- Colander: For draining the pasta shells. Rinse them with cool water afterward to stop the cooking and make them easier to handle.
- Measuring cups and spoons: Precision matters, especially with the cheese filling. You’ll need a 1-cup measure for the marinara and a set of measuring spoons for the herbs and spices.
- Wooden spoon or spatula: For mixing the cheese filling. I’m partial to my wooden spoon—it’s been with me since the 80s!
- Grater: If you’re grating your own Parmesan and mozzarella (and you should!), a box grater works perfectly. Freshly grated cheese melts so much better than pre-shredded.
That’s it! No fancy gadgets or tools—just good, old-fashioned kitchen essentials. Now, let’s get cooking!
How to Make Easy Stuffed Shells
Alright, let’s get these beauties in the oven! I’ll walk you through each step just like I do with my grandkids – simple, clear, and with all my little tricks along the way. Before you know it, you’ll have a bubbling dish of cheesy goodness ready to wow everyone.
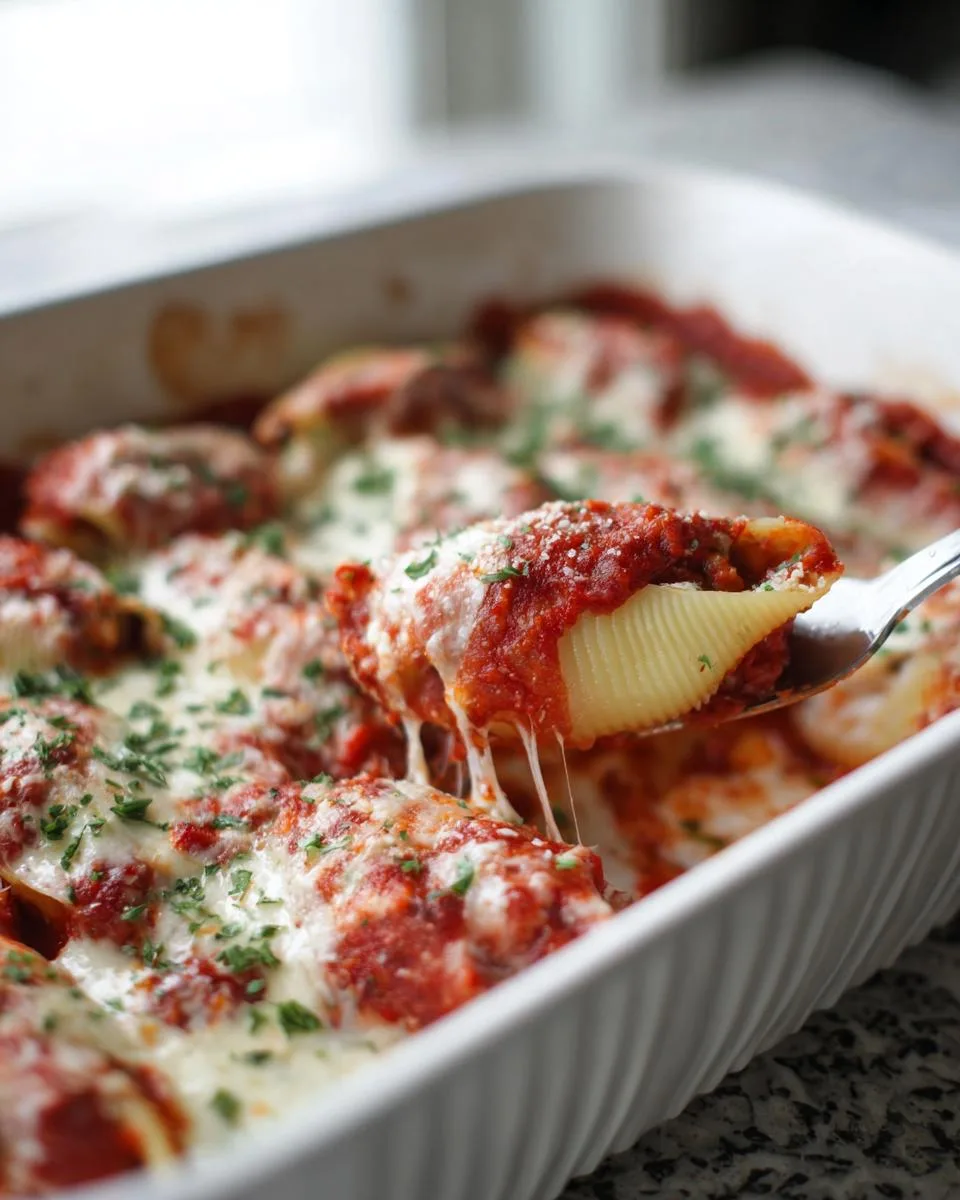
Step 1: Prep the Baking Dish & Sauce
First things first – turn that oven to 350°F and grab your 9×13 baking dish. Here’s my golden rule: always start with sauce on the bottom to prevent sticking. Pour about 1½ cups (half of that 28-ounce jar) of marinara sauce into the dish and spread it evenly with the back of a spoon. You want a nice thin layer covering every inch – this is what’ll keep your shells from getting dry on the bottom. I like to tilt the dish to make sure the sauce reaches all the corners.
Step 2: Cook the Pasta Shells
Now for the shells! Bring a big pot of water to a rolling boil – I’m talking bubbles dancing like they’re at a party. Add that tablespoon of kosher salt (it seasons the pasta from the inside out!). Gently drop in your jumbo shells and give them a quick stir to prevent sticking. Here’s the key – cook them for 3 minutes LESS than the package says for al dente. They’ll finish cooking in the oven, and this keeps them from turning mushy. For most brands, that’s about 7-8 minutes total. Drain them in a colander and immediately rinse with cool water to stop the cooking – this also makes them easier to handle when stuffing. Let them drain well so you don’t get watery filling.
Step 3: Make the Cheese Filling
Time for the good stuff! Grab your big mixing bowl and add the whipped cottage cheese (or ricotta if you went that route), grated Parmesan, egg, minced garlic, parsley, chopped basil, salt, and pepper. Now roll up your sleeves and mix it all together until it’s completely combined. You want it smooth but still fluffy – like really thick frosting. Taste it! This is your chance to adjust the seasoning. Need more garlic? More pepper? Now’s the time. Pro tip: let the filling sit for 5 minutes so the flavors can get friendly with each other.
Step 4: Assemble & Bake
Let’s put it all together! Take a shell in one hand and a spoon in the other. Scoop about 1 heaping tablespoon of filling into each shell – don’t be shy, pack it in there! Nestle each stuffed shell into the sauced baking dish, open side up. You should fit about 30-35 shells snugly in there. Pour the remaining marinara sauce evenly over the top – I like to leave some shell edges peeking out for that rustic look. Now sprinkle that glorious mozzarella cheese over everything – cover every inch! Pop it in the oven for 25 minutes. You’ll know it’s done when the cheese is golden and bubbly, and the sauce is bubbling around the edges. Let it sit for 5 minutes before serving (I know, the wait is torture!) so the filling can set up nicely.
Print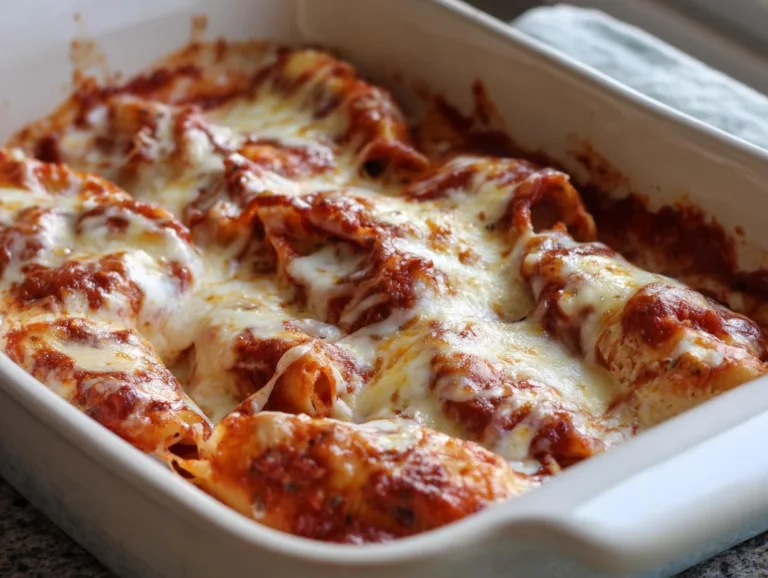
Easy Stuffed Shells Recipe That Melts Hearts in 40 Minutes
Easy stuffed shells with creamy cheese filling and marinara sauce, a comforting family favorite.
- Total Time: 40 minutes
- Yield: 6 servings 1x
Ingredients
- 12 ounces jumbo pasta shells
- 1 tablespoon kosher salt
- 30 ounces whipped cottage cheese or ricotta cheese
- 6 ounces Parmesan cheese, grated
- 1 egg
- 1 to 2 garlic cloves, minced
- 1 tablespoon fresh parsley, minced
- ¾ cup fresh basil leaves, finely chopped (about 8 to 10 leaves)
- ½ teaspoon salt
- ½ teaspoon fresh ground pepper
- 28 ounces marinara sauce
- 8 ounces mozzarella cheese, grated
Instructions
- Preheat oven to 350°F.
- Spray a 9×13 baking dish with cooking spray. Spread half of the marinara sauce on the bottom of the dish. Set aside.
- Bring a large pot of salted water to a boil. Add pasta shells and cook until 3 minutes shy of al dente – according to the package directions.
- Drain pasta shells and rinse with cool water. Set aside.
- In a large bowl, combine whipped cottage cheese, Parmesan cheese, egg, garlic, parsley, basil, salt, and pepper.
- Spoon mixture into shells and place shells in baking dish, nestling them in the sauce.
- Cover shells with remaining sauce and sprinkle mozzarella cheese on top.
- Bake for 25 minutes or until hot and bubbly. Serve immediately.
Notes
- Store leftovers in an airtight container for up to 3 days.
- You can freeze stuffed shells before baking for up to 3 months.
- Prep Time: 15 minutes
- Cook Time: 25 minutes
- Category: Main Dish
- Method: Baked
- Cuisine: Italian
- Diet: Vegetarian
Nutrition
- Serving Size: 1 serving
- Calories: 450
- Sugar: 8g
- Sodium: 1200mg
- Fat: 18g
- Saturated Fat: 10g
- Unsaturated Fat: 6g
- Trans Fat: 0g
- Carbohydrates: 45g
- Fiber: 3g
- Protein: 25g
- Cholesterol: 80mg
Tips for Perfect Easy Stuffed Shells
After making these stuffed shells more times than I can count, I’ve picked up a few tricks that make ALL the difference between good shells and knock-your-socks-off shells. Here are my golden rules:
Rinse those shells like your dinner depends on it
The minute those shells come out of the boiling water, give them a good rinse with cool water. Not just a quick splash – I’m talking full-on shower time! This stops them from cooking further (no one wants mushy shells) and washes away that sticky starch that makes them cling together. Spread them out on a clean towel afterward to dry slightly – wet shells make watery filling.
Fill ’em like you mean it
Here’s where most folks go wrong – they’re too gentle with the filling! Use a small cookie scoop or tablespoon to really pack that cheesy goodness into each shell. You want them plump like little pillows, not sad and half-empty. Pro tip: hold the shell over the bowl while filling – any spills go right back in the mix!
The toothpick test never lies
That last 5 minutes of baking is crucial. Slide a toothpick into the center filling – if it comes out hot to the touch (careful, it’s lava!), you’re golden. The cheese on top should be bubbly with those perfect golden-brown spots. If your oven runs hot (like mine does), tent with foil if the cheese starts browning too fast.
Bonus tip from Grandma Jo: Let the dish rest for 5 minutes after baking. I know it’s hard to wait when your kitchen smells like an Italian trattoria, but this lets the filling set up so you get perfect slices instead of cheesy lava flows!
Serving Suggestions for Easy Stuffed Shells
Now that you’ve got this gorgeous dish of cheesy stuffed shells fresh from the oven, let’s talk about how to serve them up like a pro! Here’s what I’ve learned after decades of feeding my hungry crew:
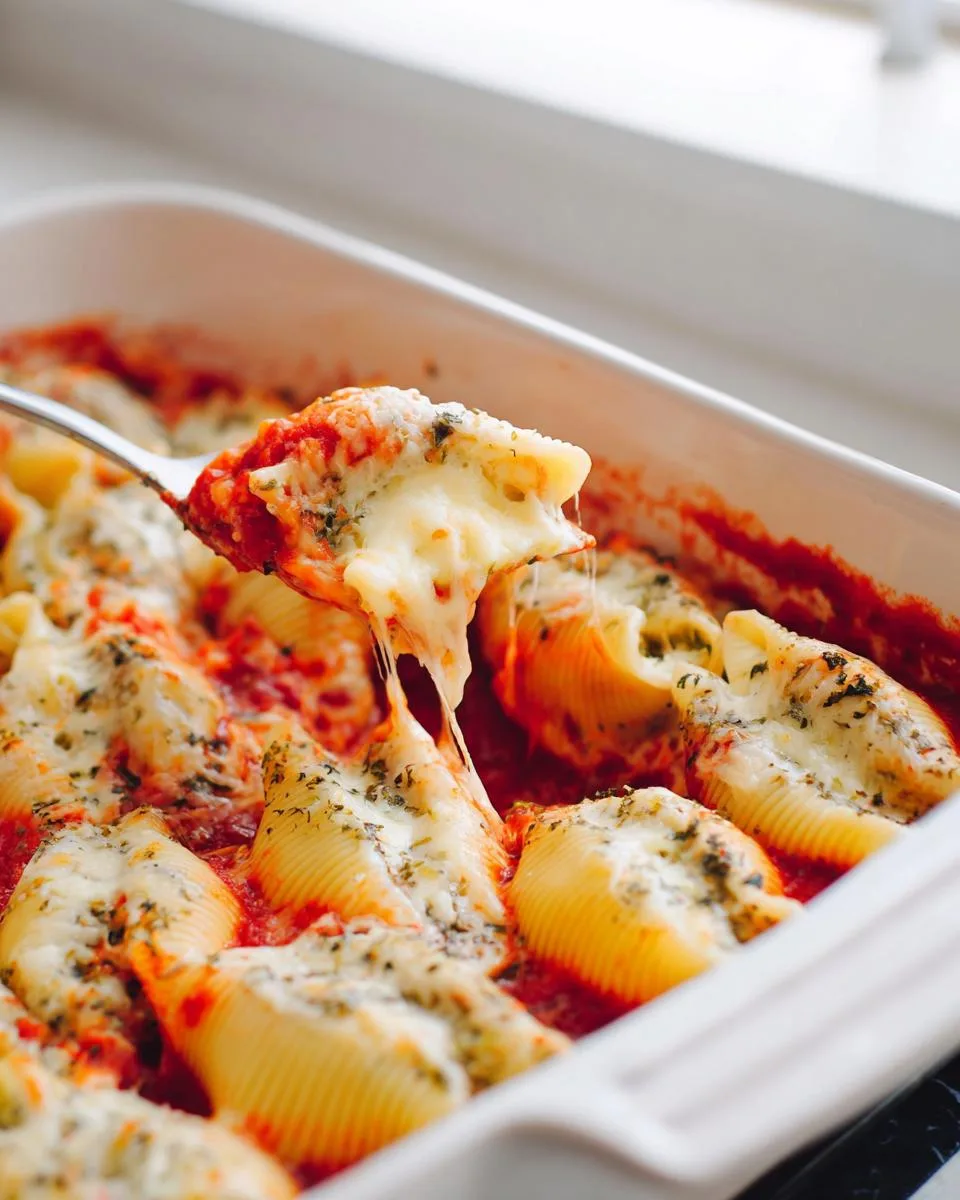
The bread basket is non-negotiable
Listen, you need something to sop up that extra sauce! My family would revolt if I didn’t serve these shells with warm garlic bread. Just slice a baguette, brush with garlic butter, and toast until golden – easy peasy. For busy nights, I keep frozen garlic bread on hand (no shame in my game!), but when I’m feeling fancy, I’ll make my garlic knots with extra Parmesan.
Keep your greens simple
A crisp salad cuts through all that richness beautifully. My go-to is just romaine, red onion, and cherry tomatoes with a lemony vinaigrette – the brightness balances the dish perfectly. In summer, I’ll swap in a caprese salad with fresh basil from the garden. Pro tip: dress the salad lightly right before serving so nothing gets soggy.
Round it out with veggies
When I want to sneak in extra veggies, I’ll roast some zucchini or eggplant alongside the shells during the last 15 minutes of baking. Toss them with olive oil, salt, and Italian seasoning – they’ll caramelize while the cheese melts. Or for super lazy nights, a bag of frozen garlic green beans microwaved with a pat of butter does the trick!
Most importantly? Serve these shells with love and watch the magic happen. Whether it’s a Tuesday night or Sunday dinner, this meal turns any table into a celebration. Now pass the Parmesan!
Storage & Reheating Instructions
Now, let’s talk about keeping those delicious stuffed shells tasting fresh—because let’s be honest, you’ll probably have leftovers (if you’re lucky!). Here’s exactly how I store and reheat them after all these years:
Fridge storage for short-term wins
First, let those leftover shells cool to room temperature—but don’t leave them out more than 2 hours (food safety first!). Pop them in an airtight container—I like glass so the tomato sauce doesn’t stain anything—and they’ll keep beautifully for up to 3 days in the fridge. Pro tip: place parchment paper between layers if you’re stacking them to prevent sticking!
Freezer magic for future you
This is where stuffed shells really shine! You’ve got two options:
- Freeze before baking: Assemble the whole dish right up to the baking step, then wrap tightly with plastic wrap AND foil (double protection against freezer burn). It’ll keep for up to 3 months. When ready, bake straight from frozen—just add 15-20 extra minutes.
- Freeze after baking: Let cooked shells cool completely, then freeze individual portions in freezer-safe containers. Perfect for quick lunches!
Reheating like a pro
Here’s how to bring those shells back to life without drying them out:
- Oven method (best for texture!): Preheat to 350°F. Place shells in an oven-safe dish, splash a tablespoon of water or extra sauce over top to keep moist, cover with foil, and bake for 20 minutes (30 if frozen). Remove foil for last 5 minutes if you want the cheese bubbly again.
- Microwave shortcut: Place a single serving on a microwave-safe plate, cover loosely with a damp paper towel (keeps them from getting rubbery), and heat in 30-second bursts until warmed through—usually about 2 minutes total.
One last tip from Grandma Jo: Never reheat more than you’ll eat in one sitting—these taste best fresh! And if the cheese seems dry after reheating, a quick drizzle of warm marinara sauce brings them right back to life.
Easy Stuffed Shells FAQs
After years of making these stuffed shells for family and friends, I’ve heard every question under the sun! Here are the answers to the ones I get most often:
Can I use frozen shells to save time?
Oh honey, I feel you on the time crunch! But here’s the thing – frozen shells tend to get mushy when stuffed and baked. If you’re really in a pinch, look for the “no boil” jumbo shells (Barilla makes good ones) and follow their package directions. But honestly? The extra 10 minutes to cook regular shells fresh makes ALL the difference in texture.
Can I add meat to these stuffed shells?
Absolutely! My grandson Joe always begs for “meatier” shells. Just brown ½ pound of Italian sausage or ground beef with a clove of garlic, let it cool slightly, then mix it right into the cheese filling. For extra flavor, sprinkle some cooked crumbled bacon or prosciutto over the top before baking. My personal tip? Try mixing in some chopped spinach too – it balances the richness perfectly.
How do I prevent shells from cracking when stuffing?
This used to drive me nuts too! Here’s what works: First, don’t overcook them – that 3 minutes under al dente is crucial. Second, handle them gently with a slotted spoon after draining. And my secret weapon? A tiny drizzle of olive oil in the cooling water helps keep them pliable. If one does crack, don’t panic – just position it crack-side down in the baking dish and no one will ever know!
Nutritional Information
Now, I know some folks like to keep track of what’s in their food—and I totally get it! But here’s the thing: the nutritional info for these easy stuffed shells can vary depending on the specific brands and ingredients you use. Whether you’re using full-fat ricotta, low-fat cottage cheese, or a particular marinara sauce, the numbers can shift a bit. So, while I don’t list exact figures here, just know that this dish is a hearty balance of protein, carbs, and all that cheesy goodness we love. If you need precise numbers, I recommend plugging your exact ingredients into a nutrition calculator. But honestly? Sometimes it’s okay to just enjoy the meal and savor every bite—life’s too short not to!
Share Your Easy Stuffed Shells Experience
Nothing makes me happier than hearing how these stuffed shells turn out in your kitchen! Did your kids gobble them up? Did your partner ask for seconds? Maybe you added your own twist with some spicy sausage or extra garlic? I want to hear all about it!
Leave a comment below and tell me how your shells turned out – the good, the messy, and the “oops-I-ate-too-much” moments. Better yet, snap a photo of that cheesy masterpiece before it disappears (we both know it won’t last long!) and tag me on social media. There’s nothing like seeing those golden, bubbly shells fresh from your oven!
And if this recipe becomes a regular in your rotation like it is in mine? Give it a star rating so other home cooks know it’s a winner. Cooking is all about sharing the love, and every time you make these shells, you’re keeping the tradition alive. Now go enjoy that cheesy goodness – you’ve earned it!
For More recipes, Follow me on Facebook!






