
Oh, those hectic weekday mornings! If your house is anything like mine was when my kids were growing up, it’s a whirlwind of lost shoes, forgotten permission slips, and “Mom, I’m hungry!” That’s exactly why freezer breakfast burritos became my secret weapon. I’ve been making big batches of them for years—it’s one of my favorite meal prep traditions. Nothing beats the feeling of knowing you’ve got a warm, hearty breakfast ready in minutes, even on the most chaotic days. It’s a little bit of home-cooked comfort, ready whenever you need it.

Table of Contents
Table of Contents
Why You’ll Love These Freezer Breakfast Burritos
Listen, I know what mornings are like – pure chaos with a side of burnt toast. That’s why these freezer breakfast burritos have been my family’s saving grace for years. They’re:
- Quick as lightning – 90 seconds in the microwave and boom, breakfast is served
- Nutrition-packed – protein from the eggs, vitamins from the veggies (yes, I count cheese as a vitamin)
- Customizable – swap ingredients based on what’s in your fridge
- Meal prep magic – one afternoon of work means breakfast for weeks
Perfect for Busy Mornings
Remember last Thursday when you barely had time to brush your teeth? That’s when freezer breakfast burritos shine. My daughter used to grab one on her way to the bus stop – no dishes, no fuss. Just wholesome food that keeps you full until lunch. The best part? They reheat perfectly from frozen, so even if you forget to thaw them overnight (who doesn’t?), breakfast is still covered.
Easy to Customize
My secret? There’s no “wrong” way to make these. Don’t have ham? Turkey bacon works beautifully. Not a fan of bell peppers? Try spinach instead. Once I even used leftover Thanksgiving turkey (don’t tell my mother-in-law). The basic formula stays the same: protein + veggies + eggs + cheese = breakfast victory.
Ingredients for Freezer Breakfast Burritos
Now let’s talk ingredients – and I mean the good stuff that makes these freezer breakfast burritos sing! After years of testing, I’ve nailed down exactly what you’ll need:

- 8 oz. sharp cheddar cheese (shred it yourself for better melt!)
- 1 yellow onion, diced nice and small
- 1 green bell pepper, diced (red works too if you’re feeling fancy)
- 2 Tbsp butter, divided (because everything’s better with butter)
- Salt and pepper – just a couple pinches to wake up those flavors
- 1 lb. cooked ham, diced into little cubes
- 12 large eggs (trust me, medium ones just don’t cut it)
- 8 large flour tortillas (burrito-size, about 10-inch diameter)
That’s it! Simple, wholesome ingredients that come together like magic. I’ll show you exactly how to make them sing in just a minute.
How to Make Freezer Breakfast Burritos
Alright, let’s roll up our sleeves and make some magic happen! I’ve been making these freezer breakfast burritos for so many years, I could probably do it in my sleep. But don’t worry – I’ll walk you through each step like I’m right there in your kitchen with you.
Prep the Fillings
First things first – let’s get those fillings ready. Heat up a skillet over medium heat and melt half your butter. Toss in those diced onions and bell peppers with a pinch of salt. You’ll want to sauté them until they’re soft but still have a little crunch – about 5 minutes should do it. Transfer them to a bowl and wipe out the skillet.
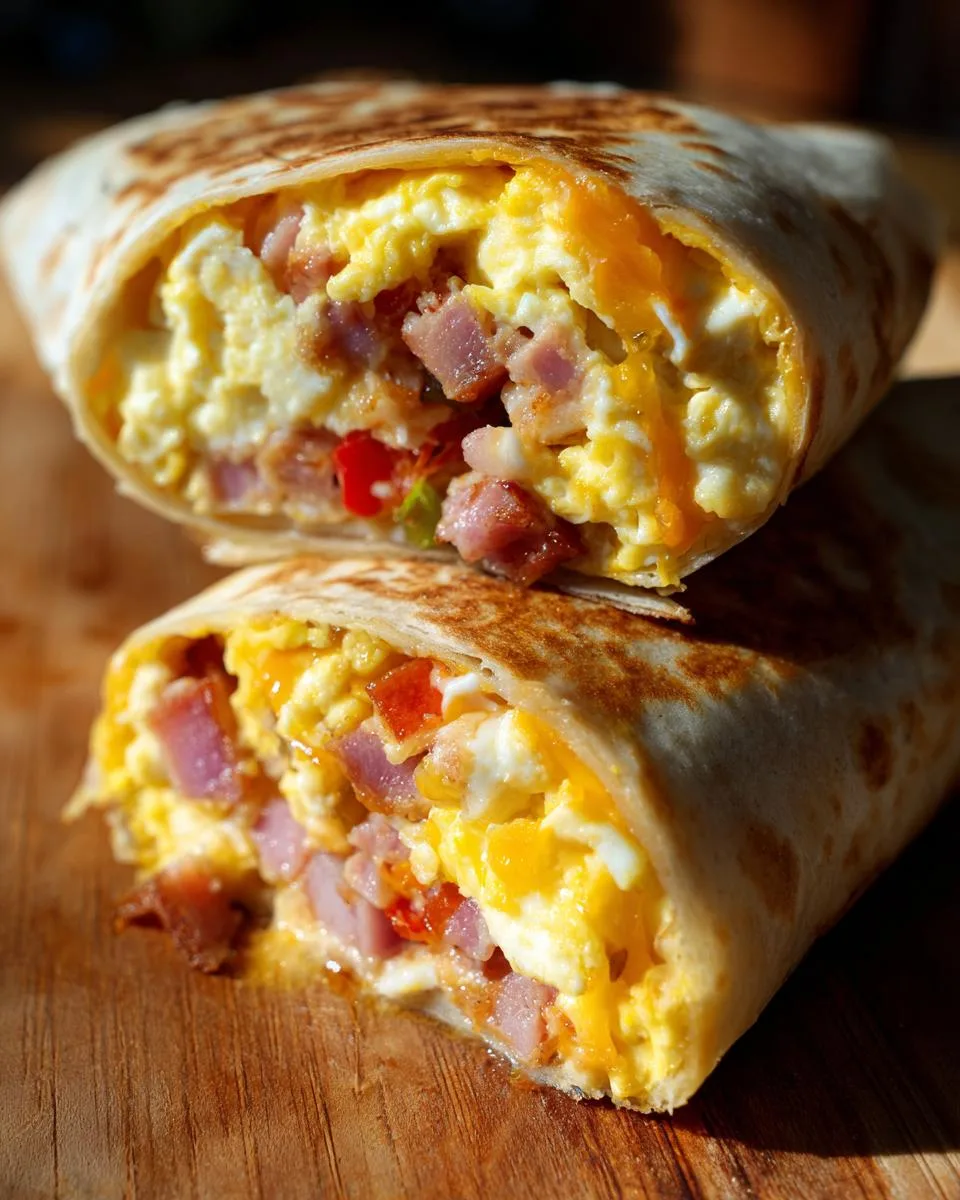
Next, same skillet, same heat – melt the other half of your butter and add the diced ham. Cook until it gets those beautiful golden brown edges (another 5 minutes). Now for the eggs – whisk them up good in a bowl with a pinch of salt and pepper. Pour them into the skillet and scramble gently. Here’s my golden rule: take them off the heat when they’re still slightly moist. They’ll finish cooking when you reheat the burritos later, and nobody wants dry eggs!
Assemble the Burritos
Time for the fun part! Lay out your tortillas and divide the fillings evenly. I like to layer mine: eggs first, then ham, veggies, and finally a generous handful of cheese. Now here’s my trick for rolling perfect freezer breakfast burritos: fold in the sides first, then roll tightly from the bottom up. You want them snug but not bursting – think “comfortable hug” tightness. If you pull too hard, you’ll tear the tortilla, and we don’t want that!
Freeze for Later
Almost done! Wrap each burrito snugly in parchment paper – this prevents freezer burn and makes reheating a breeze. Label them with the date (trust me, future-you will thank you). Lay them flat in a single layer in your freezer until frozen solid, then you can stack them to save space. They’ll keep beautifully for up to 3 months – though in my house, they never last that long!
Print
Grandma Jo’s 3-Month Freezer Breakfast Burritos Secret
Freezer-friendly breakfast burritos stuffed with eggs, ham, cheese, and veggies.
- Total Time: 35 mins
- Yield: 8 burritos 1x
Ingredients
- 8 oz. cheddar ($1.69)
- 1 yellow onion ($0.32)
- 1 bell pepper ($1.00)
- 2 Tbsp butter (divided, $0.26)
- 2 pinches salt and pepper ($0.05)
- 1 lb. cooked ham ($3.75)
- 12 large eggs ($2.79)
- 8 large flour tortillas (burrito size, $1.39)
Instructions
- Shred cheddar if not pre-shredded. Dice onion and bell pepper.
- Sauté onion and bell pepper with ½ Tbsp butter until soft (5 min). Season with salt/pepper. Transfer to bowl.
- Dice ham. Sauté with ½ Tbsp butter until browned (5 min). Transfer to separate bowl.
- Whisk eggs. Cook in skillet with remaining butter until moist but set. Season.
- Assemble burritos: eggs, veggies, cheese, ham in tortillas. Roll tightly.
- Wrap each burrito in parchment. Label.
- Freeze in labeled bags.
- Thaw overnight or reheat frozen (microwave defrost + high heat).
Notes
- Don’t overcook eggs—they dry out.
- Freeze burritos flat for easy storage.
- Reheat skillet method for crispier tortillas.
- Prep Time: 20 mins
- Cook Time: 15 mins
- Category: Breakfast
- Method: Stovetop
- Cuisine: American
- Diet: Low Lactose
Nutrition
- Serving Size: 1 burrito
- Calories: 420
- Sugar: 3g
- Sodium: 890mg
- Fat: 22g
- Saturated Fat: 10g
- Unsaturated Fat: 9g
- Trans Fat: 0g
- Carbohydrates: 32g
- Fiber: 2g
- Protein: 24g
- Cholesterol: 290mg
Tips for the Best Freezer Breakfast Burritos
After making hundreds of these freezer breakfast burritos, I’ve picked up some tricks that make all the difference. First, those eggs – pull them off the heat while they’re still slightly glossy. They’ll finish cooking when reheated, keeping them fluffy instead of rubbery. Second, let your fillings cool before assembling to prevent soggy tortillas (nobody likes a mushy burrito!). For reheating, my favorite method is the microwave’s defrost setting followed by 30 seconds on high – but for crispy perfection, heat them in a dry skillet until golden. Oh, and always wrap tightly in parchment – aluminum foil sticks terribly!
FAQs About Freezer Breakfast Burritos
Over the years, I’ve gotten all sorts of questions about these freezer breakfast burritos – and let me tell you, no question is too silly! Here are the ones that come up most often in my kitchen:
How Long Do They Last in the Freezer?
These beauties will stay perfect for about 3 months in your freezer – though honestly, mine never make it past a month before getting devoured! The key is wrapping them properly in parchment paper first, then sealing them in an airtight freezer bag. If you see any frost or ice crystals forming, that’s your cue they’ve been in too long.
Can I Use Corn Tortillas?
Oh honey, I’ve tried! While corn tortillas might seem healthier, they just don’t hold up the same way. Flour tortillas stay flexible after freezing and reheating, while corn ones tend to get crumbly and dry. If you’re really set on corn, try warming them first to make them more pliable – but flour tortillas are definitely my go-to for freezer breakfast burritos.
Can I Make These Vegetarian?
Absolutely! Some of my favorite variations skip the meat entirely. Try swapping in black beans (drained well!) or sautéed mushrooms instead of ham. My granddaughter loves when I add diced sweet potatoes – just roast them first so they’re nice and tender. The possibilities are endless!
Why Do My Burritos Get Soggy When Reheating?
Ah, the dreaded soggy burrito! This usually happens if the fillings were too hot when you wrapped them, or if there’s too much moisture in the ingredients. Make sure everything cools completely before assembling, and pat your veggies dry after sautéing. If you’re still having trouble, try reheating in a dry skillet instead of the microwave – it crisps up the tortilla beautifully.
Can I Add Hot Sauce Before Freezing?
While I love a good kick of heat, I’d recommend adding hot sauce when you reheat rather than before freezing. The vinegar in most hot sauces can change texture over time in the freezer. Better to keep a bottle handy for serving – my family’s always fighting over who gets the last drop of Cholula!
Storage and Reheating
Now let me tell you how to bring these freezer breakfast burritos back to life – because let’s face it, nobody wants to eat a cold burrito! My favorite method is the microwave: wrap in a paper towel and use the defrost setting for 2 minutes, then high heat for 30 seconds. For crispy perfection, heat them in a dry skillet over medium-low until golden (about 5 minutes per side). If you’ve got more time, thaw overnight in the fridge first – they’ll reheat in just 60 seconds!
Nutritional Information
Now let’s talk numbers – but remember, these are estimates that can change based on your exact ingredients. Each freezer breakfast burrito packs about 420 calories, with a whopping 24g of protein to keep you full all morning. You’re looking at 22g fat (10g saturated), 32g carbs, and 2g fiber. They do run a bit high in sodium (890mg) thanks to the ham and cheese, so if that’s a concern, try low-sodium ham or cutting back on the salt. At the end of the day, it’s homemade food made with love – and that’s nutrition you can’t measure!
Share Your Feedback
Nothing makes me happier than hearing how these freezer breakfast burritos worked in your kitchen! Did your kids gobble them up? Did you try any fun variations? Drop me a note in the comments – I read every single one while sipping my morning coffee. Your tips and tricks might just help another busy parent out there!
And if this recipe saved your morning like it’s saved mine a hundred times, give it a little star rating so others know it’s the real deal. Cooking is all about sharing the love, and I can’t wait to hear your stories! For more great meal prep ideas, check out my collection of recipes.
For More recipes, Follow me on Facebook!






