
Oh, honey, if you’re looking for a spooktacular treat that’ll have the whole family giggling, you’ve gotta try these Ghost Nutter Butter Cookies! Back in my day, we didn’t have all these fancy Halloween treats, but when my grandkids begged for something fun, I whipped these up in a flash. They’re so simple—just Nutter Butters dipped in white chocolate with little chocolate chip eyes—but trust me, they disappear faster than a ghost in the night! After decades of baking, I can tell you these are the perfect mix of nostalgia and ease. The kids love helping, and honestly? I might sneak a few for myself, too.

Table of Contents
Table of Contents
Ingredients for Ghost Nutter Butter Cookies
Now, don’t go fretting over fancy ingredients, dear—this recipe keeps things wonderfully simple. Here’s what you’ll need to gather up:

- 24 Nutter Butter cookies – the peanutty base for our little ghosts
- 8 ounces Almond Bark white candy wafers or white chocolate – either works beautifully for that ghostly coating
- 48 mini chocolate chips or 2 ounces melted chocolate – for those adorable spooky eyes (I always grab extra—someone inevitably sneaks a handful!)
That’s it! Just three simple ingredients stand between you and the cutest Halloween treats this side of the graveyard.
How to Make Ghost Nutter Butter Cookies
Alright, sweetheart, let’s get spooky! These little ghost cookies come together faster than you can say “Boo!”—just follow these simple steps and you’ll have a plate full of adorable treats in no time. The key is working quickly but carefully, especially when handling that melted chocolate.
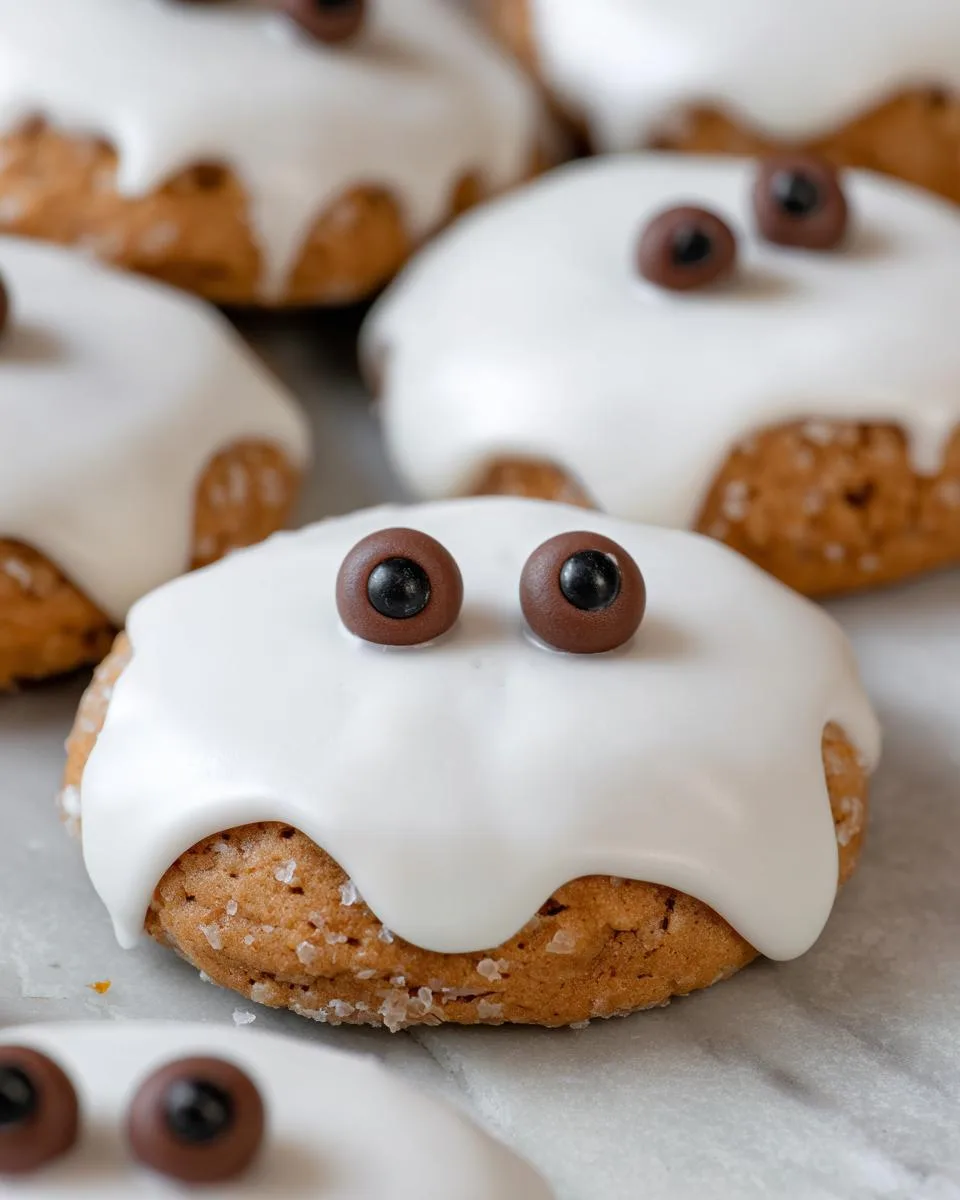
Step 1: Melt the White Chocolate
First things first—let’s melt our “ghost coat.” Grab your white chocolate wafers or bars (chopped up if they’re not wafers) and pop them in a microwave-safe bowl. Here’s my golden rule: 30 seconds, stir, then 15 more seconds. Keep repeating this until it’s smooth as silk. Trust me, rushing this with longer bursts will give you burnt chocolate, and nobody wants ghost cookies that taste like regret!
Step 2: Dip the Cookies
Now the fun part! Line a baking sheet with parchment paper (this saves so much cleanup later). Hold a Nutter Butter by one edge and dunk it in the melted chocolate—I use a fork to flip it and make sure every nook gets covered. Let the excess drip off, then place it gently on the parchment. Pro tip: twist your wrist as you lift to get that perfect drip-free base. Oh, and don’t crowd them—ghosts need personal space too!
Step 3: Add the Ghost Faces
Time for personality! While the chocolate’s still wet (this part’s crucial!), grab two mini chocolate chips per cookie and press them in for eyes. Work fast—that chocolate sets quicker than you’d think! I like making some ghosts surprised (wide-set eyes) and some sleepy (close together). If the chocolate starts hardening before you’re done, just give it a quick 5-second microwave zap to loosen it back up. And voilà—you’ve got yourself a cookie that’s equal parts cute and delicious!
Print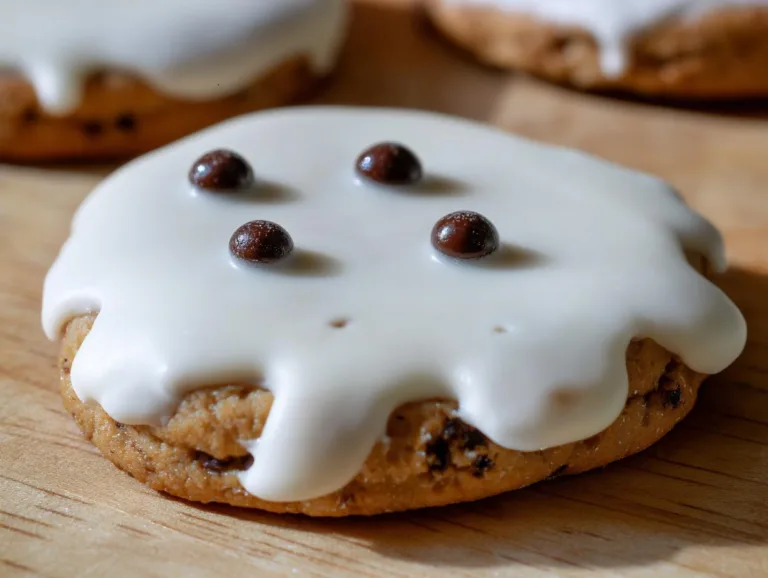
Easy 3-Ingredient Ghost Nutter Butter Cookies That Charm Us
Ghost Nutter Butter Cookies are a fun and easy Halloween treat. These cookies are dipped in white chocolate and decorated with mini chocolate chips to resemble ghosts.
- Total Time: 15 minutes
- Yield: 24 cookies 1x
Ingredients
- 24 Nutter Butter Cookies
- 8 ounces Almond Bark White Candy Wafers or White Chocolate
- 48 Mini Chocolate Chips or 2 ounces melted chocolate
Instructions
- Melt the chopped Almond Bark in a microwave-safe bowl for 30 seconds. Stir and heat for an additional 15 seconds. Repeat if needed.
- Dip each Nutter Butter cookie into the melted white chocolate and place on a parchment-lined cookie sheet.
- Add mini chocolate chips for eyes while the white chocolate is still wet. They will stick as the chocolate hardens.
Notes
- Use parchment paper for easy cleanup.
- Let the cookies cool completely before serving.
- Prep Time: 10 minutes
- Cook Time: 5 minutes
- Category: Dessert
- Method: No-Bake
- Cuisine: American
- Diet: Vegetarian
Nutrition
- Serving Size: 1 cookie
- Calories: 120
- Sugar: 8g
- Sodium: 60mg
- Fat: 6g
- Saturated Fat: 3g
- Unsaturated Fat: 2g
- Trans Fat: 0g
- Carbohydrates: 15g
- Fiber: 1g
- Protein: 2g
- Cholesterol: 5mg
Tips for Perfect Ghost Nutter Butter Cookies
After making these adorable ghost cookies more times than I can count, I’ve picked up a few tricks that’ll make your batch extra special:
- The fork trick – Use a fork to dip and flip the cookies. It gives you way more control than tongs or fingers, and you’ll get that smooth coating every time.
- Speed is key – Work in small batches of 4-5 cookies at a time so the chocolate doesn’t set before you add those cute little eyes.
- Chocolate too thick? Add just a teaspoon of coconut oil to thin it out for perfect dipping consistency.
- Kid-friendly decorating – Let little ones place the eyes while you handle the hot chocolate—they love helping and it keeps tiny fingers safe!
- Storage secret – Layer them between parchment paper so the ghosts don’t stick together in storage.
Remember—imperfect ghosts are the spookiest (and most charming) anyway, so don’t stress!
Variations for Ghost Nutter Butter Cookies
Oh sugar, half the fun is playing dress-up with these little ghosts! Here are some of my favorite twists over the years:
- Spooky drizzle – Melt some dark chocolate and zigzag it over the white coating for a “haunted” effect.
- Candy eyes – Swap chocolate chips for store-bought candy eyes (the wiggly ones are extra silly).
- Pastel ghosts – Add a drop of food coloring to the white chocolate for Easter or baby showers.
- Crushed Oreos – Sprinkle some at the base to look like floating over graveyard dirt!
See? Even ghosts like to change outfits sometimes!
Storing and Serving Suggestions
Now don’t you go leaving these little ghosts out haunting the countertop! Pop them in an airtight container with parchment between layers – they’ll stay fresh as a moonlit night for up to 5 days at room temperature. Serve them with chilled apple cider or warm pumpkin-spiced hot chocolate for the ultimate Halloween snack attack!
Nutritional Information for Ghost Nutter Butter Cookies
Now, I know we’re not counting calories when it comes to Halloween treats, but for those who like to know what they’re nibbling on, here’s the scoop on our ghostly cookies:
- Serving Size: 1 cookie
- Calories: 120
- Sugar: 8g
- Sodium: 60mg
- Fat: 6g (3g saturated, 2g unsaturated)
- Carbohydrates: 15g
- Fiber: 1g
- Protein: 2g
- Cholesterol: 5mg
Remember, these values are estimates—your cookies might vary slightly depending on the exact brands you use or if you sneak an extra chocolate chip or two (not that I’d blame you!).
FAQs About Ghost Nutter Butter Cookies
Over the years, I’ve gotten all sorts of questions about these spooky little treats. Here are the ones that pop up most often—straight from my kitchen to yours!
Can I use regular chocolate chips instead of mini ones?
Bless your heart, you sure can—just chop them up a bit! Mini chips give the perfect ghost-eye size, but if all you’ve got are regular ones, simply cut them in half with a sharp knife. The smaller pieces look just as cute and still stick beautifully to the white chocolate.
How long do these ghost cookies last?
If they last more than a day in your house (mine never do!), store them in an airtight container at room temperature. They’ll stay fresh and delicious for up to 5 days. After that, the chocolate might start blooming (getting those white streaks), but they’ll still taste fine!
My chocolate keeps seizing—help!
Oh honey, I’ve been there! If your white chocolate gets clumpy, it’s usually from steam or water getting in. Make sure your bowl and utensils are bone dry. If it happens anyway, try stirring in a teaspoon of vegetable oil or shortening to smooth it back out.
Can I make these with homemade cookies?
Of course you can, sugar! Any peanut butter sandwich cookie will work. But I’ll let you in on a secret—store-bought Nutter Butters hold up better to dipping and have that perfect ghost shape. Homemade ones tend to crumble unless they’re extra sturdy.
Final Thoughts
Well, sugar, I can’t wait to see your ghostly cookie creations! Snap a picture of your spooky treats and tag me—nothing warms my heart more than seeing families making memories with these recipes. Now go on, get dipping, and let those little ghost cookies haunt your Halloween table with happiness!
For More recipes, Follow me on Facebook!






