
Oh, Halloween baking—it brings back the sweetest memories! I’ll never forget the year my grandkids squealed with delight when they saw their first batch of Halloween Monster Cupcakes staring back at them with googly candy eyes and wild, colorful fur. It’s the kind of kitchen magic that turns ordinary cupcakes into spooky—and silly—masterpieces. After decades of baking, I’ve learned the secret to these little monsters isn’t just in the frosting (though that helps!), but in the laughter and creativity they inspire. Whether you’re hosting a party or just want to surprise your family, these cupcakes are the perfect way to make Halloween extra special. Trust me, once you see those tiny hands grabbing for the OREO mouths, you’ll understand why this recipe has become a tradition in my kitchen—and maybe yours too!

Table of Contents
Table of Contents
Why You’ll Love These Halloween Monster Cupcakes
These Halloween monster cupcakes are the perfect mix of fun and fright—without any scary baking skills required! Here’s why they’re a must-make:
- Kid-approved creativity: Let little hands add candy eyeballs and OREO mouths—it’s edible playtime!
- No-fail decorating: The grass icing tip makes “fur” foolproof (even if your piping skills are rusty).
- Customizable chaos: Go wild with neon greens, purples, or midnight blues—every monster gets its own personality.
- Quick to whip up: Use store-bought cupcakes and frosting if you’re short on time (I won’t tell!).
Seriously, these cupcakes disappear faster than ghosts at sunrise—just ask my grandkids!
Ingredients for Halloween Monster Cupcakes
Gather these simple ingredients—most are probably already in your pantry! The magic happens when ordinary items transform into playful monster features. Here’s exactly what you’ll need:

- 24 pre-baked cupcakes (homemade or store-bought, completely cooled)
- 1 cup buttercream frosting (divide into smaller portions if using multiple colors)
- Gel food coloring (I love Americolor for vibrant monster hues!)
- 1 small grass icing tip (Wilton #233 is my go-to for perfect “fur”)
- 12-24 assorted candy eyeballs (mix sizes for extra personality)
- 1 package OREO cookies (regular and mini work great for different mouth sizes)
- Extra white frosting (optional, for adding silly teeth details)
Pro tip: Grab extra eyeballs—they tend to “disappear” when little helpers are around! The beauty of these Halloween monster cupcakes is how everyday ingredients become something wonderfully weird.
Equipment You’ll Need
No fancy gadgets required here—just a few trusty tools from your baking drawer to bring these little monsters to life. Here’s what’s essential:
- Piping bags (disposable or reusable—I’ve used the same cloth one for 20 years!)
- Grass icing tip (that little Wilton #233 works like magic—looks like fur in one squeeze)
- Small mixing bowls (one for each frosting color unless you enjoy washing dishes mid-project)
- Food coloring set (gel types won’t water down your frosting like liquid ones do)
- Sharp knife (for splitting OREOs—the “crack!” sound is weirdly satisfying)
- Toothpicks (optional, but perfect for dotting on tiny frosting teeth or fixing wayward eyeballs)
See? Nothing complicated—just the usual suspects from a baker’s toolkit. If you’re missing something, improvise! I once used a ziplock bag with the corner snipped off in a pinch (grandkids never noticed the difference).
How to Make Halloween Monster Cupcakes
Ready to turn ordinary cupcakes into a crew of colorful monsters? Follow these simple steps—I promise it’s easier than it looks! The secret is in the piping technique, but don’t stress if your first few look a little… unique. That’s part of the charm!
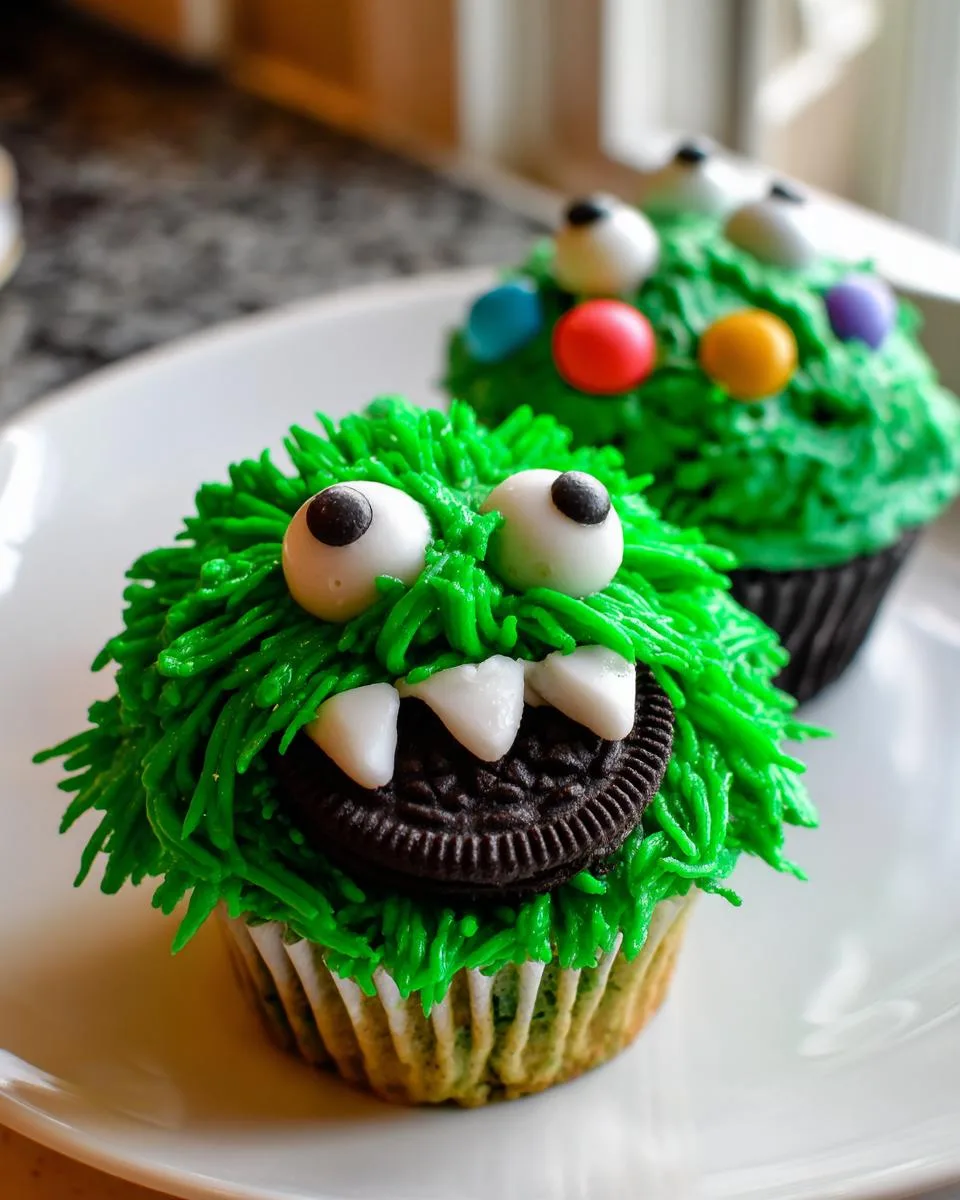
Step 1: Color the Frosting
First things first—let’s make that frosting scream Halloween! Divide your buttercream into small bowls (one for each color you’re using). Now, grab your gel food coloring—trust me, it gives the boldest colors without thinning the frosting. Add a tiny drop at a time and stir until you get that perfect monster hue. Want lime-green fur? Go for it! Purple polka-dot monsters? Why not! My grandkids love when I make a rainbow batch—each cupcake becomes its own little character.
Step 2: Pipe the Monster Fur
Here’s where the magic happens! Fit your piping bag with the grass icing tip (Wilton #233 is my old faithful). Hold the bag straight up at a 90-degree angle, just barely touching the cupcake’s edge. Squeeze gently, pull up about half an inch, then stop—this creates each furry strand. Work from the outside in, covering the whole top. If your frosting gets too soft (warm hands, I get it!), pop the bag in the fridge for 5 minutes. Pro tip: Pipe in layers for extra shaggy monsters—the messier, the better!
Step 3: Add Eyes and Mouths
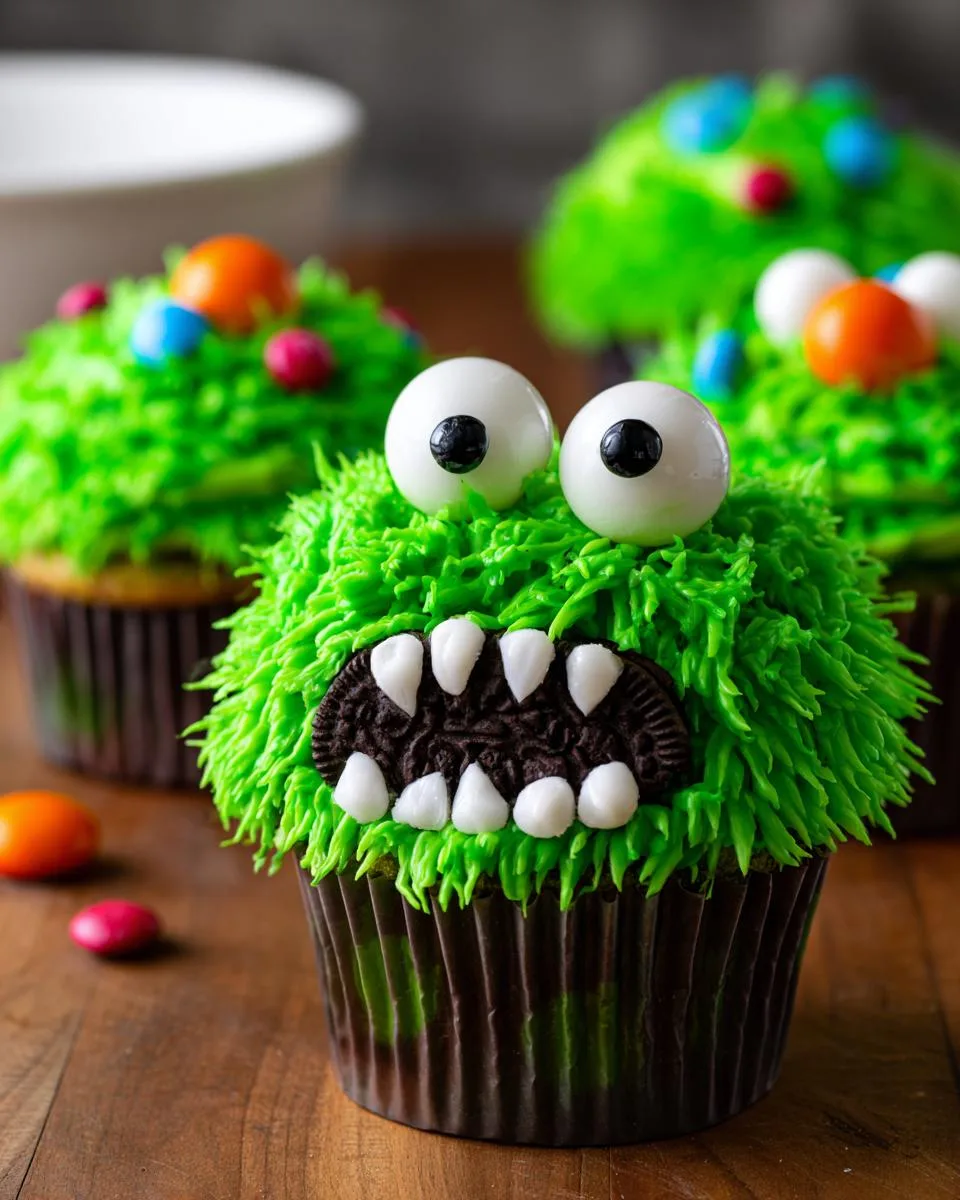
Time to give these guys personality! While the frosting’s still soft, press in those candy eyeballs—go wild with sizes and placements. Cross-eyed? Perfect! Three eyes? Even better! For mouths, break OREOs in half (the “cookie side” facing out looks like teeth) or use mini OREOs whole. Press them gently into the fur. I like to angle them sideways for a goofy grin—after all, these are friendly monsters!
Step 4: Create Tooth Details
This step’s optional but oh-so-fun! Use a toothpick to dab small dots of white frosting along the OREO’s edge for crooked “teeth.” Or get creative—add fangs, buck teeth, or even a snaggletooth! My grandson once gave every monster a single gold tooth (with edible glitter, naturally). The key here? Don’t overthink it. Imperfections make these Halloween monster cupcakes delightfully spooky!
Print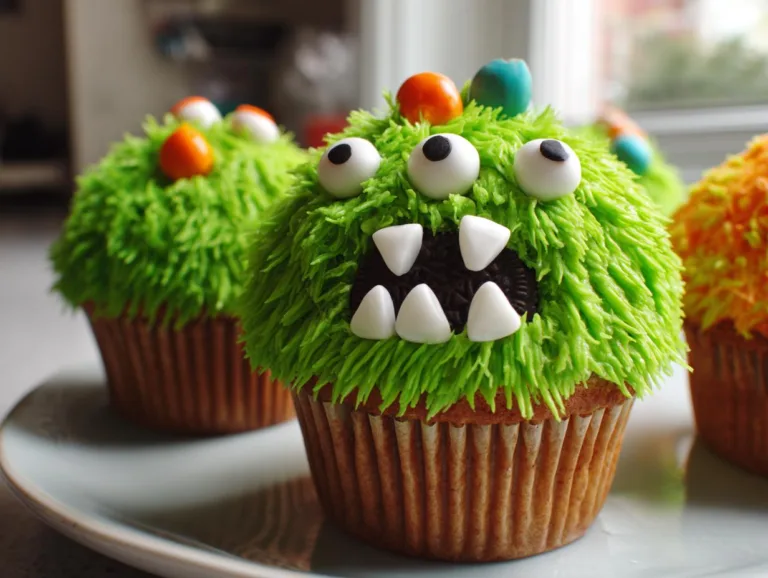
13 Spooky Halloween Monster Cupcakes That Kids Adore
Learn how to make fun and spooky Halloween Monster Cupcakes with colorful fur, candy eyeballs, and OREO mouths.
- Total Time: 40 minutes
- Yield: 24 cupcakes 1x
Ingredients
- 1 Grass Icing Tip (Small star icing tip)
- 24 Cupcakes
- 1 cup Buttercream Frosting
- Food Coloring of choice for monster “fur”
- Candy Eyeballs
- 1 package OREOs of various sizes
Instructions
- Mix your frosting with the food coloring of your choice for making your monster cupcakes.
- Put your grass icing tip in a piping bag. This is how you will get the “fur” look.
- Once the tip is in your icing bag, fill it with colored icing and pipe the “fur” onto your monsters. Start at the outside and work your way in.
- After icing, add candy eyeballs—use a variety for a fun effect.
- Add OREO mouths to the monsters. Use a small OREO or cut a large one in half.
- Add white frosting teeth.
- Be creative and have fun!
Notes
- Use different colors for variety.
- Experiment with different-sized eyeballs for a playful look.
- Let cupcakes cool completely before decorating.
- Prep Time: 20 minutes
- Cook Time: 20 minutes
- Category: Dessert
- Method: Baking
- Cuisine: American
- Diet: Vegetarian
Nutrition
- Serving Size: 1 cupcake
- Calories: 180
- Sugar: 15g
- Sodium: 120mg
- Fat: 8g
- Saturated Fat: 4g
- Unsaturated Fat: 3g
- Trans Fat: 0g
- Carbohydrates: 25g
- Fiber: 1g
- Protein: 2g
- Cholesterol: 20mg
Pro Tips for Perfect Halloween Monster Cupcakes
After decades of making these little monsters, I’ve picked up a few tricks to take them from good to ghoulishly great! Here are my tried-and-true secrets:
- Chill those cupcakes first – Cold cupcakes mean less crumb mess when piping. I pop mine in the fridge for 15 minutes before frosting. It makes all the difference!
- Thick frosting is your friend – If your buttercream looks glossy or runny, add a spoonful more powdered sugar. You want it to hold those furry peaks!
- Mix up those eyeballs – Grab different sizes from the baking aisle. I love when some monsters have one huge eye and one tiny one – so much character!
- OREO hack – Freeze them for 10 minutes before splitting. They’ll crack cleanly without crumbling all over your counter.
- Frosting too soft? No worries! Just chill the whole decorated cupcake for 5 minutes – the fur will firm right up.
Remember – “perfect” isn’t the goal here. Some of my favorite monsters have been happy accidents! Last year, one cupcake’s fur went completely wild (I may have squeezed too hard), and it became the star of the party – we called it the “Yeti Monster.” The kids still talk about it!
Halloween Monster Cupcakes Variations
Oh, the fun you can have with these little monsters! Once you’ve mastered the basics, it’s time to let your imagination run wild. Here are some of my favorite twists on Halloween monster cupcakes that always get the kids (and let’s be honest, the adults too!) excited:
- Zombie Squad – Use moldy-green frosting with gray streaks (just mix in a tiny bit of black gel coloring). Add crooked candy eyeballs and “stitches” made from thin red icing lines.
- Vampire Bites – Pipe deep red fur, then press in almond slivers for fangs. A drizzle of red gel near the mouth makes for a delightfully gruesome touch!
- Cyclops Cuties – One giant candy eye right in the center, surrounded by neon blue or purple fur. Bonus points for adding pipe cleaner “horns” sticking up!
- Mummy Madness – Instead of fur, pipe criss-crossing white frosting “bandages,” leaving gaps to show the cupcake underneath. Two candy eyeballs peeking out completes the look.
- Rainbow Ruckus – Divide your frosting into 3-4 bright colors and pipe alternating sections. The wilder the color combo, the better – think hot pink next to electric blue!
Last year, my granddaughter created “Glow-in-the-Dark Ghost Monsters” by mixing a bit of edible glow powder into white frosting – they were the hit of the school party! The beauty of Halloween monster cupcakes is that there are no rules. Raid your pantry for inspiration – black licorice whiskers, shredded coconut fur (dyed green, of course), or even pretzel stick antlers can take your creatures to the next level.
Storing and Serving Suggestions
Now that you’ve created your adorable Halloween monster cupcakes, let’s talk about keeping them fresh and fabulous! Here’s what I’ve learned after years of making these for parties and school events:
At room temperature: Pop them in an airtight container (I love my old cake carrier with the snap lid) and they’ll stay fresh for 2 days. The buttercream fur actually holds up better this way than in the fridge—plus, chilled OREOs tend to get that sad, soggy texture none of us want.
For parties: Arrange them on a platter with spooky decor—dry ice “fog” always gets oohs and ahhs! Just be sure to keep them covered until serving time so the fur doesn’t dry out. Pro tip from Grandma Jo: place a damp paper towel under the lid if your party lasts more than a few hours—it keeps the Halloween monster cupcakes moist without making them sticky.
Transporting tips: Use a cupcake carrier with individual slots (those plastic ones from the dollar store work great). No carrier? No problem! Set them in a shallow box lined with parchment paper—just don’t stack them unless you want one-eyed cyclops cupcakes with flattened fur!
Can you freeze them? Honestly, I don’t recommend it. The candy eyes get weepy and the OREOs lose their crunch. These Halloween monster cupcakes are best enjoyed fresh—but trust me, that’s never been a problem in my house!
Halloween Monster Cupcakes FAQs
Over the years, I’ve gotten all sorts of questions about these silly little monsters—here are the ones that pop up most often! If you’re wondering something, chances are another baker has too.
Can I use store-bought cupcakes for this recipe?
Absolutely! I’ve done it many times when I’m short on time—just make sure they’re completely cooled before decorating. Those plastic-wrapped ones from the bakery section work great, but I’d avoid the frosted ones—you want a clean slate for your monster fur!
What’s the best way to transport Halloween monster cupcakes?
Oh honey, I learned this lesson the hard way after a tray of tipped-over cupcakes turned into a monster massacre! Now I swear by cupcake carriers with individual slots—the kind with the rigid plastic lid. No carrier? Nestle them snugly in a shallow box lined with non-slip shelf liner or parchment paper.
Which food coloring works best for vibrant monster colors?
Hands down, gel food coloring! The liquid kind waters down your frosting (and nobody wants sad, pale monsters). I keep Americolor’s basic set in my baking drawer—a tiny drop goes a long way for those neon greens and electric purples that make Halloween monster cupcakes pop!
Nutrition Information
Now, let’s be honest – nobody eats Halloween monster cupcakes for their nutritional value! But since folks ask, here’s the general breakdown per cupcake (your mileage may vary depending on frosting thickness and how many eyeballs you pile on!).
- Calories: About 180 (mostly from that delicious buttercream and OREO smile)
- Fat: 8g (real butter makes it worth every gram!)
- Sugar: 15g (it’s a treat – let the kids enjoy it!)
- Protein: 2g (hey, eggs in the cupcake count, right?)
Remember, these numbers can change based on your specific ingredients – homemade vs store-bought cupcakes, different frosting brands, etc. My philosophy? Halloween comes once a year – savor every silly, sugary bite of these monster creations!
For More recipes, Follow me on Facebook!






