
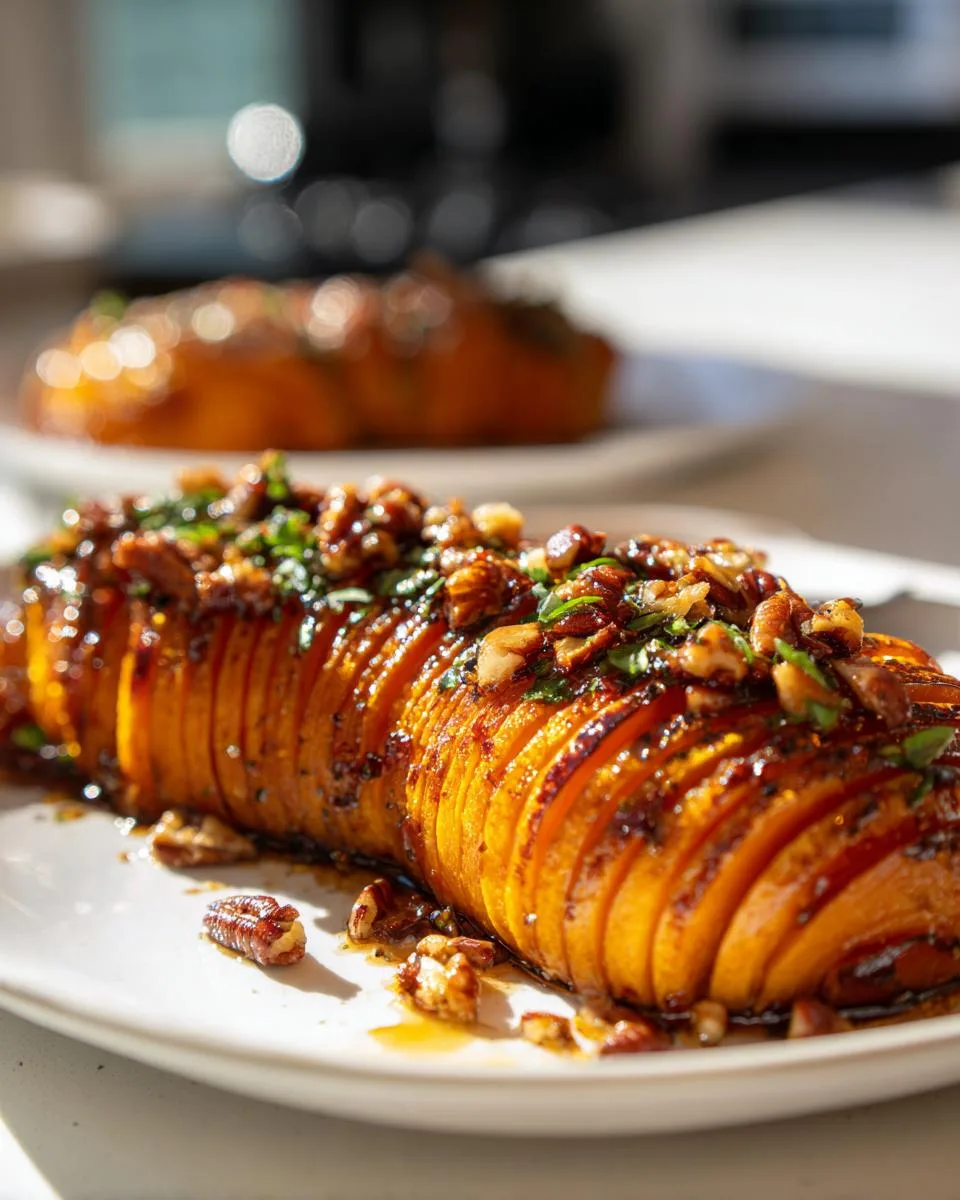
Oh honey, if you’re looking for a showstopper side dish that’s equal parts gorgeous and delicious, you’ve struck gold with this Honey Glazed Hasselback Butternut Squash! After forty years of cooking Sunday dinners for my big, hungry family, I can tell you – nothing gets those “oohs” and “ahhs” at the table quite like this beauty. That sweet honey glaze caramelizing between each golden slice? Pure magic. But don’t let the fancy look fool you – it’s simpler than it appears, and that perfect balance of savory herbs and sweet honey will have everyone begging for seconds. Trust me, this is one of those recipes that’ll become your new holiday tradition!

Table of Contents
Table of Contents
Why You’ll Love This Honey Glazed Hasselback Butternut Squash
This recipe has been a showstopper at my family gatherings for years, and here’s why it’ll become your new favorite too:
- Looks fancy but secretly easy – That impressive Hasselback presentation? It’s just about making careful slices while keeping the squash intact. I use wooden spoon handles as my trusty slicing guides!
- Sweet meets savory perfection – The honey glaze with Dijon and herbs creates this incredible balance that makes people go “What is that amazing flavor?” every single time.
- Less mess, more wow – Unlike messy stuffed squash, this beauty roasts right on the pan, basting itself in its own delicious glaze as it bakes. Fewer dishes to wash is always a win in my book.
- Versatile crowd-pleaser – Works just as beautifully with your holiday turkey as it does with a simple weeknight roasted chicken. Leftovers (if you have any) make killer next-day salads too!
Ingredients for Honey Glazed Hasselback Butternut Squash
Now let’s gather our simple but mighty ingredients – this is where the magic starts! I’ve made this recipe so many times I could probably measure these out in my sleep, but here’s exactly what you’ll need:

- 1 medium butternut squash (about 1kg/2.2lb) – look for one with a long, even neck for prettiest slices
- 1/4 cup unpasteurized honey – or pure maple syrup if you’re keeping it vegan (both work beautifully!)
- 2 tbsp extra-virgin olive oil – the good stuff makes a difference here
- 1 tbsp Dijon mustard – my secret weapon for balancing the sweetness
- 1 tbsp finely chopped fresh sage leaves – don’t even think about dried here, friends
- 1 tsp finely chopped fresh thyme – those little leaves pack a punch
- 1 tsp salt – I use kosher, but any will do
- 1/2 tsp ground black pepper – freshly cracked if you can
- 3-4 tbsp chopped pecans – for that perfect crunchy finish
A quick note about the honey – I always use unpasteurized because it’s got that incredible floral depth, but if you’re making this for vegan friends, pure maple syrup works just as well. The first time I tried the maple version, my grandson didn’t even notice the difference – and that boy notices everything about his food!
Equipment You’ll Need
Now, don’t go thinking you need fancy gadgets for this recipe – just a few trusty kitchen basics will do the trick. Here’s what I grab every time I make my Honey Glazed Hasselback Butternut Squash:
- A sturdy roasting pan – Nothing fancy, but make sure it’s got a rim to catch all those delicious juices
- Sharp chef’s knife – A dull knife is more dangerous than a sharp one when tackling that tough squash skin
- Mixing bowl – Just a medium-sized one for whipping up that heavenly glaze
- Pastry brush – Mine’s about 20 years old and stained with memories (and honey). Silicone works great too!
- Wooden spoon handles – My secret weapon for perfect Hasselback slices without cutting all the way through
That’s it! No special equipment needed – just the same tools I bet you already have in your kitchen. Though I will say, if you don’t have a good sharp knife, now’s the time to get one. Trying to slice squash with a dull blade is like trying to cut butter with a spoon – frustrating and slightly dangerous!
How to Make Honey Glazed Hasselback Butternut Squash
Alright, let’s get cooking! I’ve made this recipe dozens of times, and I’ll walk you through each step just like I would if we were standing side by side in my kitchen. The key is taking your time with each stage – trust me, that little bit of patience pays off big with flavor and presentation!
Preparing the Squash
First things first – let’s tackle that gorgeous butternut squash. Preheat your oven to 425°F and pop that rack in the top third position – this helps everything caramelize beautifully. Now, here’s my trick for cutting squash safely: give it a little roll on the counter first to find its natural flat side, then make your lengthwise cut right down the middle. Scoop out those seeds and stringy bits (save ’em for roasting if you’re feeling thrifty!), then peel completely. I find a good Y-peeler works faster than a knife here.
Place both halves cut-side down on your roasting pan – this initial roast helps soften them just enough for perfect slicing. Bake for 20 minutes, then let them cool for about 5. They should be tender but still firm – you want them to hold their shape for those pretty Hasselback cuts!
Making the Honey Glaze
While the squash is cooling, let’s whip up that magical glaze. Grab your mixing bowl and combine the honey (or maple syrup), olive oil, Dijon, chopped herbs, salt, and pepper. Now, here’s where I get particular – whisk it until it’s completely emulsified. You’ll know it’s ready when it stops separating and becomes this glossy, fragrant potion. Taste it (just a finger dip – I won’t tell!) and adjust the seasoning if needed. Sometimes I add an extra pinch of salt if the honey is particularly sweet.
Hasselback Slicing Technique
Now the fun part! Turn your squash halves cut-side down again – the flat surface helps with stability. Grab two wooden spoons and place them lengthwise along either side of the squash – these will stop your knife from cutting all the way through. Make slices about 1/4 inch apart – any thinner and they might break, any thicker and you won’t get that beautiful fan effect. Don’t stress about perfection here – slight variations give it rustic charm! My first attempts looked like a kindergartener’s art project, but they still tasted amazing.
Baking and Glazing
Time to build those layers of flavor! Brush about 1/3 of your glaze over the squash, getting it into all those nooks and crannies. Add 1/4 cup water to the pan (this prevents burning – trust me, I learned this the hard way!). Bake for 15 minutes, then carefully remove. The kitchen should smell heavenly by now! Brush with another layer of glaze and pan juices, add another 1/4 cup water, and bake 15 more minutes.
For the grand finale, mix your chopped pecans with the remaining glaze and spoon this nutty goodness over the squash. Another 1/4 cup water in the pan, then bake just 5 more minutes – this toasts the pecans perfectly without burning them. When it comes out, spoon over those delicious pan juices, sprinkle with fresh herbs and a pinch of salt, and prepare for the compliments to start rolling in!
Print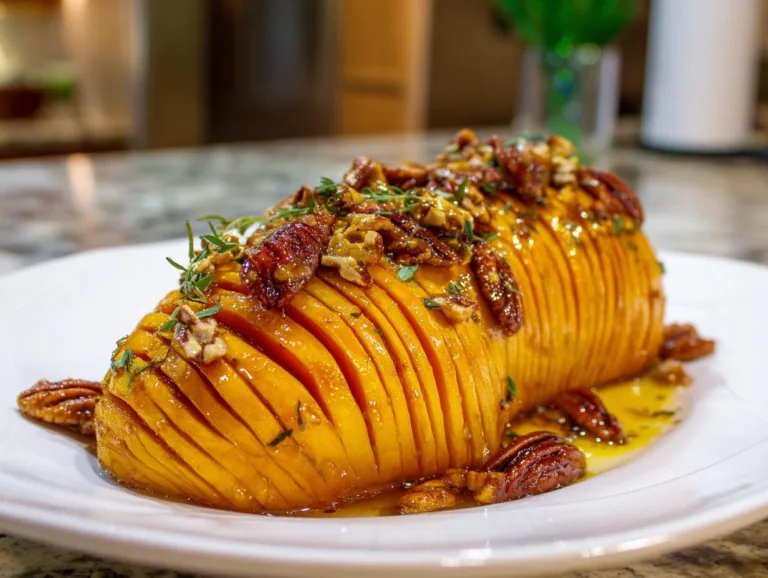
Honey Glazed Hasselback Butternut Squash: Show Stealer
A delicious and visually appealing honey-glazed Hasselback butternut squash with a sweet and savory flavor.
- Total Time: 1 hour 10 minutes
- Yield: 4 servings 1x
Ingredients
- 1 medium butternut squash, about 1kg (2.2lb)
- 1/4 cup unpasteurized honey (use pure maple syrup to keep vegan)
- 2 tbsp extra-virgin olive oil
- 1 tbsp Dijon mustard
- 1 tbsp finely chopped fresh sage leaves
- 1 tsp finely chopped fresh thyme
- 1 tsp salt
- 1/2 tsp ground black pepper
- 3–4 tbsp chopped pecans
Instructions
- Preheat your oven to 425°F and place a rack in the top third position.
- Cut the butternut squash in half lengthwise, scoop out the seeds and pulp, and peel the skin completely.
- Place both squash halves cut side down on a roasting pan and bake for 20 minutes. Let cool for 5 minutes.
- Mix honey, olive oil, Dijon mustard, chopped herbs, salt, and pepper in a small bowl.
- Slice the squash thinly without cutting all the way through, using wooden spoon handles as guards.
- Brush 1/3 of the honey mixture over the squash, add 1/4 cup water to the pan, and bake for 15 minutes.
- Check the pan to prevent burning and add more water if needed.
- Remove squash, brush with more glaze and pan juices, add another 1/4 cup water, and bake for 15 minutes.
- Mix chopped pecans with remaining glaze, spoon over squash, add 1/4 cup water, and bake for 5 more minutes.
- Remove from oven, spoon pan juices over squash, sprinkle with fresh herbs and salt, and serve.
Notes
- Use pure maple syrup for a vegan version.
- Keep an eye on the pan to avoid burning the glaze.
- Adjust seasoning to taste.
- Prep Time: 15 minutes
- Cook Time: 55 minutes
- Category: Side Dish
- Method: Roasting
- Cuisine: American
- Diet: Vegetarian
Nutrition
- Serving Size: 1/4 squash
- Calories: 220
- Sugar: 15g
- Sodium: 590mg
- Fat: 10g
- Saturated Fat: 1.5g
- Unsaturated Fat: 7g
- Trans Fat: 0g
- Carbohydrates: 35g
- Fiber: 5g
- Protein: 2g
- Cholesterol: 0mg
Tips for Perfect Honey Glazed Hasselback Butternut Squash
After making this recipe more times than I can count (and surviving a few kitchen disasters along the way!), I’ve picked up some foolproof tricks that’ll guarantee your Honey Glazed Hasselback Butternut Squash turns out spectacular every single time:
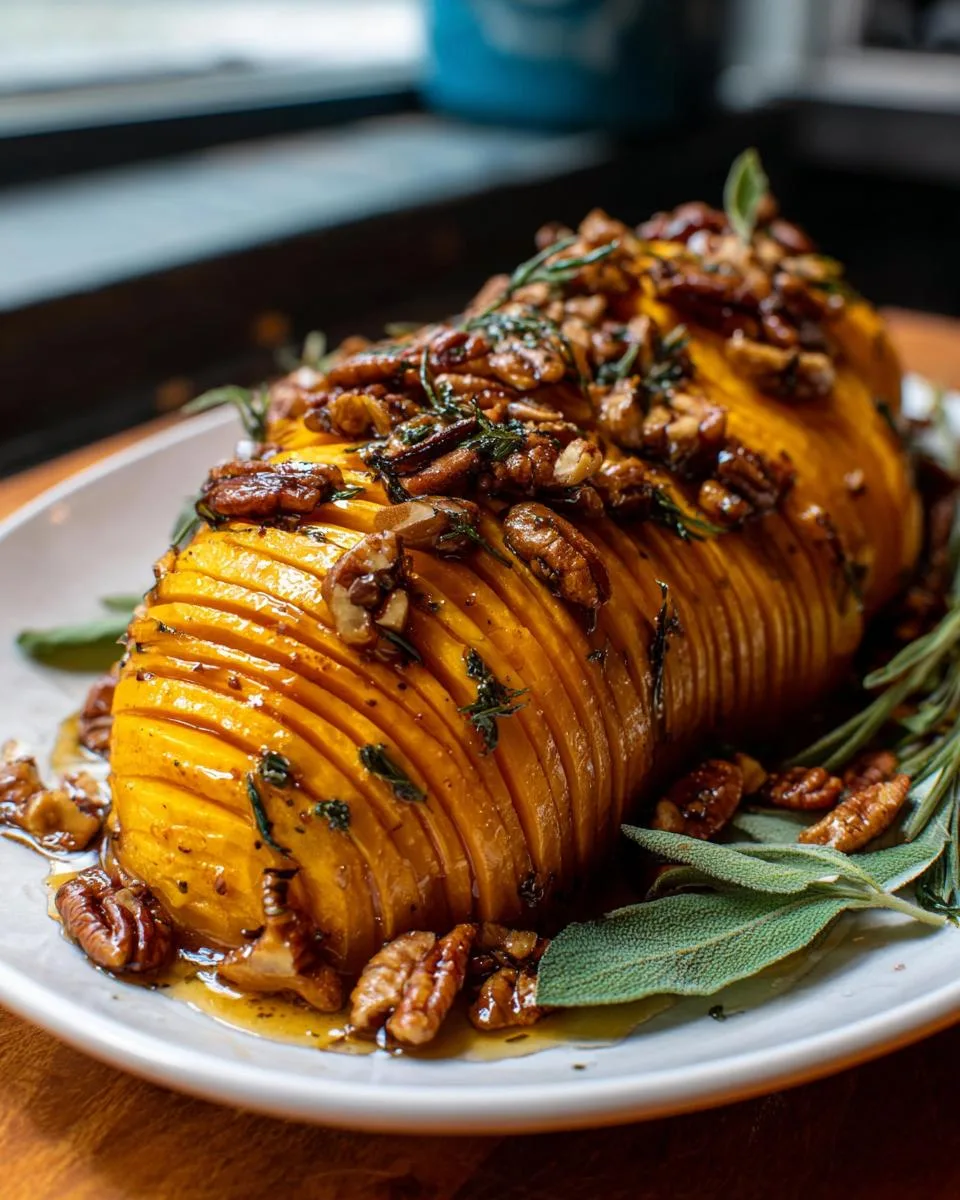
- Oven vigilance is key – Every oven lies a little! Mine runs hot, so I start checking at the 12-minute mark during each baking stage. If those edges are browning too fast, just tent loosely with foil. And don’t skip adding that water to the pan – it’s the difference between caramelized and charcoalized!
- Taste your glaze as you go – Honey sweetness can vary wildly depending on the season and brand. I always adjust with an extra pinch of salt if it’s too sweet, or a tiny drizzle more honey if the mustard is overpowering. Your taste buds know best!
- Fresh herbs make all the difference – I know it’s tempting to grab that dried sage from the back of your spice cabinet, but resist! Fresh herbs give that vibrant, almost floral note that dried just can’t match. No fresh thyme? Rosemary works beautifully too in a pinch.
- The squash matters more than you think – Look for one with a long, straight neck – it makes for prettier, more even slices. And if your squash feels light for its size? It’ll be dry inside. You want that dense, heavy feel that promises sweet, moist flesh.
One last tip from my decades of cooking – don’t panic if your slices aren’t perfectly even! My first attempt looked like a toddler went at it with a butter knife, but you know what? It still disappeared faster than cookies at a bake sale. The flavor’s what counts, and this recipe delivers every time.
Variations & Serving Suggestions
Now that you’ve mastered my classic Honey Glazed Hasselback Butternut Squash, let’s talk about how you can make it your own! Over the years, I’ve played with all sorts of twists – some became family favorites, others… well, let’s just say they taught me what not to do again. Here are my tried-and-true variations and perfect pairings:
- Vegan version – Simply swap the honey for pure maple syrup (the real stuff, not pancake syrup!). My granddaughter’s vegan roommate couldn’t believe it wasn’t honey – the maple caramelizes beautifully and gives that same glossy finish.
- Spicy kick – Add 1/2 teaspoon chili flakes or a pinch of cayenne to the glaze if you like things with a little heat. My son-in-law loves it this way – says it “wakes up” the sweetness perfectly.
- Herb variations – No sage? Rosemary makes a wonderful substitute. In summer, I sometimes use fresh marjoram for a lighter, floral note. Just steer clear of strong herbs like oregano unless you want your squash tasting like pizza!
- Nut swaps – While pecans are my go-to, walnuts or even pistachios work great too. For nut-free, try toasted pumpkin seeds – they give that same satisfying crunch.
As for serving? Oh honey, this squash plays well with so many dishes! It’s been the star of my Thanksgiving table for fifteen years running, but here’s how I love to serve it:
- With roasted meats – The sweetness balances perfectly with savory turkey, chicken, or even a glazed ham. Last Christmas, I served it with a maple-mustard glazed pork loin that had everyone raving.
- Over grains – Leftovers (ha! as if you’ll have any) are divine tossed with warm quinoa or farro. Drizzle with pan juices and some crumbled goat cheese – instant fancy lunch!
- In salads – Let cooled slices join a bed of bitter greens with some blue cheese and toasted walnuts. The contrast is incredible – my bridge club still talks about that salad.
- As a vegetarian main – Serve a whole half over creamy polenta for a satisfying meatless meal. Add some sautéed mushrooms if you’re feeling fancy!
The beauty of this recipe is how it adapts to any occasion – from Tuesday night dinner to your fanciest holiday spread. Just last week, my neighbor Janice used the basic technique on acorn squash and said it was a hit at her book club. That’s the joy of cooking – take something good and make it your own!
Storage & Reheating
Now, I know the chances of having leftovers are slim (this Honey Glazed Hasselback Butternut Squash tends to disappear fast at my house!), but just in case you do, here’s how to keep it tasting fresh and delicious:
- Airtight is the way to go – Let the squash cool completely, then tuck it into an airtight container with any extra pan juices. It’ll keep beautifully in the fridge for up to 3 days. I’ve tried pushing it to 4 days once – trust me, the texture suffers!
- Reheating magic – My favorite method is in a 350°F oven for about 10-15 minutes until warmed through. Cover loosely with foil to prevent drying out. Need it faster? Microwave in 30-second bursts works in a pinch, though the slices won’t stay quite as crisp.
- Reviving the crunch – If those pecans have gone soft, a quick broil for 1-2 minutes (watch closely!) brings back their toasty goodness. I sometimes sprinkle on a few fresh chopped nuts right before serving too.
- Freezer tips – While you can freeze it, the texture changes quite a bit upon thawing. If you must, freeze slices on a tray first, then transfer to bags. Reheat straight from frozen in a 375°F oven until hot – about 20 minutes.
One last tip from Grandma Jo – those leftover pan juices are liquid gold! Strain and save them in a jar in the fridge. I’ve used them to glaze carrots the next day, whisked them into vinaigrettes, or even drizzled over roasted sweet potatoes. Waste not, want not, as my mother always said!
Nutritional Information
Now, I’m no nutritionist – just a grandma who believes good food feeds both body and soul – but here’s what I know about my Honey Glazed Hasselback Butternut Squash. These numbers are estimates since ingredients vary (that honey you buy at the farmers’ market might be sweeter than mine, and lord knows my “heaping” tablespoon measurements aren’t exactly scientific!). But for those keeping track:
- Serving Size: About 1/4 of a squash half (trust me, you’ll want more!)
- Calories: Around 220 per serving
- Sugar: 15g (mostly from that beautiful natural honey and the squash itself)
- Sodium: 590mg (that salt helps balance the sweetness perfectly)
- Fat: 10g (the good kind from olive oil and pecans!)
- Carbohydrates: 35g
- Fiber: 5g (thank you, butternut squash!)
- Protein: 2g
Remember, these numbers dance around depending on your exact ingredients and how generous you are with that glaze (I won’t judge if you sneak an extra brush or two!). What matters most is that you’re eating real, wholesome food made with love – and that’s nutrition you can’t measure on any label.
Frequently Asked Questions
After sharing this Honey Glazed Hasselback Butternut Squash recipe with friends and family for years, I’ve heard all the questions – and made all the mistakes so you don’t have to! Here are the answers to what everyone wants to know:
Can I use other types of squash for this recipe?
Absolutely! While butternut is my favorite for its sweet flavor and long slices, acorn squash works beautifully too. Just cut it into rings instead of halves. Delicata squash is another great option – no need to peel it, and those pretty scalloped edges make for stunning presentation. The only one I’d avoid is spaghetti squash – it just doesn’t hold up the same way.
How do I prevent the glaze from burning?
Oh honey, I learned this the hard way my first time! Three tricks: First, always add that 1/4 cup water to the pan before each bake – it creates steam. Second, keep that oven rack in the top third position. And third, check every 10 minutes – if the edges are darkening too fast, just tent loosely with foil. Burnt honey smells like regret, trust me!
Can I make this ahead of time?
You sure can! Here’s my method: Roast and slice the squash the day before, then refrigerate. Make the glaze separately. About an hour before serving, let the squash come to room temp, then proceed with glazing and final baking. The texture actually improves after resting! Just don’t add the pecans until the last 5 minutes – nobody likes soggy nuts.
My squash slices keep breaking – help!
Been there! Two solutions: First, make sure you’re not over-roasting during that initial 20-minute bake – it should be tender but still firm. Second, try using two wooden spoons with the handles removed as guides – place them alongside the squash while slicing to prevent cutting all the way through. And remember – even if it’s not picture-perfect, it’ll still taste amazing!
Tag me @GoodOlRecipes if you try this – I’d love to see your beautiful creations! Nothing makes this old grandma happier than seeing new generations enjoy these recipes. You can also find more delicious recipes on our recipe page.
For More recipes, Follow me on Facebook!






