
Oh, do I ever have a Halloween treat that’ll make your party the talk of the neighborhood! These jalapeño popper mummies have been my go-to spooky snack ever since my grandkids declared them “the coolest food ever” at our family Halloween bash ten years ago. Now, they won’t let me host October gatherings without them.

Table of Contents
Table of Contents
What makes these little mummies so special? Well, they combine all the creamy, spicy goodness of classic jalapeño poppers with the fun of Halloween – and they’re so simple even my 8-year-old granddaughter can help make them (though she mostly just eats the cheese filling when I’m not looking). After forty years of cooking for family gatherings, I can tell you these disappear faster than ghosts at sunrise!
The magic happens when you wrap those cheese-stuffed peppers in crescent dough “bandages,” leaving just enough space for cute little candy eyes to peek through. They bake up golden and crisp while the filling gets all melty and delicious. Trust me, you’ll want to make a double batch – half for your guests, and half to sneak when nobody’s watching!
Ingredients for Jalapeño Popper Mummies
Now, let me walk you through exactly what you’ll need to make these adorable little mummies. I’ve learned over the years that having everything prepped and measured makes the whole process smoother – especially when you’ve got excited kids “helping” in the kitchen!

- 8 oz cream cheese, softened – Leave it out for about 30 minutes first. Trying to mix cold cream cheese is like wrestling with a stubborn mummy!
- 8 oz Monterey Jack cheese, shredded – I always shred my own – the pre-shredded stuff just doesn’t melt as nicely.
- ½ tsp garlic powder – This little bit adds just the right savory note.
- ½ tsp onion powder – My secret for that extra flavor boost.
- ¼ tsp salt – Just enough to make all the flavors pop.
- ¼ tsp black pepper – Freshly ground if you’ve got it!
- 10 jalapeños, sliced in half lengthwise, seeds removed – Wear gloves for this part – I learned that the hard way one year!
- 12 oz Pillsbury crescent rolls – The refrigerated dough works perfectly for our mummy wrappings.
- 1 egg, lightly beaten with 1 Tbsp water (for egg wash) – This gives them that beautiful golden glow.
- 40 small candy eyeballs or sliced olives – The kids love decorating with the candy eyes, but olives work great too if you want something more natural.
A quick tip from someone who’s made these more times than I can count – measure everything out before you start. There’s nothing worse than getting elbow-deep in cheese filling only to realize you’re out of crescent dough! Trust me, I speak from experience.
Ingredient Substitutions and Notes
Now, let’s talk about making these jalapeño popper mummies your own! Over the years, I’ve tried all sorts of variations when I’ve been in a pinch or cooking for friends with different tastes. Here’s what I’ve learned works (and what doesn’t) when you need to switch things up.
Cheese Choices for Every Taste
If Monterey Jack isn’t your thing or you’re out of it, don’t worry! Sharp cheddar makes a fantastic substitute – it gives a nice tangy kick that pairs beautifully with the jalapeños. For my vegan granddaughter, we use a mix of vegan cream cheese and shredded vegan mozzarella. It’s not exactly the same, but when you’re wrapping it in dough and adding those cute eyes, nobody seems to mind the difference!
Spice Level Adjustments
Here’s the truth – jalapeños can be sneaky little things! Some batches are mild as can be, while others will have your eyes watering. If you’re serving kids or spice-sensitive folks, look for larger, smooth-skinned peppers – they tend to be milder. Want to turn up the heat? Leave a few seeds in some of the halves (mark them with a toothpick so you know which is which!). My son-in-law loves when I do this – calls them “zombie mummies with a bite!”
Creative Eye Alternatives
While candy eyeballs are fun and easy, I’ve gotten creative over the years when I’ve been in a pinch. Sliced black olives work wonderfully (just pat them dry first). For a Halloween party last year, I used tiny dots of cream cheese with black sesame seeds – looked just like little mummy eyes peeking out! And if you’re really in a hurry, a dot of mustard or ketchup from a squeeze bottle works in a pinch (though the kids might complain it’s not as spooky).
One last note – if you can’t find crescent rolls, puff pastry sheets work beautifully too. Just roll them out slightly thinner before cutting into strips. The texture will be a bit flakier, but oh-so-delicious! Whatever substitutions you make, just remember – the most important ingredient is the fun you have making them. After all, isn’t that what Halloween cooking is all about?
How to Make Jalapeño Popper Mummies
Now comes the fun part – turning all those ingredients into the cutest little mummies you ever did see! I’ve made these so many times I could probably do it in my sleep, but I’ll walk you through each step just like I did with my grandkids. Before you know it, you’ll have a tray full of spooky, cheesy goodness ready to wow your Halloween guests!
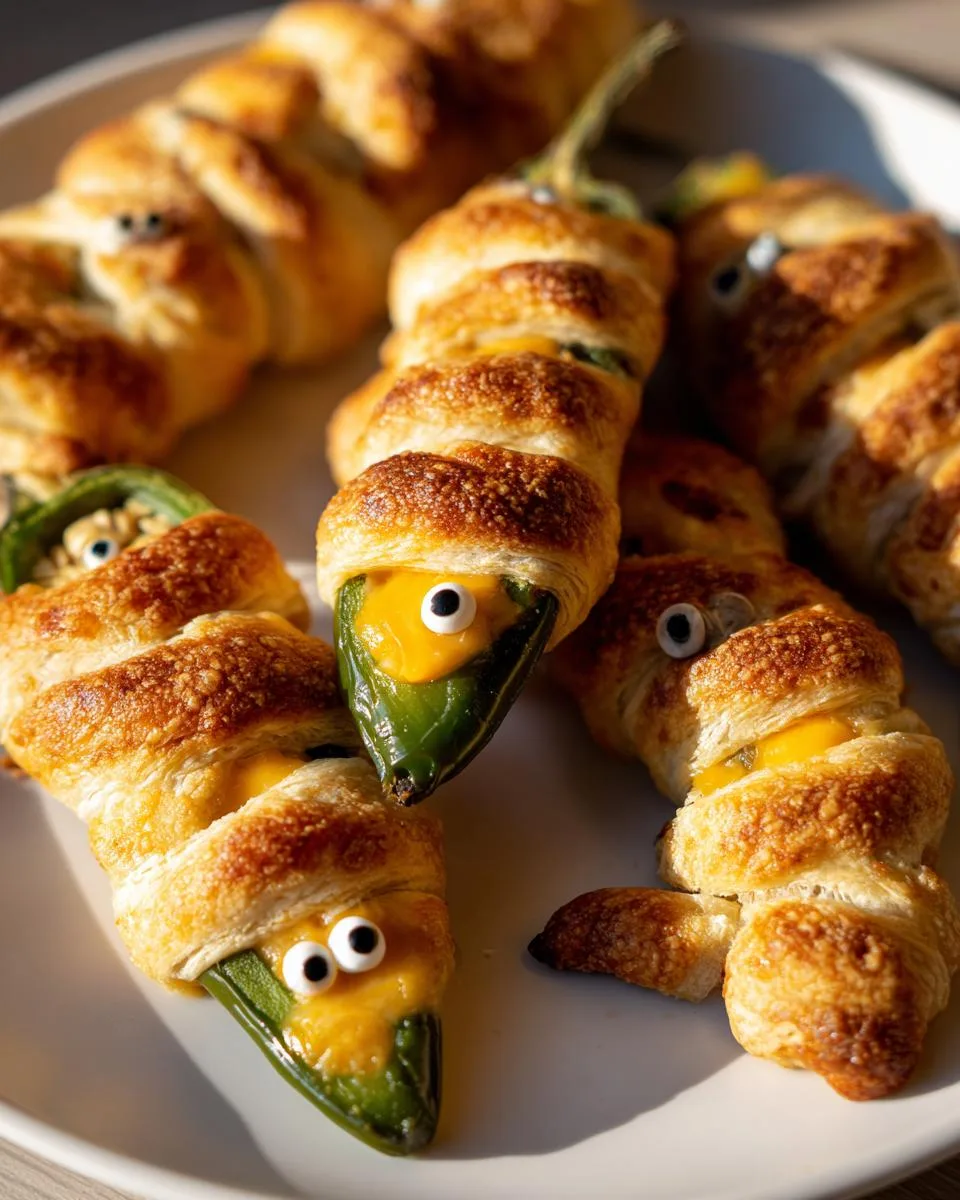
Preparing the Cheese Filling
First things first – let’s make that irresistible cheesy filling. In a medium bowl, mix together the softened cream cheese and shredded Monterey Jack until they’re completely combined. You want this smooth as a witch’s spell! Then sprinkle in your garlic powder, onion powder, salt, and pepper. Mix it all up until every spice is evenly distributed.
Here’s my little trick – taste a tiny bit on your finger (just a smidge!) to check the seasoning. Sometimes I’ll add an extra pinch of garlic if I’m feeling fancy. The filling should be creamy enough to scoop easily but thick enough to stay put when you stuff those jalapeños. If it seems too stiff, let it sit for another 10 minutes to soften up more.
Assembling the Mummies
Now for the creative part! Grab your prepped jalapeño halves and spoon about a tablespoon of the cheese mixture into each one. Don’t overfill them – you want just enough so the cheese peeks out when wrapped but doesn’t ooze everywhere during baking.
Time to make those mummy wrappings! Unroll your crescent dough and press two triangles together to form rectangles (the perforations should disappear). Then, using a pizza cutter or sharp knife, slice each rectangle into about 10 thin strips. These will be your “bandages!” Carefully wrap two strips around each stuffed jalapeño, crisscrossing them slightly but leaving a little window where the eyes will go later. It’s okay if they look messy – mummies aren’t perfect!
Baking and Finishing Touches
Almost there! Arrange your little mummies on the prepared baking sheet about an inch apart. Give each one a light brush with the egg wash – this is what gives them that beautiful golden glow in the oven. Pop them in at 400°F and bake for about 12 minutes. You’ll know they’re done when the dough turns a perfect golden brown and the cheese starts bubbling slightly at the edges.
Now for the magic – as soon as they come out of the oven, press two candy eyeballs (or olive slices) into each mummy’s “face” while they’re still warm. The heat helps them stick just right. Let them cool for about 5 minutes before serving – I know it’s hard to wait, but that cheesy filling is like lava when it first comes out!
And there you have it – the most adorable, delicious jalapeño popper mummies that’ll have everyone at your party howling for more!
Print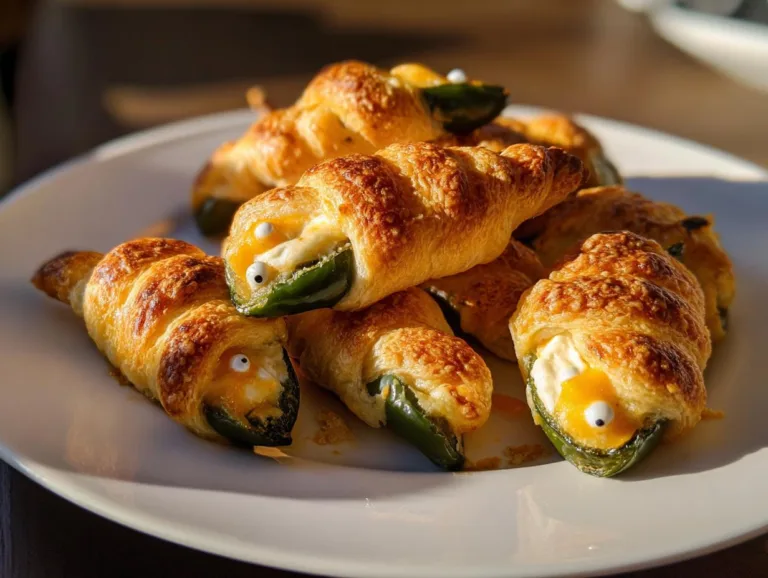
Scary Good Jalapeño Popper Mummies in 30 Minutes
Spooky and delicious jalapeño popper mummies stuffed with cheese and wrapped in crescent dough.
- Total Time: 32 minutes
- Yield: 20 pieces 1x
Ingredients
- 8 oz cream cheese, softened
- 8 oz Monterey jack cheese, shredded
- ½ tsp garlic powder
- ½ tsp onion powder
- ¼ tsp salt
- ¼ tsp black pepper
- 10 jalapeños, sliced in half lengthwise, seeds removed
- 12 oz Pillsbury crescent rolls
- 1 egg, lightly beaten with 1 Tbsp water (for egg wash)
- 40 small candy eyeballs or sliced olives
Instructions
- Preheat the oven to 400°F. Line a large baking tray with foil and lightly spray with olive oil cooking spray.
- Slice jalapeños lengthwise and remove the seeds.
- Mix cream cheese, Monterey Jack cheese, garlic powder, onion powder, salt, and black pepper in a bowl.
- Spoon cheese mixture into jalapeño halves.
- Unroll crescent rolls and divide into 4 rectangles by pressing together 2 triangles each. Slice each rectangle into 10 strips.
- Wrap each cheese-stuffed jalapeño with 2 dough strips, leaving room for eyes.
- Arrange on baking tray and brush with egg wash.
- Bake for 12 minutes or until golden.
- Press 2 candy eyeballs into each mummy after baking.
- Cool slightly and serve warm.
Notes
- Use sliced olives instead of candy eyeballs if preferred.
- Prep Time: 20 minutes
- Cook Time: 12 minutes
- Category: Appetizer
- Method: Baking
- Cuisine: American
- Diet: Vegetarian
Nutrition
- Serving Size: 1 piece
- Calories: 120
- Sugar: 1g
- Sodium: 210mg
- Fat: 8g
- Saturated Fat: 4g
- Unsaturated Fat: 3g
- Trans Fat: 0g
- Carbohydrates: 9g
- Fiber: 0.5g
- Protein: 3g
- Cholesterol: 25mg
Tips for Perfect Jalapeño Popper Mummies
After making these spooky little guys for years, I’ve picked up some tricks that’ll make your jalapeño popper mummies come out looking and tasting their best every single time. Here’s what I’ve learned:
- Dry those peppers! After removing the seeds, gently pat the jalapeño halves with a paper towel. Any extra moisture can make the cheese filling slide right out – and nobody wants a naked mummy!
- Dough strip thickness matters. When cutting your crescent dough, aim for strips about ¼ inch wide. Too thin and they’ll tear; too thick and they won’t wrap nicely. I like using my pizza cutter – it makes quick work of the job.
- Oven temperature is key. These little guys bake fast, so make sure your oven is fully preheated to 400°F before they go in. I keep an oven thermometer in mine because those dials can be unreliable after years of use!
- Give them space to breathe. Arrange your mummies at least an inch apart on the baking sheet. Crowding leads to steamed dough instead of crispy golden bandages – and crispy is what we want!
- Eye timing is everything. Add the candy eyeballs right when the mummies come out of the oven. If you wait too long, they won’t stick properly. If they go in before baking? Well… let’s just say melted eyeballs aren’t very spooky!
One last tip from my kitchen to yours – if you’re serving these at a party, make a few extras just for the cook. I can’t tell you how many times I’ve “tested” one for quality control and ended up eating three before they even hit the serving platter!
Serving and Storing Jalapeño Popper Mummies
Now, let’s talk about the best ways to serve these little mummy delights – and how to keep any leftovers (if you’re lucky enough to have any!). Over the years, I’ve learned a few tricks to make them shine at parties and keep them tasting fresh.
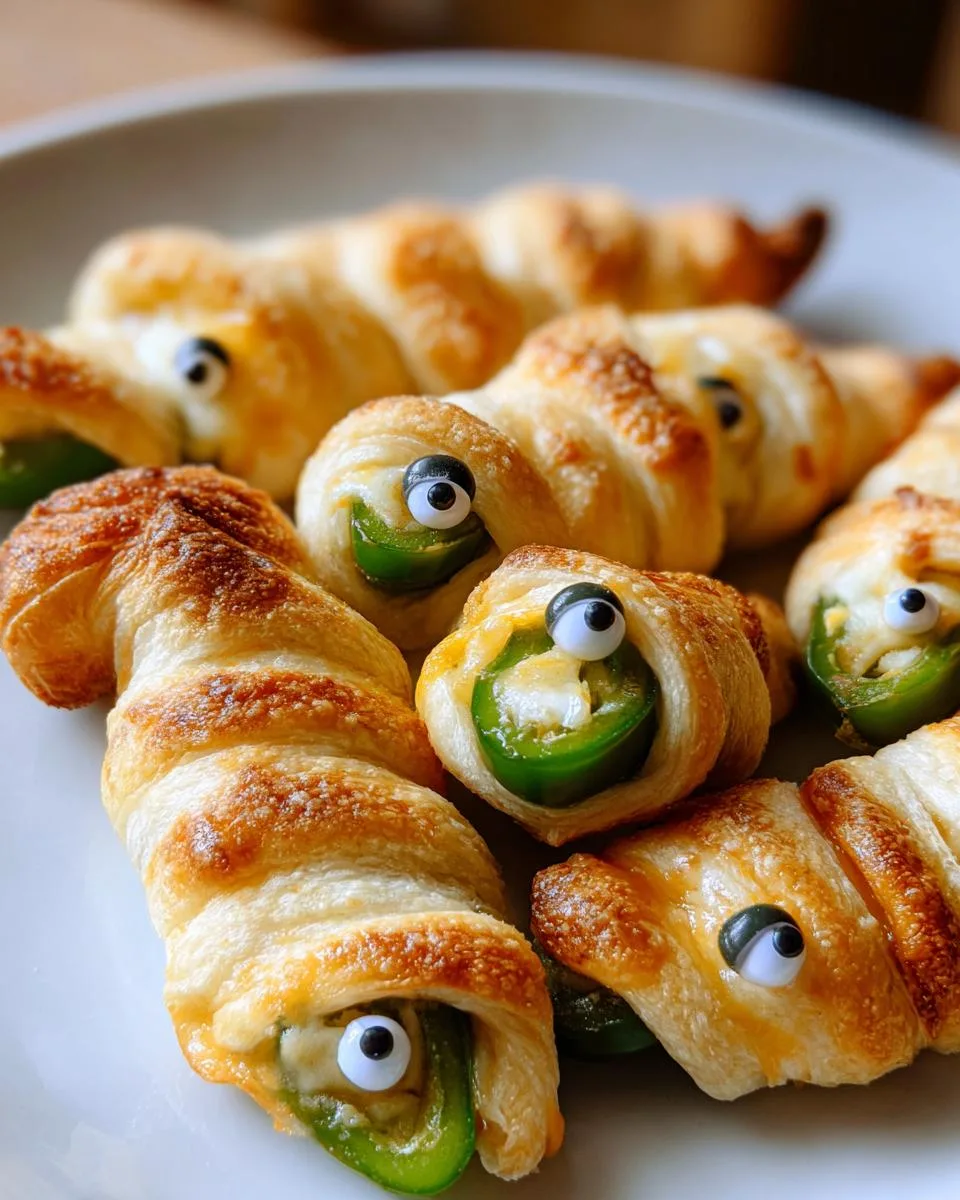
Serving Your Spooky Creations
These jalapeño popper mummies are absolute best served warm, when the cheese is still gooey and the crescent dough is crisp. I like to arrange them on a black serving platter with some fresh parsley “graveyard grass” for a fun Halloween touch. The kids get such a kick out of it!
For dipping sauces, you’ve got options:
- Cool ranch dressing – my grandkids’ favorite, it cuts the heat perfectly
- Marinara sauce – warmed up with a pinch of garlic powder
- Sour cream mixed with lime juice – my personal go-to
Just set out small bowls of each and let your guests dunk to their heart’s content!
Storing Leftovers (If You’re Lucky!)
If by some miracle you have leftovers (this has happened maybe twice in my life), here’s how to keep them tasting fresh:
- Let them cool completely, then pop them in an airtight container with parchment between layers
- They’ll keep in the fridge for about 3 days – any longer and the dough gets soggy
- Don’t freeze them – the texture just isn’t the same when thawed
Reheating for That Fresh-Baked Taste
To bring back that just-baked magic, I skip the microwave (it makes the dough rubbery) and use my toaster oven instead:
- Preheat to 350°F
- Arrange mummies on a baking sheet
- Heat for 5-7 minutes until warmed through
They won’t be quite as crisp as fresh-from-the-oven, but still delicious enough to satisfy those midnight mummy cravings!
One last serving tip from my Halloween playbook – make a double batch and keep half warm in the oven (about 200°F) as you serve the first round. That way when the first plate disappears (and it will!), you’ve got reinforcements ready to go. Trust me, your guests will thank you!
Jalapeño Popper Mummies Nutritional Information
Now, let’s talk about what’s inside these tasty little mummies! I know, I know – when something tastes this good, who cares about nutrition? But since my daughter started asking me for the numbers (she’s become quite the health nut lately), I figured I’d share what I’ve learned about these jalapeño popper mummies.
Each piece comes out to about:
- 120 calories – perfect for popping a few without guilt
- 8g fat (4g saturated) – that’s all that delicious cheese and buttery dough
- 9g carbs – mostly from the crescent roll “bandages”
- 3g protein – a little protein boost from the cheeses
- 1g sugar – just enough to balance the spice
- 210mg sodium – about what you’d expect from savory snacks like this
Now, here’s my grandma wisdom for you – these numbers can wiggle around a bit depending on the brands you use. I’ve noticed that different cream cheeses can change the fat content, and some crescent roll brands have slightly more or less carbs. The jalapeños themselves barely add any calories – they’re just there for personality and a little kick!
If you’re watching certain nutrients, here are my tricks for lightening them up:
- Use reduced-fat cream cheese (but not fat-free – it doesn’t melt right)
- Try low-fat crescent roll dough – it works nearly as well
- Go easy on the egg wash – just a light brush does the trick
But between you and me? Halloween comes once a year – sometimes you just gotta enjoy the full-fat, full-flavor version! My philosophy is everything in moderation… except maybe these mummies at a party. Then all bets are off!
Frequently Asked Questions
Over the years, I’ve gotten all sorts of questions about these jalapeño popper mummies from family, friends, and even neighbors who’ve tasted them at our Halloween parties. Here are the answers to the ones I hear most often – straight from my kitchen to yours!
Can I make these ahead of time?
You sure can – with a little planning! I often assemble the mummies up to the baking step the night before, then cover them tightly with plastic wrap and refrigerate. Just give them an extra minute or two in the oven since they’ll be going in cold. The one thing I don’t recommend is adding the eyeballs until right before serving – they can get soggy or lose their stick if left too long.
How can I make them less spicy for kids?
Oh honey, I’ve been there – nothing worse than a crying grandkid with a spicy mouth! Here’s my trick: after removing the seeds (always wear gloves!), soak the jalapeño halves in cold water for about 15 minutes. This pulls out some of the heat. You can also mix in a tablespoon of honey with the cheese filling – the sweetness balances the spice beautifully. And of course, choose the biggest, smoothest jalapeños you can find – they’re usually milder.
Can I use puff pastry instead of crescent rolls?
Absolutely! In fact, I’ve done this many times when crescent rolls were sold out (apparently everyone makes these for Halloween!). Just roll the puff pastry out slightly thinner before cutting into strips – about 1/8 inch thick. The texture will be more flaky than the crescent version, but just as delicious. One bonus – puff pastry tends to hold its shape better when wrapping those tricky curved peppers!
Are olives better than candy eyeballs?
Well now, that depends on who you ask! The kids in my life would riot if I used anything but candy eyeballs – they love the silly look. But for adult parties or if you’re avoiding food coloring, sliced black olives work wonderfully (just pat them dry first). My book club ladies actually prefer the olive version – says it makes them feel slightly more sophisticated while still being festive. Me? I say use whatever makes your mummies happy!
Can I freeze the unbaked mummies?
I don’t recommend it, sugar. The dough just doesn’t rise as nicely after freezing, and the jalapeños can get watery when thawed. But here’s what does work – make the cheese filling ahead and freeze that (up to a month!), then just thaw overnight in the fridge when you’re ready to assemble. Saves time while keeping that fresh-baked taste we all love!
Have more questions? Just ask – I’ve probably tried it at least once in my decades of Halloween cooking! Nothing makes me happier than helping others create these fun treats for their own family traditions.
Share Your Spooky Creations
Nothing warms my heart more than seeing the creative twists you all come up with on these jalapeño popper mummies! Last year, my neighbor Linda added black sesame seeds to her dough strips for “dirty mummy bandages,” and my grandson’s class made mini versions with sweet peppers for their Halloween party – pure genius!
I’d love to see what spooky magic you create in your kitchen. Does your little one insist on giving each mummy a different facial expression? Did you experiment with colored dough for purple or green mummies? Maybe you discovered the perfect dipping sauce combo that I haven’t tried yet – I’m always looking for new ideas!
Over the years, I’ve pinned so many photos from readers on my bulletin board – it’s like watching our little mummy family grow. From elegant olive-eyed versions at fancy parties to messy-but-lovable first attempts by budding young cooks, every creation tells its own delicious story. So grab your camera when those cheesy masterpieces come out of the oven – before they disappear!
Who knows – your jalapeño popper mummy might just inspire someone else’s new Halloween tradition. After all, that’s how the best recipes live on, isn’t it? From one kitchen to another, sharing the fun and the flavor. Now if you’ll excuse me, I think I need to go test batch #47 of the season… purely for quality control, of course!
For More recipes, Follow me on Facebook!






