
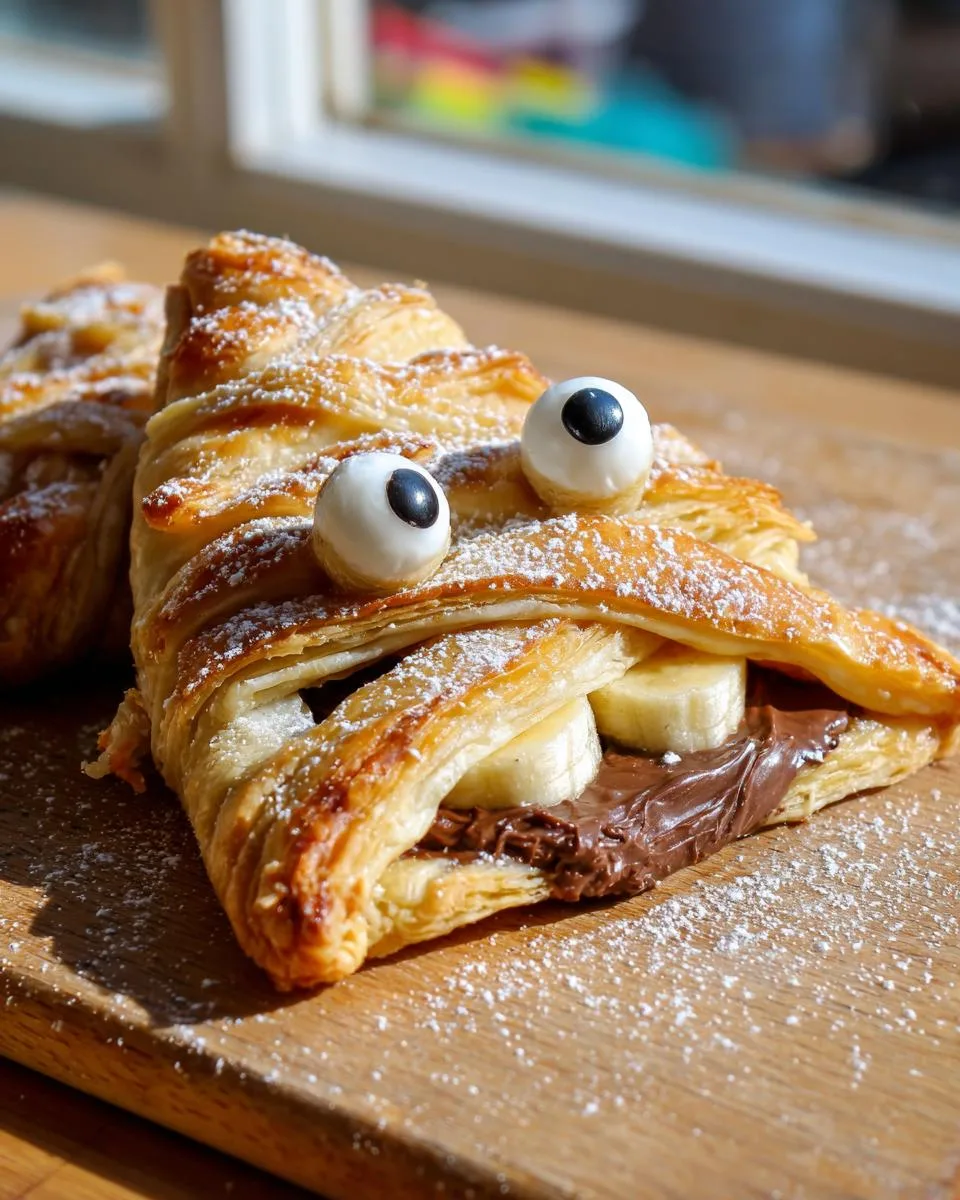
Oh, Halloween baking—the one time of year when it’s totally okay to play with your food! I’m Grandma Jo, and for decades, my kitchen has been filled with the smell of comforting treats and the sound of grandkids giggling over silly desserts. These Nutella Mummy Hand Pies? They’re our newest tradition—fun, flaky, and secretly vegan and gluten-free. I love how the puff pastry wraps around that gooey Nutella and banana filling like little edible bandages, with those chocolate eyes peeking out. Trust me, even picky eaters go wild for these! Whether you’re hosting a spooky party or just want a sweet project with the kids, these hand pies bring all the Halloween magic without any fuss.

Table of Contents
Table of Contents
Why You’ll Love Nutella Mummy Hand Pies
These little mummies aren’t just adorable—they’re downright irresistible! Here’s why they’ve become my go-to Halloween treat:
- So easy even the kids can help – No fancy skills needed, just rolling, filling, and wrapping
- Secretly vegan & gluten-free – Nobody will guess these treats accommodate dietary needs
- Perfect party food – Portable, mess-free, and guaranteed to disappear fast
- Endless fun decorating – Let everyone give their mummy a unique personality
- That warm Nutella-banana combo – Like a cozy hug in every flaky bite
Honestly, I’ve seen grown adults giggle while arranging the pastry strips—they’re that much fun to make!
Ingredients for Nutella Mummy Hand Pies
Gather these simple ingredients – quality matters when you want that perfect flaky texture and rich flavor. I always use:

- 2 sheets ready-roll puff pastry (make sure it’s vegan & gluten-free – I love Jus-Rol’s version)
- 6 tablespoons vegan Nutella (or homemade hazelnut spread if you’re feeling fancy)
- 2 medium bananas, sliced into thin rounds (look for ones with a few brown spots – they’re sweeter!)
- 3 tablespoons dairy-free milk (almond or oat milk works great for brushing)
- 2 tablespoons caster sugar – that fine texture helps it stick to the pastry
- 1 packet dairy-free white chocolate buttons (for those adorable googly eyes)
- Icing sugar for dusting (just a light snowfall makes them extra spooky)
Pro tip: Keep everything chilled until you’re ready to use it – warm pastry is a nightmare to work with!
Equipment You’ll Need
Don’t worry—you probably have most of this in your kitchen already! Here’s what I grab when making my mummy pies:
- 2 baking trays lined with grease-proof paper (trust me, it saves so much scrubbing later)
- A rolling pin – even a wine bottle works in a pinch!
- Pastry brush (those silicone ones are my favorite—no bristles falling out)
- Piping bag or spoon for the Nutella (though I’ve been known to just use a zip-top bag with the corner snipped off)
- Wire rack for cooling (lets air circulate so they stay crispy)
See? Nothing fancy—just good ol’ basics that get the job done right.
How to Make Nutella Mummy Hand Pies
Alright, let’s bring these adorable mummies to life! I’ve made this recipe dozens of times with my grandkids, and we’ve got the process down to a fun, foolproof system. Just follow these steps, and you’ll have a tray of spooktacular treats in no time.
Preparing the Pastry
First things first – keep that pastry cold! I unroll my sheets directly onto the baking paper they come with, then use a rolling pin just to smooth out any wrinkles. Don’t go wild – we want about 1/8-inch thickness. Cut one and a half sheets into rectangles (roughly 4×2.5 inches), then slice the remaining half into thin strips for the mummy wrappings. Pop everything in the fridge for 5 minutes – this prevents the butter from melting too fast in the oven.
Filling and Assembling
Now the fun begins! I pipe or spoon about a tablespoon of Nutella in the center of each rectangle, leaving a good half-inch border. Then comes a layer of banana slices – not too thick, or they’ll make the pies soggy. Brush the edges with dairy-free milk (this is our “glue”), then crisscross those pastry strips over the filling like real mummy bandages. Press lightly to seal – no need to be perfect, the messy look adds character! A final milk brush and sugar sprinkle gives them that golden glow.
Baking and Decorating
Bake one tray at a time at 180°C fan for 15-18 minutes until golden and puffed. Resist peeking too often – that pastry needs steady heat to rise properly! Let them cool slightly on the tray (they’re fragile when hot), then transfer to a wire rack. While they cool, make googly eyes by cutting white chocolate buttons in half. Once completely cool, pipe tiny Nutella dots to attach them. A light dusting of icing sugar gives that “fresh from the tomb” look!
Print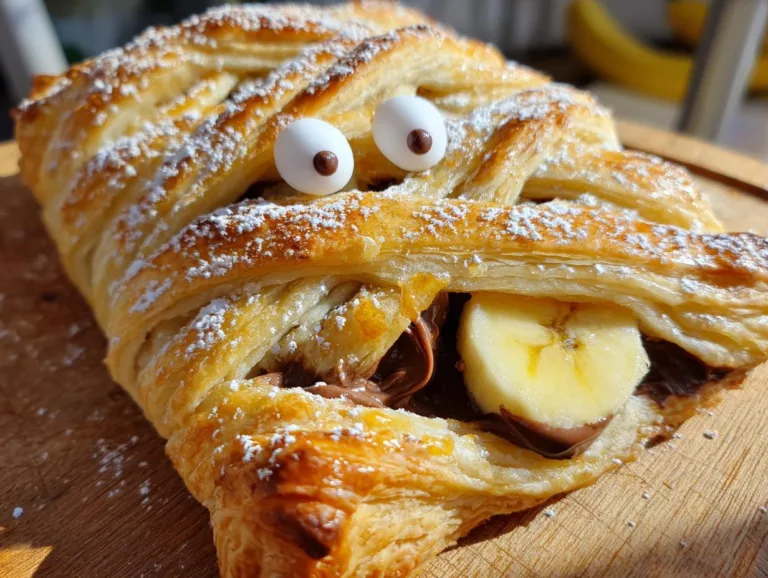
Easy Nutella Mummy Hand Pies: A Spooky 10-Minute Treat!
Nutella Mummy Hand Pies are fun and easy vegan and gluten-free treats perfect for Halloween or any festive occasion. These hand pies feature puff pastry filled with vegan Nutella and banana, topped with a mummy-like pastry strip design and googly eyes made from white chocolate.
- Total Time: 33 minutes
- Yield: 12 pies 1x
Ingredients
- 2 sheets of ready roll puff pastry (Vegan & gluten-free)
- 6 tablespoons of Vegan Nutella
- 2 medium-sized bananas
- 3 tablespoons of dairy-free milk (for the ‘egg wash’)
- 2 tablespoons of caster / granulated sugar
- Googly eyes
- 1 packet of dairy-free white chocolate buttons
- 2 tablespoons of icing sugar (dusting)
Instructions
- Pre-heat oven to 180°C fan and line 2 baking trays with grease-proof paper.
- Unroll the pastry sheets leaving them on the baking paper. Use a rolling pin to slightly flatten out any wrinkles.
- Cut one and a half pastry sheets into rectangles (approx. 4 inches by 2.5 inches). Cut the remaining half into thin strips. Roll out scraps for extra shapes.
- Refrigerate the pastry rectangles for 5 minutes.
- Pipe or spoon vegan Nutella into the center of each rectangle and top with banana slices.
- Brush dairy-free milk around the edges to help seal.
- Lay pastry strips over the filling in a zig-zag ‘mummy’ pattern, pressing them down lightly.
- Brush with dairy-free milk and sprinkle sugar for browning.
- Bake one tray at a time for 15-18 minutes until golden and flaky.
- Cool slightly on the tray, then transfer to a wire rack.
- Cut white chocolate buttons into smaller circles for eyes.
- Pipe Nutella dots to attach the eyes once the pies are completely cooled.
- Dust with icing sugar (optional) and serve at room temperature or warm.
Notes
- Do not overfill the pies to prevent leakage.
- Ensure the pies are fully cooled before adding chocolate eyes.
- Store leftovers in an airtight container for up to 2 days.
- Prep Time: 15 minutes
- Cook Time: 18 minutes
- Category: Dessert
- Method: Baking
- Cuisine: American
- Diet: Vegan
Nutrition
- Serving Size: 1 pie
- Calories: 180
- Sugar: 12g
- Sodium: 90mg
- Fat: 9g
- Saturated Fat: 3g
- Unsaturated Fat: 5g
- Trans Fat: 0g
- Carbohydrates: 22g
- Fiber: 1g
- Protein: 2g
- Cholesterol: 0mg
Tips for Perfect Nutella Mummy Hand Pies
After making dozens of these little mummies, I’ve picked up some tricks that guarantee success every time:
- Keep everything cold – Warm pastry stretches and tears. If your kitchen’s hot, work in batches and return dough to the fridge often.
- Less is more with filling – Just a tablespoon of Nutella and 2-3 banana slices prevents messy leaks.
- Wait for cool eyes – Attaching chocolate pieces too soon makes them melt into sad zombie eyes!
- Store like a pro – Layer cooled pies between parchment in an airtight container – they’ll stay crisp for 2 days (if they last that long!).
Trust me, these small steps make all the difference between good pies and grandkid-approved amazing pies!
Variations and Substitutions
Oh, the fun part—making these mummies your own! Here are some delicious twists we’ve tried over the years:
- Swap the Nutella – Strawberry jam or peanut butter make fabulous fillings (just skip the banana if using jam)
- Drizzle magic – Melted dairy-free chocolate zigzags add extra spooky flair
- Fruit fun – Thin apple slices or mashed berries work instead of bananas
- Cinnamon sugar – Sprinkle some on before baking for a cozy fall flavor
Really, anything goes—that’s the beauty of hand pies!
Serving and Storing Nutella Mummy Hand Pies
These mummy pies shine when served slightly warm—just enough to make that Nutella filling gloriously gooey! I usually pop cooled ones in the microwave for 10 seconds before serving. Store any leftovers (ha!) in an airtight container with parchment between layers—they’ll stay crisp for up to 2 days. Pro tip: The chocolate eyes might “wink” if stored in a warm spot, so keep ’em cool!
Nutritional Information
These numbers are per pie – but remember, darling, all nutritional values are estimates and depend on your specific ingredients. My grandkids never let me finish counting anyway!
Frequently Asked Questions
Over the years, I’ve gotten some great questions about these mummy pies—here are the ones that pop up most often:
Can I freeze Nutella Mummy Hand Pies?
Absolutely! Freeze them before baking for best results. Just assemble without the eyes, place on a tray to freeze solid, then transfer to a bag. When ready, bake straight from frozen—add 2-3 extra minutes. The chocolate eyes should always go on after thawing though, unless you want some seriously spooky melted faces!
Can I use regular Nutella if we’re not vegan?
Of course, darling! Regular Nutella works just fine—the recipe stays the same. Though I will say, that vegan version holds up beautifully against the heat. Either way, you’ll get that same ooey-gooey chocolate-hazelnut magic inside.
Help—my pies leaked everywhere!
Oh honey, we’ve all been there! Three tricks: 1) Don’t overfill—stick to 1 tablespoon Nutella max. 2) Leave a good half-inch border when sealing. 3) Chill the filled pies for 10 minutes before baking—cold pastry holds its shape better. And if some does leak? Call it “mummy ooze” and serve with pride!
Can I make these ahead of time?
You bet! The unbaked pies keep refrigerated for 8 hours (cover tightly). Or bake them fully, then refresh in a 160°C oven for 5 minutes before serving. Just add those adorable eyes at the last minute so they stay perky!
Final Thoughts
There you have it, sweetheart—my foolproof way to make Halloween magic happen in your kitchen! I’d love to see your mummy masterpieces—tag me @GrandmaJoRecipes so I can cheer you on. Now go wrap up some fun!
For More recipes, Follow me on Facebook!






