
There’s something magical about that first bite of tangy rhubarb bars in springtime – that perfect balance of sweet and tart that takes me right back to Grandma Jo’s kitchen. This Tangy Rhubarb Bars Recipe has been my go-to for decades, ever since I first tasted them at a church potluck in 1978. I begged the sweet old lady who made them for her secret, and after three batches of my own (and one minor kitchen disaster involving way too much lemon zest), I finally nailed it.

Table of Contents
Table of Contents
What makes these bars so special? That crisp, buttery crust hugging a layer of ruby-red rhubarb filling that practically sings with flavor. It’s the kind of dessert that makes neighbors suddenly remember they “just happened to be passing by” when they smell it baking. Whether you grew up with rhubarb patches in your backyard or you’re discovering this spring gem for the first time, these bars will become your new tradition. Trust me – after one bite, you’ll understand why I’ve been making this exact recipe for over forty years.
Why You’ll Love These Tangy Rhubarb Bars
Let me tell you why this recipe has been my secret weapon for every potluck and family reunion since disco was cool:
- The perfect sweet-tart balance: That first bite hits you with bright rhubarb zing, then melts into buttery sweetness. It’s like springtime exploded in your mouth!
- Foolproof crust magic: My chilled-butter trick makes the shortbread base so crisp you’ll hear it crack when you bite in. No soggy bottoms here!
- Wins over picky eaters: My grandson (who won’t touch veggies) devours these rhubarb bars. The ruby-red filling looks like candy, and that tart surprise keeps them coming back.
- Better the next day: The flavors deepen overnight – if you can resist eating the whole pan fresh from the oven. (I never can!)
Forty-three years later, I still get giddy watching people’s eyes light up after their first bite. That’s the magic of these tangy rhubarb bars!
Ingredients for Tangy Rhubarb Bars
Now let’s gather our ingredients – and I mean exactly these ingredients. I learned the hard way that substitutions can turn these from “divine” to “disaster” real quick!

For the Crust
This buttery foundation makes all the difference. Measure carefully:
- 1 1/2 cups all-purpose flour – spooned and leveled, not packed
- 1/2 cup (1 stick) chilled butter – straight from the fridge, cubed
- 1/4 cup powdered sugar – sifted if lumpy
See that “chilled” note? Warm butter makes greasy dough – trust me, I’ve ruined pans that way!
For the Filling
The star of our show needs these supporting players:
- 2 large eggs – room temperature beats smoother
- 1 1/2 cups granulated sugar – packed lightly
- 1/4 cup all-purpose flour – our thickening agent
- 1/4 teaspoon salt – just enough to balance the sweet
- 4 cups diced rhubarb – 1/2-inch pieces, red stalks preferred
Fun fact: That “4 cups diced” equals about 6 medium stalks. And yes, we want those ruby-red pieces – the greener stalks can be too tart!
How to Make Tangy Rhubarb Bars
Now comes the fun part – let’s turn these simple ingredients into magic! I’ll walk you through each step just like I did with my granddaughter last spring (minus the flour explosion we had – bless her enthusiastic little hands).
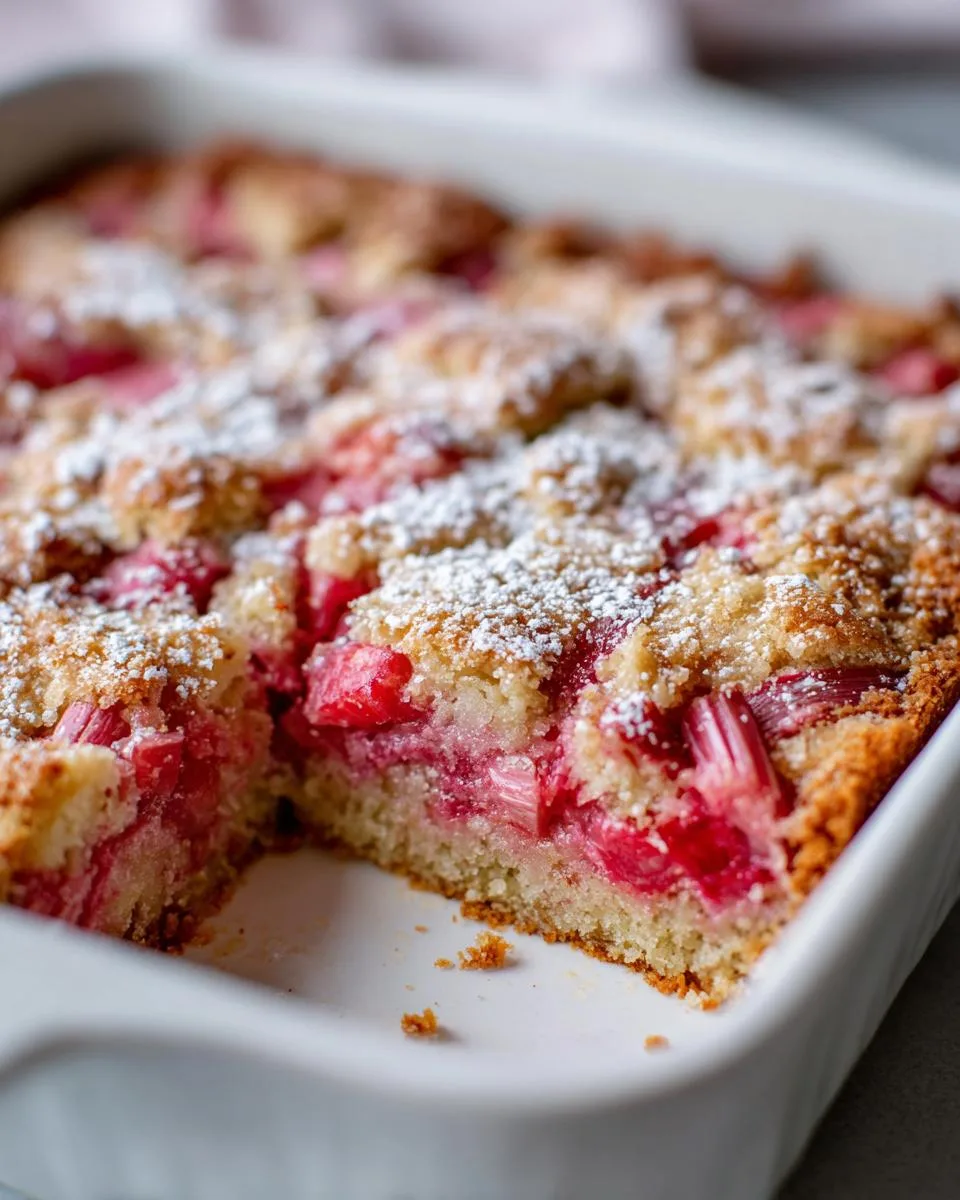
Preparing the Crust
First, preheat your oven to 350°F – no guessing here, use that oven thermometer! While it heats, grab your mixing bowl and combine the flour and powdered sugar. Now here’s my trick: take that chilled butter straight from the fridge and cut it into small cubes. Toss them into the flour mixture, then use your fingers or a pastry cutter to work it in until it resembles coarse crumbs with some pea-sized butter pieces remaining. This creates those perfect flaky layers!
Press the mixture firmly into your greased 9×13 inch pan – I like to use the bottom of a measuring cup for an even layer. Pop it in the oven for 10-12 minutes until you see those golden edges forming. Don’t skip this par-bake – it’s what keeps our crust crisp under that juicy filling!
Making the Filling
While the crust bakes, let’s make that gorgeous ruby filling. In a large bowl, whisk together the eggs until they’re nice and frothy – about a minute by hand does it. Gradually add the sugar, whisking constantly until fully incorporated. Now sprinkle in the flour and salt, whisking until smooth. The mixture will be thick, almost like pancake batter.
Here’s where the magic happens: gently fold in those diced rhubarb pieces. I use a rubber spatula and make big, slow turns – you want every piece coated but not smashed. When the crust comes out golden, immediately pour this mixture over the hot crust. The heat helps set the bottom layer – another little baker’s secret!
Baking and Cooling
Reduce your oven temperature to 325°F – this lower heat ensures our filling sets perfectly without overcooking the edges. Bake for 30-35 minutes until the filling is just set (it should jiggle slightly in the center like firm jelly). The edges will be bubbly and golden-brown.
Now comes the hardest part: patience! Let the pan cool on a wire rack for at least 30 minutes. Then – and this is crucial – refrigerate for at least 2 hours before cutting. I know it’s tempting, but rushing this step makes messy slices. The chilled bars cut cleanly, showing off those beautiful layers.
There you have it – forty years of rhubarb wisdom in one perfect pan of tangy rhubarb bars. Just wait until you see the ruby-red filling peeking through that golden crust… springtime never tasted so good!
Print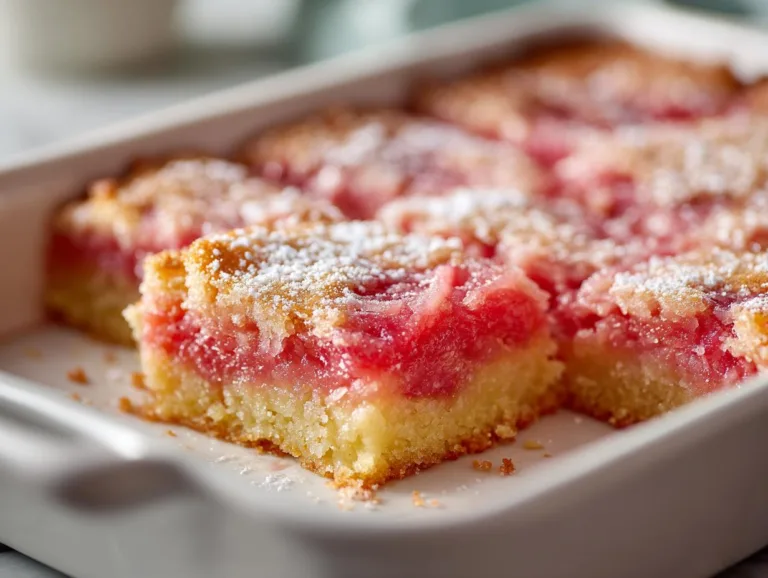
42 Years of Perfect Tangy Rhubarb Bars Recipe – Sweet Bliss
A classic recipe for tangy rhubarb bars with a buttery crust and sweet-tart filling.
- Total Time: 1 hour 30 minutes
- Yield: 24 bars 1x
Ingredients
- For the crust:
- 1 1/2 cups all-purpose flour
- 1/2 cup butter, chilled
- 1/4 cup powdered sugar
- For the filling:
- 2 eggs
- 1 1/2 cups sugar
- 1/4 cup all-purpose flour
- 1/4 teaspoon salt
- 4 cups diced rhubarb
Instructions
- Preheat oven to 350°F.
- Combine flour and powdered sugar in a bowl.
- Cut in butter until mixture resembles coarse crumbs.
- Press into a greased 9×13 inch baking pan.
- Bake crust for 10-12 minutes until lightly browned.
- Mix eggs, sugar, flour, and salt for filling.
- Stir in diced rhubarb gently.
- Pour filling over hot crust.
- Reduce oven to 325°F and bake 30-35 minutes until set.
- Cool 30 minutes, then chill before cutting.
Notes
- Use fresh rhubarb for best results.
- Chill bars completely for clean cuts.
- Store leftovers refrigerated.
- Prep Time: 15 minutes
- Cook Time: 45 minutes
- Category: Dessert
- Method: Baking
- Cuisine: American
- Diet: Vegetarian
Nutrition
- Serving Size: 1 bar
- Calories: 120
- Sugar: 15g
- Sodium: 45mg
- Fat: 4g
- Saturated Fat: 2.5g
- Unsaturated Fat: 1g
- Trans Fat: 0g
- Carbohydrates: 20g
- Fiber: 1g
- Protein: 2g
- Cholesterol: 25mg
Tips for Perfect Tangy Rhubarb Bars
After forty years of making these bars (and learning from my fair share of rhubarb mishaps), here are my can’t-live-without tips:
- Rhubarb readiness test: Give stalks a gentle squeeze – they should feel crisp like celery, not limp. The redder the stalks, the prettier your filling!
- Dice don’t shred: 1/2-inch pieces give perfect texture. Too small and they disappear; too big makes slicing messy.
- The chill factor: That 2-hour fridge wait isn’t optional! It sets the filling so cleanly you could serve these at a royal tea party.
- Oven watch: If edges brown too fast, tent with foil – but don’t touch that timer! Underbaked filling is a sticky situation.
Follow these, and you’ll get bars so perfect even my persnickety Aunt Edna would approve!
Ingredient Substitutions & Notes
Now, I know sometimes you’re staring at sad-looking rhubarb stalks or realize you’re out of butter mid-recipe – been there! Here are my tried-and-true swaps that won’t ruin your tangy rhubarb bars (plus a few important notes I’ve learned the hard way):
When Life Gives You Frozen Rhubarb
No fresh rhubarb? Frozen works in a pinch! Thaw it completely first (drain any excess liquid – we want tartness, not soup). The texture will be softer, so reduce bake time by 5 minutes. Pro tip: Toss thawed rhubarb with 1 tablespoon of the sugar from the recipe to help maintain structure.
The Flour Situation
Out of all-purpose flour? For the crust, you can substitute 1:1 with gluten-free baking blend (I like King Arthur’s). For the filling, arrowroot or cornstarch works instead of flour – use just 2 tablespoons since they’re stronger thickeners. And honey – don’t swap the granulated sugar for liquid sweeteners unless you enjoy sticky rhubarb soup!
Butter Emergencies
Once, mid-baking, I discovered my butter had gone rancid (the horror!). In absolute emergencies, you can use high-quality margarine for the crust, but expect a slightly less crisp texture. Coconut oil works too, but chill it solid first. Whatever you do, don’t use oil – we need that solid fat for proper crust texture!
Important note: Never swap the rhubarb for strawberries or other fruit entirely – that changes the chemistry! The tartness is what makes these bars special. But if you must, try 3 cups rhubarb + 1 cup strawberries max, and reduce sugar by 1/4 cup.
Serving and Storing Tangy Rhubarb Bars
Oh, the joy of presenting these tangy rhubarb bars to your guests! After that agonizing wait (I know, I know – but trust me, it’s worth it), here’s how to serve them like a pro. I always chill mine on a pretty platter – that ruby filling looks stunning against white porcelain. For special occasions, I dollop each square with freshly whipped cream and a tiny mint leaf. The cream mellows the tartness just enough to make kids go back for seconds (and thirds, if my grandbabies are any indication!).
Now, about those leftovers – if you’re lucky enough to have any! These bars keep beautifully in the fridge for up to 3 days. I stack them in an airtight container with parchment between layers (learned that trick after a disastrous sticky mess in ’92). They actually taste even better the next day as the flavors meld. For longer storage, freeze them in single layers – they’ll keep for 2 months. Just thaw overnight in the fridge, and they’re as good as fresh. Though between you and me, they never last that long in my house!
Nutritional Information
Now, I know what you’re thinking – “Grandma Jo, who cares about nutrition when there’s buttery, tangy goodness involved?” But hear me out! Even my dessert-loving heart appreciates knowing what’s in each bite of these rhubarb bars. Here’s the scoop per serving (based on cutting into 24 perfect little squares):
- Calories: 120 – just enough to feel indulgent without guilt
- Sugar: 15g (that’s the natural rhubarb tang balancing the sweetness!)
- Fat: 4g – thank that cold butter for making every bite rich
- Carbohydrates: 20g – mostly from that melt-in-your-mouth crust
- Protein: 2g – who knew dessert could pack a nutritional punch?
Remember: These values are estimates based on my exact ingredients. Your numbers might dance a little depending on your rhubarb’s tartness or how generous you are with the powdered sugar dusting (no judgment here!).
Now stop worrying about numbers and enjoy that perfect bite – life’s too short not to savor every tangy, buttery moment!
Frequently Asked Questions
Over the years, I’ve gotten the same wonderful questions about these tangy rhubarb bars from bakers just like you. Here are the answers I’ve perfected through decades of trial and (delicious) error:
Can I use frozen rhubarb instead of fresh?
Absolutely! Thaw it completely and pat it dry – that extra moisture can make your filling runny. I actually keep a bag of pre-diced rhubarb in my freezer for off-season cravings. Just remember frozen rhubarb bakes up softer, so reduce your oven time by about 5 minutes.
How long do these rhubarb bars stay fresh?
In the fridge, they’re perfect for 3 days (if they last that long!). The crust stays surprisingly crisp thanks to that initial bake. For longer storage, freeze them in a single layer – they’ll keep for 2 months. Pro tip: Put parchment between layers so they don’t stick together when frozen.
My filling came out runny – what went wrong?
Oh honey, I’ve been there! Usually it’s one of three things: not enough flour in the filling (measure carefully!), underbaking (wait until the center just barely jiggles), or cutting too soon (that 2-hour chill is non-negotiable). Next time, try adding an extra tablespoon of flour to the filling if your rhubarb was extra juicy.
Can I make these gluten-free?
You bet! For the crust, use a 1:1 gluten-free baking blend (I swear by King Arthur’s). For the filling, swap the flour with 2 tablespoons cornstarch. The texture comes out nearly identical – my gluten-sensitive niece couldn’t tell the difference at last year’s family reunion!
Why do you reduce the oven temperature for the filling?
Great question! That initial high heat sets the crust perfectly, but rhubarb filling needs gentler heat to set without curdling the eggs or making the edges tough. It’s the same principle as custard – low and slow wins the race. This trick took me three failed batches to figure out back in ’79!
Share Your Experience
There’s nothing I love more than hearing how these tangy rhubarb bars turn out in your kitchen! Did your crust come out perfectly crisp? Maybe you added a splash of vanilla to the filling like my neighbor Mrs. Wilkins does? Or perhaps – like my first attempt – you learned the hard way not to skip the chilling step (we’ve all been there!).
Drop a note below telling me about your rhubarb adventure. Did your picky eater surprise you by asking for seconds? Did it become the star of your church social like it did for me back in ’78? Your stories and tweaks make this recipe come alive – after all, good food is meant to be shared and remade with love in every kitchen.
And if you snap a photo of those ruby-red bars, my heart might just skip a beat – nothing brings me more joy than seeing this decades-old recipe creating new memories at your table!
For More recipes, Follow me on Facebook!






