
Nothing gets me more excited than Halloween baking season – and these Zombie Brain Cupcakes are hands-down my favorite spooky treat to make! After decades of baking for grandkids’ Halloween parties, I can tell you these mini cupcakes disappear faster than a ghost in the night. The secret? A moist, tender crumb packed with warm cinnamon, nutmeg, and cloves – flavors that’ll remind you of cozy autumn days. But don’t let the cute name fool you – these little brains are seriously delicious. Trust me, once you see how the beet puree gives them that eerie pinkish hue (no artificial dyes needed!), you’ll be hooked just like I was when I first whipped up a batch back in the ’90s.

Table of Contents
Table of Contents
Why You’ll Love These Zombie Brain Cupcakes
Oh honey, where do I even begin? These little guys have been stealing hearts (and brains!) at Halloween parties for decades. Here’s why you’re going to adore them as much as my grandkids do:
- Spooktacularly easy – No fancy skills needed! Just basic mixing and baking. Perfect for when the neighborhood kids descend on your house demanding treats.
- Natural food coloring – That gorgeous pink comes straight from beets, no artificial dyes. My daughter-in-law still can’t believe it when I tell her.
- Moist texture that lasts – Thanks to that beet puree magic, these stay soft for days. If they last that long, which they never do in my house!
- Warm spice hug – Cinnamon, nutmeg, and cloves make these taste like autumn in cupcake form. My grandson calls them “pumpkin pie’s weird cousin.”
- Endless decorating fun – Pipe on some white icing “veins,” add raspberry jam “blood,” or keep it simple. Every batch tells a different spooky story.
- Crowd-pleaser guaranteed – Kids go wild for the name, adults sneak seconds for the flavor. I’ve seen grown men pretend they’re “just trying one” and end up eating six.
The best part? Watching people’s faces when they take that first bite and realize these aren’t just cute – they’re downright delicious. That’s when you’ll know you’ve got a Halloween classic on your hands, just like I did all those years ago.
Ingredients for Zombie Brain Cupcakes
Now, let’s gather everything you’ll need to bring these spooky little treats to life! I’ve learned over the years that simple ingredients make the best cupcakes – but a few special touches take them from ordinary to extraordinary. Here’s exactly what you’ll want to have ready:

- 1 cup all-purpose flour – spooned and leveled, please! No packing it down like you’re stuffing a scarecrow
- 2 tsp ground cinnamon – the warm, cozy backbone of our spice blend
- 1 tsp baking powder – our little rising helper
- 1/4 tsp baking soda – just enough to keep things light
- 1/4 tsp salt – trust me, it makes all the flavors pop
- 1/4 tsp ground ginger – for that sneaky little kick
- 1/8 tsp ground nutmeg – my secret weapon for depth
- 1/8 tsp ground cloves – just a whisper, but oh what a difference
- 3/4 cup brown sugar – packed lightly, preferably dark brown for more molasses flavor
- 1/2 cup beet puree – (about 1 medium beet, cooked until tender and blended smooth) – our natural food coloring and moisture magic
- 1 large egg – room temperature, please – it makes all the difference
- 1/2 teaspoon vanilla extract – the good stuff, none of that imitation nonsense
A quick note about the beet puree – don’t stress if it’s not perfectly smooth. A few tiny flecks actually make the “brains” look more realistic! I learned that trick when my grandkids declared lumpier batches looked “more zombie-ish.” Kids know best when it comes to Halloween treats.
Ingredient Substitutions for Zombie Brain Cupcakes
Now, I know what you’re thinking – “Grandma Jo, what if I don’t have beets?” or “Can I make these gluten-free?” Don’t you worry your pretty little witch hat off! After 30+ years of baking, I’ve tried just about every substitution in the book. Here are my tried-and-true swaps that still give you deliciously spooky results:
When you’re fresh out of beets
That beet puree does double duty – adding moisture and that eerie pink color. If you can’t find beets (or just hate peeling them like my granddaughter does), try these instead:
- Applesauce – Use an equal amount of unsweetened applesauce and add 1-2 drops of red food coloring if you want that pink hue. The texture will be just as moist!
- Pumpkin puree – Makes for orange-ish “brains” that look fantastic with green icing veins. Add an extra pinch of cinnamon to complement the pumpkin flavor.
- Mashed banana – Creates yellow-ish cupcakes that kids think look like “old zombie brains.” Bonus – adds natural sweetness so you can reduce the sugar slightly.
Flour alternatives
Need to go gluten-free? Been there! My niece has celiac disease, so we’ve perfected this swap:
- 1-to-1 gluten-free flour blend – Works like a charm. Just be sure to let the batter rest for 5 minutes before baking – it helps prevent that gritty texture some GF flours can have.
- Almond flour – Use 3/4 cup almond flour + 1/4 cup tapioca starch for a grain-free version. They’ll be denser but still tasty – more like “zombie protein brains!”
Egg replacements
For my vegan friends or anyone allergic to eggs, these options work beautifully:
- Flax egg – Mix 1 tbsp ground flaxseed with 3 tbsp water, let sit for 5 minutes until gel-like. Works perfectly in this recipe!
- Applesauce – 1/4 cup replaces one egg. Makes the cupcakes extra moist – almost like “fresh zombie brains” (in a good way!).
A quick word about spices – while I adore my special blend, feel free to adjust based on what’s in your pantry. No nutmeg? Double the cinnamon. Out of cloves? A pinch of allspice makes a fine substitute. Baking should be fun, not stressful – even when you’re making zombie brains!
Oh! One last thing – if you’re using substitutions, do a mini test batch first. Bake just 2-3 cupcakes to check the texture before committing to a whole tray. Learned that lesson after a disastrous “everything substitute” batch in ’07 that shall not be spoken of again…
How to Make Zombie Brain Cupcakes
Alright, let’s get these creepy little cupcakes baking! I’ve made this recipe so many times I could probably do it in my sleep – but don’t worry, I’ll walk you through each step just like I did with my grandkids when they were learning. The key is keeping things simple and having fun with it. Here’s exactly how we’ll bring these zombie brains to life:
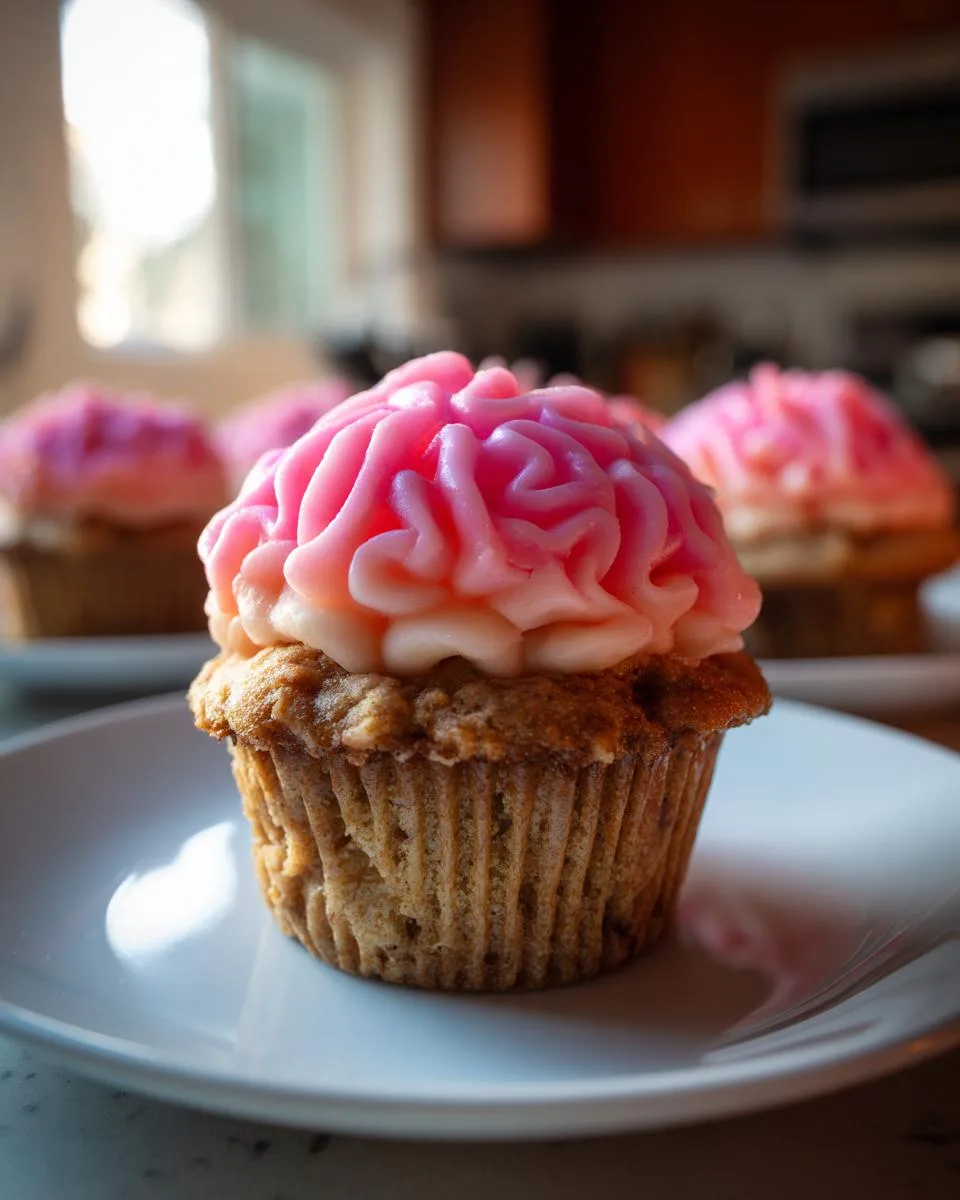
- Fire up that oven! Preheat to 350°F (175°C) and line your mini muffin tin with those cute little cupcake papers. I like using the plain white ones – they let that eerie pink color really show through.
- Whisk your dry team together: In your biggest bowl, sift the flour, baking powder, baking soda, salt, cinnamon, ginger, nutmeg and cloves. I know sifting seems old-fashioned, but it’s worth it to avoid those pesky spice clumps. Just ask my granddaughter – she learned that lesson the hard way!
- Mix the wet crew: In another bowl (yes, you’ll have dishes – baking is messy business!), beat together the brown sugar, beet puree, egg and vanilla until it’s all one happy, slightly bizarre-looking pink family. Don’t panic if it looks thin – that’s perfect.
- Bring the teams together: Pour the wet ingredients into the dry and stir just until combined. I use a rubber spatula and make about 10 gentle folds – no power mixing! Overworked batter makes for tough zombie brains, and nobody wants that.
- Fill ’em up: Drop about 2 teaspoons of batter into each cupcake liner. A small cookie scoop works great here, but a spoon and steady hand does the trick too. They should be about 3/4 full – these little guys need room to rise and get their “brain wrinkles.”
- Bake those brains: Pop them in the oven for 10-12 minutes. You’ll know they’re done when they spring back when lightly touched (just like checking a real zombie, but less… squishy). The toothpick test works too – a few moist crumbs are perfect, but wet batter means they need more time.
- Cool it: Let them chill in the pan for 2 minutes, then transfer to a wire rack. This is the hardest part – resisting the urge to eat them warm! But trust me, they’re even better when completely cooled.
See? Not scary at all! Well, not in the baking sense anyway. Now comes the really fun part – decorating these little monsters. But we’ll get to that in just a bit. First, let me tell you why these cupcakes are absolute perfection…
Print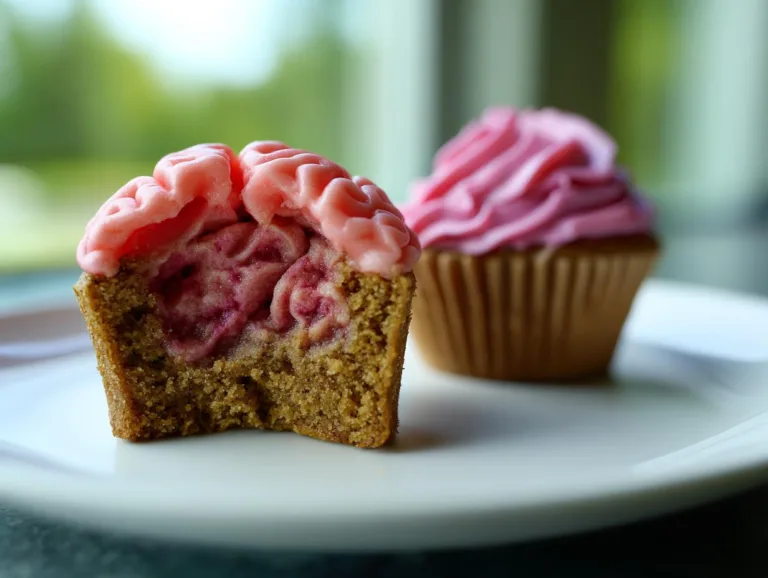
Creepy 48 Zombie Brain Cupcakes That Shock & Delight
Zombie Brain Cupcakes are a fun and spooky treat perfect for Halloween. These mini cupcakes are moist, flavorful, and easy to make with a hint of warm spices.
- Total Time: 22 minutes
- Yield: 24 mini cupcakes 1x
Ingredients
- 1 cup all-purpose flour
- 2 tsp ground cinnamon
- 1 tsp baking powder
- 1/4 tsp baking soda
- 1/4 tsp salt
- 1/4 tsp ground ginger
- 1/8 tsp ground nutmeg
- 1/8 tsp ground cloves
- 3/4 cup brown sugar
- 1/2 cup beet puree
- 1 large egg
- 1/2 teaspoon vanilla extract
Instructions
- Preheat oven to 350 degrees F. Line a mini muffin tin with cupcake papers.
- Sift the flour, baking powder, baking soda, salt, and spices together in a large bowl.
- Mix sugar, beet puree, egg, and vanilla in a separate bowl.
- Stir the wet ingredients into the dry ingredients and mix until well combined.
- Use a small scooper or spoon to drop two teaspoons of batter into each cupcake paper.
- Bake for 10 to 12 minutes, making sure a toothpick inserted into the center of a cupcake comes out clean. The cupcakes should spring back when lightly touched.
- Remove from the oven and let cupcakes cool completely.
Notes
- Use beet puree for natural coloring and moisture.
- Adjust spices to taste.
- Store in an airtight container for freshness.
- Prep Time: 10 minutes
- Cook Time: 12 minutes
- Category: Dessert
- Method: Baking
- Cuisine: American
- Diet: Vegetarian
Nutrition
- Serving Size: 1 mini cupcake
- Calories: 45
- Sugar: 5g
- Sodium: 35mg
- Fat: 0.5g
- Saturated Fat: 0.1g
- Unsaturated Fat: 0.3g
- Trans Fat: 0g
- Carbohydrates: 10g
- Fiber: 0.5g
- Protein: 1g
- Cholesterol: 8mg
Tips for Perfect Zombie Brain Cupcakes
After making these creepy little treats for more Halloweens than I can count, I’ve learned all the tricks to zombie cupcake success. Let me save you from the mistakes I made back when my hair was still brown!
Getting that beet puree just right
That vibrant pink color comes from your beet puree, so don’t skip cooking the beets until they’re fork-tender – about 45 minutes of boiling does the trick. I tried microwaving once and ended up with purple-gray cupcakes that looked more like zombie bruises than brains! Blend the cooked beets until mostly smooth, but a few tiny flecks add to the “brainy” texture. Pro tip: Wear an apron – beet stains don’t come out of your favorite shirt easily. Ask my poor daughter’s white blouse from ’98!
The golden rules of mixing
Overmixing is the silent killer of tender cupcakes. I learned this the hard way when my first batch came out dense as a brick. Now I mix the wet and dry ingredients with just 10-12 gentle folds – stop when you still see a few flour streaks. The batter will look lumpy and weird, but that’s exactly what you want. It’ll smooth out as it bakes into perfect little brain shapes.
Spice adjustments for your crowd
Not everyone loves a strong spice flavor like I do. For kids, I often cut the cloves in half – their little tastebuds are more sensitive. If you’re serving adults who enjoy bold flavors, bump up the cinnamon to a full tablespoon. My brother-in-law swears my “extra spicy zombie brains” are the only reason he comes to our Halloween parties! Just remember – you can always add more spice, but you can’t take it out. Start small and taste as you go.
Common pitfalls to avoid
- Don’t overfill the liners – 2 teaspoons is perfect. Any more and you’ll get mushroom tops instead of brain shapes
- Watch that oven temp – Get an oven thermometer! My old oven ran hot and turned batch #3 into zombie charcoal briquettes
- Cool completely before decorating – Icing on warm cupcakes equals melty zombie goo (though the kids thought that was hilarious)
- Store leftovers properly – These keep moist in an airtight container for 3 days, but never in the fridge unless you want rubbery brains
Remember – even “failed” batches usually still taste amazing. My worst-looking cupcakes became “mutant zombie brains” with extra icing “stitches.” The kids fought over them!
Serving and Storing Zombie Brain Cupcakes
Now comes the really fun part – turning these already adorable cupcakes into full-on zombie masterpieces! I’ve hosted enough Halloween parties to know presentation is half the spook factor. Here’s how I make mine scream “BOO!” (in the most delicious way possible):
Spooky serving ideas
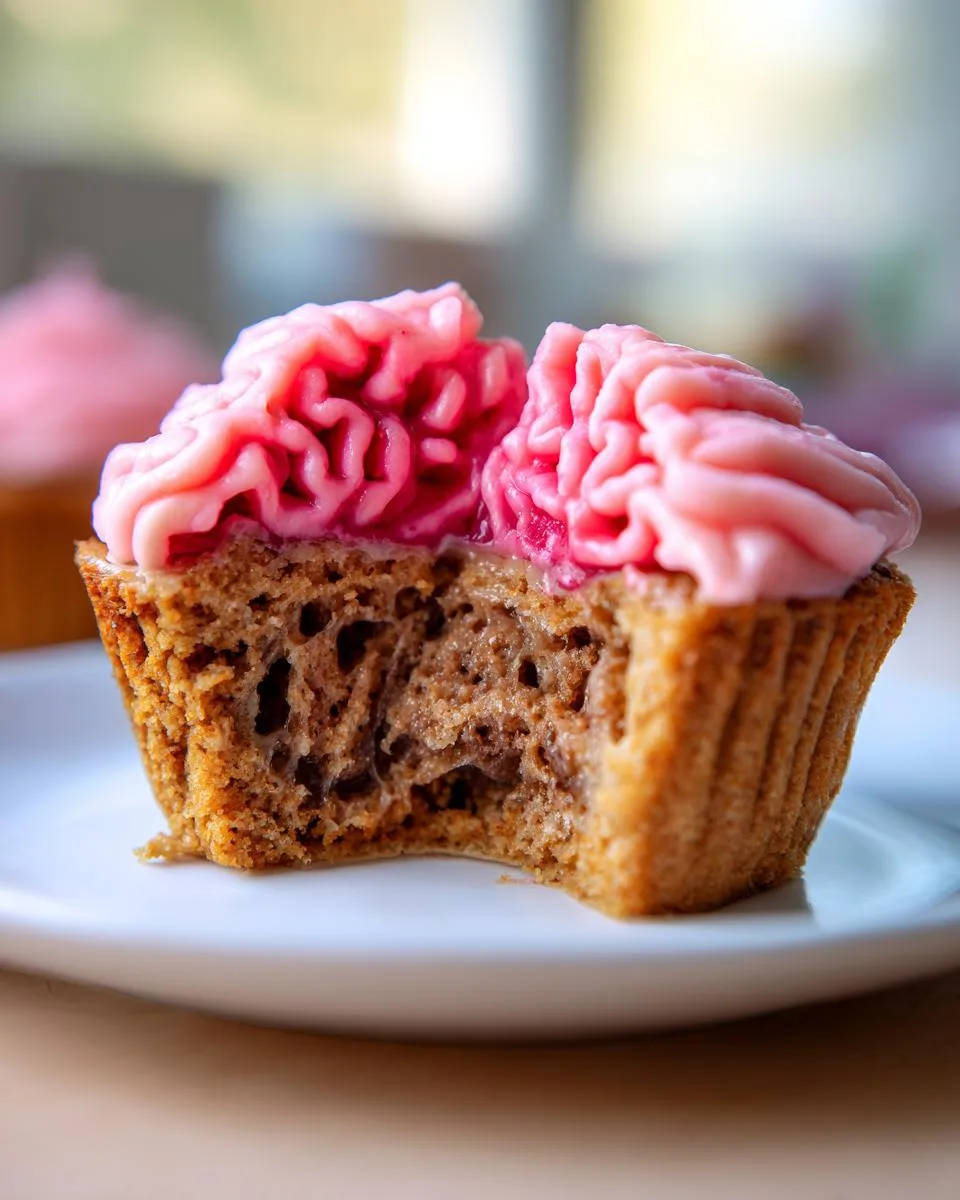
Grab some white icing and get creative! I like to pipe squiggly “veins” across the tops – just use a zip-top bag with the corner snipped off. For extra gore, drizzle with raspberry jam “blood” right before serving. My grandkids go wild when I arrange them on a platter with green-dyed coconut “mold” and plastic spiders crawling around. One year I even stuck lollipop sticks in them and called them “Zombie Brain Pops” – the neighborhood kids still talk about it!
Storage tips from Grandma’s kitchen
These little brains stay frighteningly fresh for days if you store them right:
- Room temp champions: Keep them in an airtight container at room temperature for up to 3 days. The beet puree keeps them moist – no dry zombie brains here!
- Freezer friendly: Freeze undecorated cupcakes for up to 2 months. Thaw at room temp before icing. I always stash a batch in September so I’m ready for last-minute Halloween guests.
- Icing intelligence: If you’ve already decorated them, store in a single layer so the icing doesn’t smush. A cupcake carrier works great, but a cake plate with plastic wrap works in a pinch.
Reheating? Maybe…
Honestly, these taste best at room temperature. But if you must warm them (maybe for a “fresh brains” effect?), 5 seconds in the microwave does the trick. Any longer and your icing will melt into zombie goo – which, come to think of it, might be perfect for your Halloween aesthetic!
Pro tip from many Halloweens past: Make a double batch. These disappear faster than costumes at a midnight sale. Last year I turned my back for two minutes and came back to an empty platter and a bunch of kids with suspiciously pink-stained faces. Worth every bite!
Zombie Brain Cupcakes Nutritional Information
Now, I know what you’re thinking – “Grandma Jo, are these zombie brains actually good for me?” Well, let’s just say they’re better for your soul than your waistline! But since everyone asks, here’s the nutritional breakdown per mini cupcake (because let’s be real – nobody stops at just one!):
- Serving Size: 1 mini cupcake (about the size of a ping pong ball)
- Calories: 45 – barely more than a carrot stick, but infinitely more delicious
- Sugar: 5g – mostly from that brown sugar goodness
- Sodium: 35mg – just a pinch from our baking powder and salt
- Fat: 0.5g – practically weightless, just like a ghost!
- Saturated Fat: 0.1g – barely worth mentioning
- Carbohydrates: 10g – brains need fuel, right?
- Fiber: 0.5g – thank you, beet puree!
- Protein: 1g – zombie muscles need protein too
Now, let’s be honest – these numbers are estimates based on my old kitchen scale and decades of eyeballing measurements. Your exact counts might vary depending on how heavy-handed you are with that brown sugar (no judgment here – I’ve been there!). And if you’re adding icing? Well… let’s just say some things are better left unmeasured when it comes to Halloween treats!
The way I see it – one or two of these little brains won’t hurt anyone, especially when they’re packed with real ingredients like beets and spices. My doctor actually complimented me on using natural food coloring instead of artificial dyes last year! Though he did suggest maybe not eating the whole batch in one sitting… but where’s the fun in that?
Zombie Brain Cupcakes FAQs
Over the years, I’ve gotten all sorts of questions about these spooky little treats – from panicked parents at Halloween parties to curious bakers trying the recipe for the first time. Here are the answers to everything you might be wondering (and a few things you probably weren’t!):
Can I use food coloring instead of beet puree?
Absolutely! While I love the natural color and moisture from beets, you can use 1/2 cup applesauce plus 1-2 drops of red food coloring. Just know the flavor will be slightly different – more apple-y than earthy. My granddaughter’s soccer team actually prefers the food-colored version because it’s “less vegetable-y.” Kids!
How long do these stay fresh?
In an airtight container at room temperature, they’ll stay moist and delicious for 3 days. After that, they’re still edible but lose that perfect texture. I’ve frozen them for up to 2 months with great results – just thaw at room temp before decorating. Pro tip: Write the date on the container unless you enjoy freezer roulette like I do!
Can I make regular-sized cupcakes instead of mini?
You bet! Use a standard muffin tin and fill each cup about 2/3 full. Bake at 350°F for 18-20 minutes. They won’t look quite as “brain-like” but they’ll taste just as good. My neighbor Mrs. Jenkins calls these “Zombie Head Cupcakes” when she makes the big ones – she pipes the icing to look like skulls!
Why did my cupcakes turn out purple instead of pink?
Ah, the great beet color mystery! This usually happens if your beets were very dark red to begin with. Next time, try golden beets for a lighter pink hue. Or embrace it – purple zombie brains are just as fun! My 2008 “mutant zombie” batch was accidentally violet and became legendary at the school bake sale.
Can I make these into a cake instead?
I’ve done it! Double the recipe for a 9-inch round cake and bake for 25-30 minutes. Decorate with piped “brain” designs using thick white icing. It makes a spectacular Halloween centerpiece – just ask my grandson who requested a “Zombie Brain Birthday Cake” three years running!
Still got questions? Don’t be shy – drop them in the comments below. After 30+ Halloweens with this recipe, I’ve probably encountered (and solved!) every zombie cupcake dilemma imaginable!
Your Turn to Make Some Zombie Brains!
Alright, my spooky baking friend – now it’s your turn to bring these creepy little cupcakes to life! I’ve shared all my best zombie brain secrets with you, just like I did with my grandkids all those years ago. There’s just one thing left to say – GET BAKING!
Whether you’re making these for a Halloween party, a school bake sale, or just because Wednesday feels like a zombie kind of day, I want to see your creations! Snap a photo of your spookiest cupcake design and tag me on social media – nothing makes me happier than seeing new generations discover the joy of these treats. And if you’ve got any brilliant decorating ideas I haven’t tried yet? Oh honey, you’d better share those in the comments below!
Remember – there are no mistakes in zombie baking, only happy (and delicious) accidents. Now go forth and unleash your inner mad scientist in the kitchen. Your zombie brains await!
For More recipes, Follow me on Facebook!






